Homemade Red Velvet Halloween Cake – Easy & Delicious
The best part of spooky season? Freshly baked red velvet Halloween cake! Get the ultimate recipe for a sweet treat that everyone will love.
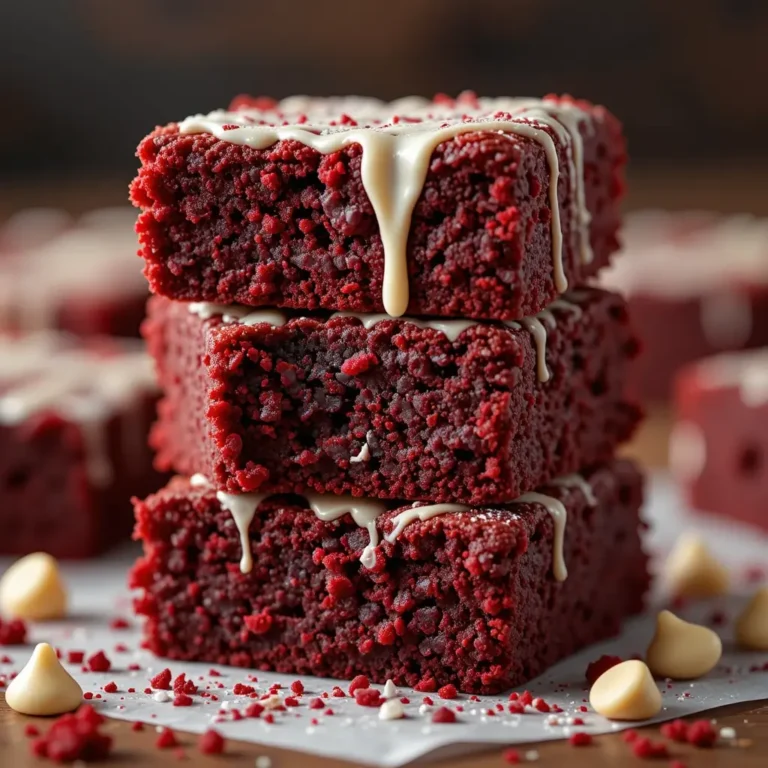
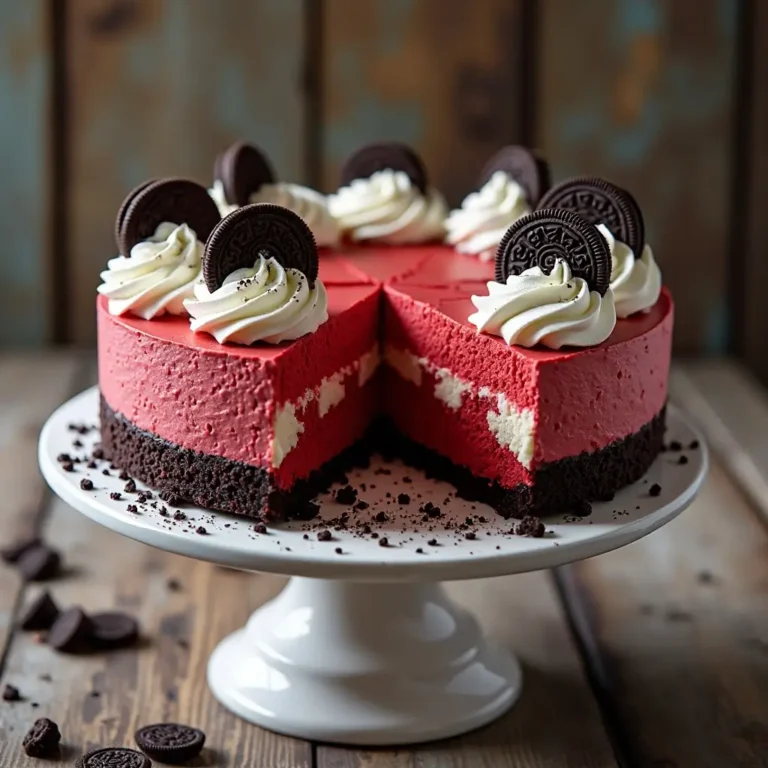
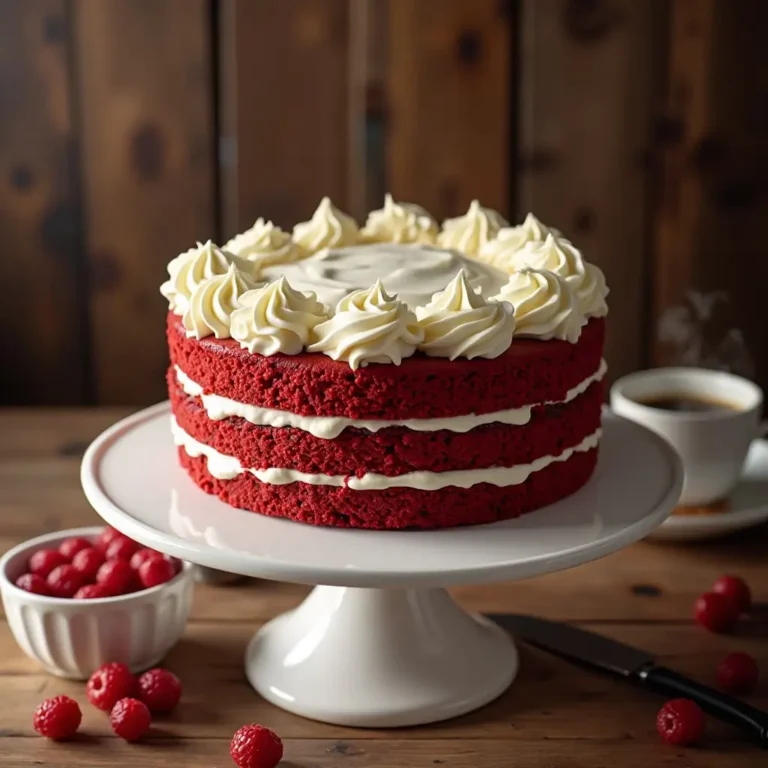
Nothing says Halloween quite like a rich, velvety red cake that’s as dramatic as it is delicious. This red velvet Halloween cake combines the classic Southern charm of traditional red velvet with spooky seasonal flair.
With its striking crimson color and luxurious cream cheese frosting, it’s the perfect centerpiece for your Halloween celebrations. Just like our popular chocolate ghost cupcakes, this recipe proves that homemade treats always steal the show at any party!
What is Red Velvet Halloween Cake?
Ever wondered why red velvet got its mysterious name? This crimson beauty isn’t just about the color – it’s a tender, slightly tangy cake with a hint of cocoa that creates pure magic in every bite. Legend says the way to anyone’s heart is through their stomach, and this Halloween twist on the Southern classic proves it right! Ready to create some spooky-sweet memories?
Why You’ll Love This Red Velvet Halloween Cake
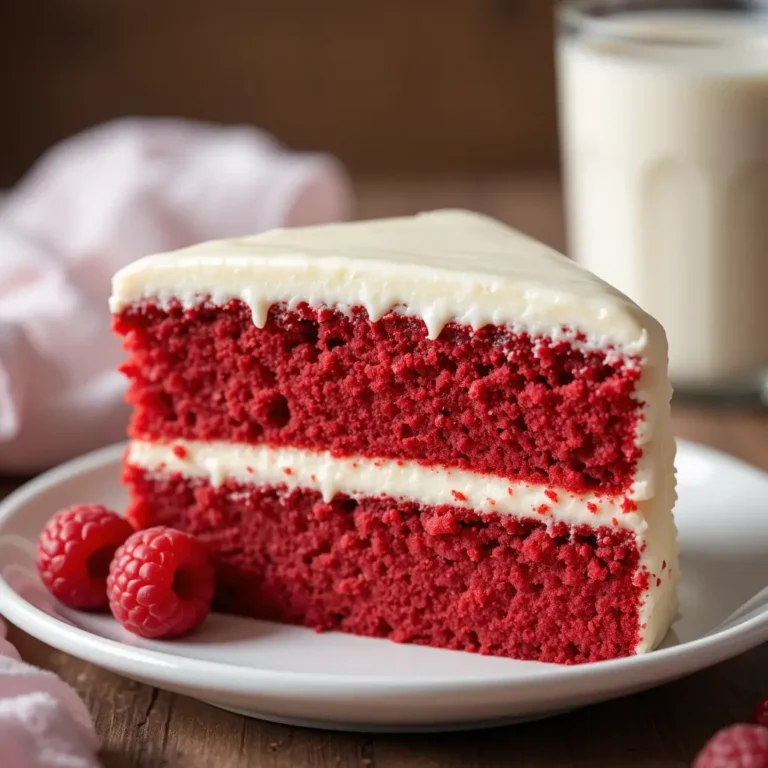
Rich, Velvety Texture That Melts in Your Mouth This cake delivers the perfect balance of moist, tender crumb with a subtle chocolate undertone. The buttermilk and vinegar create an incredibly soft texture that’s simply irresistible.
Budget-Friendly Halloween Showstopper Skip the expensive bakery prices! Making this red velvet Halloween cake at home costs a fraction of store-bought versions while delivering professional-quality results that’ll impress every guest.
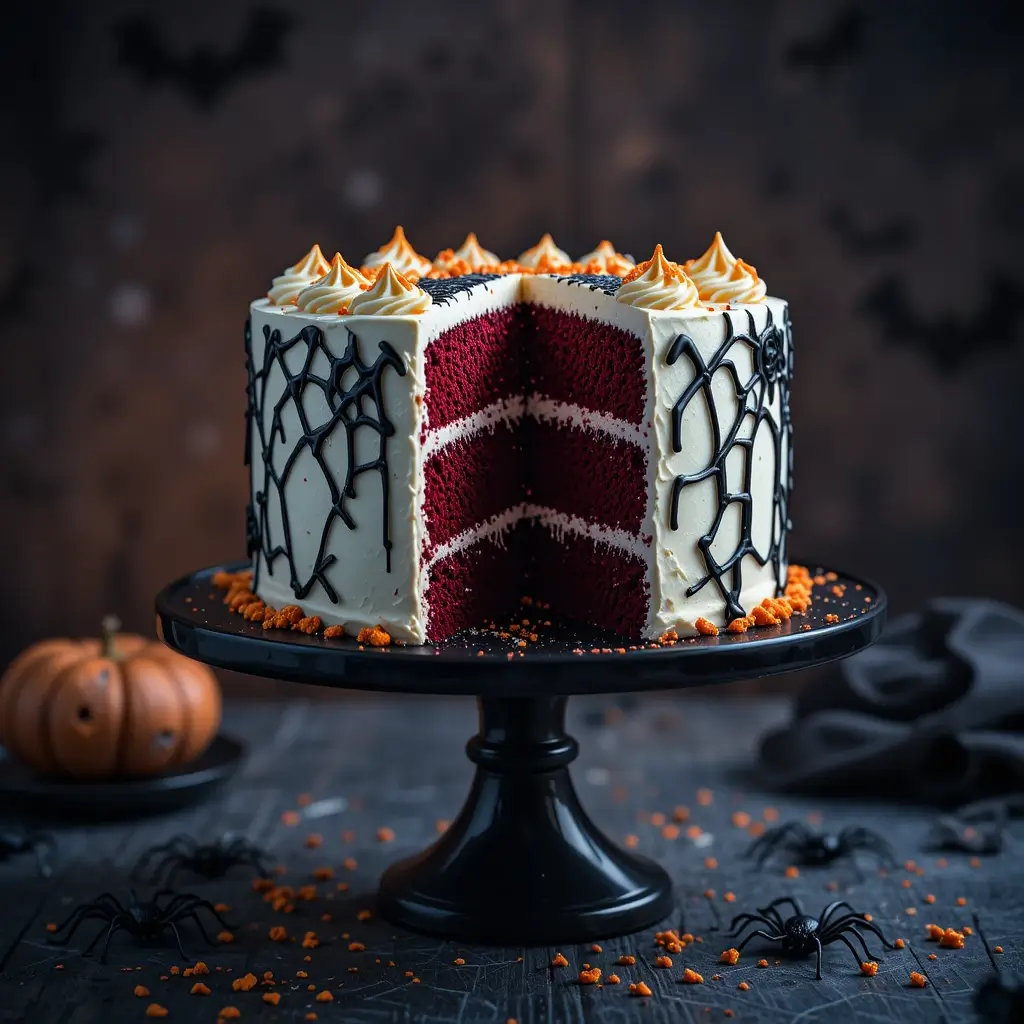
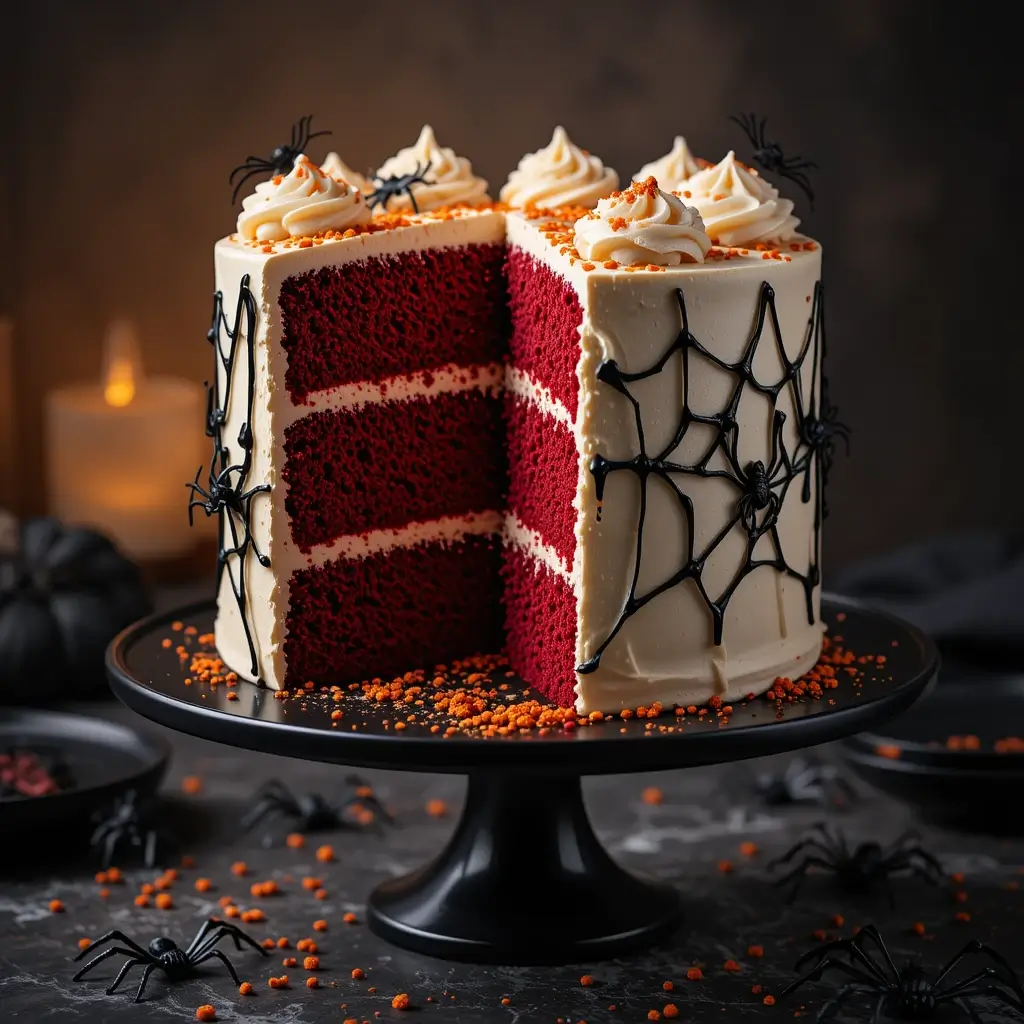
Endless Decorating Possibilities From spooky spider webs made with cream cheese frosting to Halloween-themed toppers, this cake serves as your creative canvas. The deep red color naturally fits the Halloween aesthetic, making decorating effortless and fun.
Similar to our beloved carrot cake recipe, this red velvet version becomes even more flavorful after a day, making it perfect for advance party planning. Ready to create your own Halloween masterpiece?
How to Make Red Velvet Halloween Cake
Quick Overview
This red velvet Halloween cake delivers restaurant-quality results with simple home ingredients. The secret lies in the perfect balance of cocoa, buttermilk, and food coloring that creates the signature taste and color.
Preparation Time: 20 minutes Baking Time: 25-30 minutes
Total Time: 1 hour (plus cooling) Difficulty Level: Easy to Intermediate
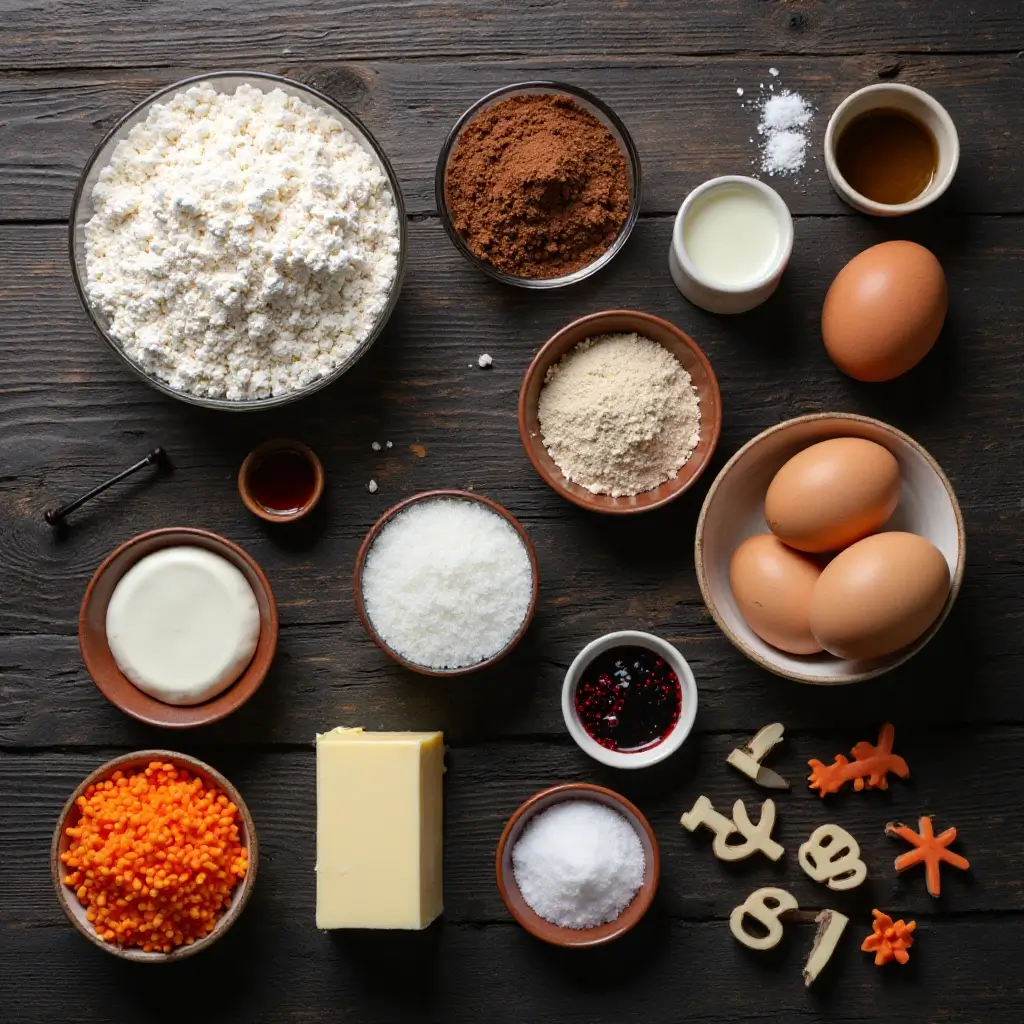
Key Ingredients for Red Velvet Halloween Cake
For the Cake:
- 2½ cups all-purpose flour
- 1½ cups granulated sugar
- 1 teaspoon baking soda
- 1 teaspoon salt
- 1 tablespoon cocoa powder
- 1½ cups vegetable oil
- 1 cup buttermilk, room temperature
- 2 large eggs, room temperature
- 2 tablespoons red food coloring
- 1 teaspoon white vinegar
- 1 teaspoon vanilla extract
For the Cream Cheese Frosting:
- 8 oz cream cheese, softened
- ½ cup butter, softened
- 4 cups powdered sugar
- 1 teaspoon vanilla extract
- Pinch of salt
For Halloween Decorations:
- Black food coloring
- Orange sprinkles
- Plastic spiders (optional)
- Halloween cookie cutters
Step-by-Step Instructions
Step 1: Prepare Your Baking Setup Preheat oven to 350°F (175°C). Grease two 9-inch round cake pans and dust with cocoa powder. This prevents sticking and adds extra chocolate flavor to the edges.
Step 2: Mix Dry Ingredients In a large bowl, whisk together flour, sugar, baking soda, salt, and cocoa powder. Make sure there are no lumps for a smooth batter.
Step 3: Combine Wet Ingredients In a separate bowl, whisk together oil, buttermilk, eggs, red food coloring, vinegar, and vanilla extract. The vinegar reacts with the baking soda for extra fluffiness.
Step 4: Create the Batter Gradually add the wet ingredients to the dry ingredients, mixing until just combined. Don’t overmix – this keeps the cake tender.
Step 5: Bake the Layers Divide batter evenly between prepared pans. Bake for 25-30 minutes, or until a toothpick inserted in the center comes out with just a few moist crumbs.
Step 6: Cool Completely Let cakes cool in pans for 10 minutes, then turn out onto wire racks. Cool completely before frosting – this prevents melting.
Step 7: Make the Frosting Beat cream cheese and butter until fluffy (about 3 minutes). Gradually add powdered sugar, vanilla, and salt. Beat until smooth and spreadable.
Step 8: Assemble and Decorate Place one layer on serving plate, spread frosting on top. Add second layer and frost entire cake. Use black food coloring to create spooky designs or pipe spider web patterns.
What to Serve Red Velvet Halloween Cake With
Spooky Beverages Pair with “witches’ brew” punch, apple cider, or hot chocolate with orange whipped cream. Coffee or black tea also complement the rich flavors beautifully.
Halloween Treats Serve alongside pumpkin spice cookies, caramel apples, or Halloween-themed macarons for a complete dessert spread.
Savory Balance After heavy Halloween dinner foods, this cake provides the perfect sweet ending. Consider lighter appetizers beforehand to save room for this decadent dessert.
Top Tips for Perfecting Red Velvet Halloween Cake
Use Room Temperature Ingredients This ensures smooth mixing and even baking. Take eggs and buttermilk out 30 minutes before baking for best results.
Don’t Skip the Vinegar The acid reaction with baking soda creates the signature tender crumb. Apple cider vinegar works as a substitute if needed.
Food Coloring Quality Matters Use gel food coloring for vibrant color without thinning the batter. Liquid coloring works but may require more to achieve deep red.
Measure Flour Correctly Spoon flour into measuring cups and level off. Too much flour creates a dense, dry cake.
Test for Doneness Toothpick should come out with a few moist crumbs, not completely clean. Overbaking leads to dry cake.
Storing and Reheating Tips
Short-Term Storage Cover cake with plastic wrap or store in airtight container at room temperature for up to 2 days. The cream cheese frosting stays fresh when properly covered.
Refrigeration Store in refrigerator for up to 5 days. Bring to room temperature 30 minutes before serving for best taste and texture.
Freezing Instructions Wrap unfrosted cake layers in plastic wrap, then aluminum foil. Freeze up to 3 months. Thaw overnight in refrigerator before frosting.
Reheating Tips Individual slices can be microwaved for 10-15 seconds to restore softness. Avoid reheating frosted cake as frosting may melt.
Frequently Asked Questions
Can I make red velvet Halloween cake without buttermilk? Yes! Mix 1 cup regular milk with 1 tablespoon white vinegar or lemon juice. Let sit 5 minutes before using.
Why isn’t my cake red enough? Use gel food coloring for more vibrant color. Liquid coloring requires more quantity and can thin the batter.
Can I make this cake ahead of time? Absolutely! Cake layers can be baked 2 days ahead and stored wrapped. Frost the day of serving for best appearance.
What’s the difference between red velvet and chocolate cake? Red velvet has less cocoa powder and includes buttermilk and vinegar, creating a more tender, tangy flavor profile.
Can I use natural red coloring? Beet juice or pomegranate juice can provide natural coloring, though the color won’t be as vibrant as artificial coloring.
How do I prevent my cake from sticking to the pan? Grease pans thoroughly with butter, then dust with cocoa powder instead of flour for better release and flavor.
Can I make cupcakes instead of a layer cake? Yes! Use the same batter to make 24 cupcakes. Bake at 350°F for 18-20 minutes.
Nutrition Information
| Nutrient | Per Slice (1/12 cake) |
|---|---|
| Calories | 485 |
| Total Fat | 22g |
| Saturated Fat | 8g |
| Cholesterol | 65mg |
| Sodium | 380mg |
| Carbohydrates | 68g |
| Fiber | 1g |
| Sugar | 58g |
| Protein | 5g |
Nutritional values are approximate and may vary based on specific ingredients used.
Creative Decoration Ideas
Spooky Spider Web Design Use melted white chocolate and black food coloring to create intricate web patterns across the frosting surface.
Cemetery Scene Create a graveyard on top using chocolate cookie “tombstones” and green-tinted coconut “grass.”
Halloween Ombre Effect Gradually darken sections of orange frosting to create a sunset effect perfect for Halloween ambiance.
Blood Drip Effect Use red gel icing to create realistic “blood” drips down the sides for a truly haunting appearance.
This red velvet Halloween cake combines classic Southern baking traditions with spooky seasonal fun, creating memories that’ll last long after the last crumb is gone. Whether you’re hosting a Halloween party or just want to celebrate the season, this recipe delivers professional results with home kitchen simplicity. Happy baking, and have a spook-tacular Halloween!