Gorgeous Thanksgiving Cake Decorating for the Perfect Holiday Table
Nothing says gratitude like a beautifully decorated Thanksgiving cake that becomes the centerpiece of your holiday table. Whether you’re a baking novice or a seasoned pro, Thanksgiving cake decorating transforms a simple dessert into an edible work of art that captures the warmth and abundance of the season. With rich autumn colors, festive designs, and…
Nothing says gratitude like a beautifully decorated Thanksgiving cake that becomes the centerpiece of your holiday table. Whether you’re a baking novice or a seasoned pro, Thanksgiving cake decorating transforms a simple dessert into an edible work of art that captures the warmth and abundance of the season.
With rich autumn colors, festive designs, and flavors that celebrate harvest time, these cakes are easier to create than you might think and will have everyone reaching for seconds before the turkey is even carved.
What is Thanksgiving Cake Decorating?
Ever wondered why we put so much effort into decorating holiday cakes? Thanksgiving cake decorating is the art of transforming ordinary cakes into festive masterpieces using autumn-themed designs, fall colors, and seasonal motifs. It’s about creating something that tastes amazing and looks even better.
Think pumpkins, turkeys, falling leaves, and harvest scenes brought to life with frosting and fondant. After all, they say the way to a man’s heart is through his stomach, but the way to impress your entire family is through a gorgeously decorated cake! Ready to become the star baker of your Thanksgiving gathering?

Why You’ll Love This Thanksgiving Cake Decorating Guide
Creates Unforgettable Holiday Memories
Decorating a Thanksgiving cake isn’t just about the final product. It’s about gathering in the kitchen with loved ones, letting kids help with sprinkles and designs, and creating traditions that last for years. The smell of freshly baked cake mixing with cinnamon and nutmeg fills your home with warmth that no candle can replicate.
Saves Money While Impressing Everyone
Bakery cakes for Thanksgiving can cost $50-$100 or more, but making and decorating your own costs a fraction of that. You control the quality of ingredients, choose your favorite flavors, and customize every detail to match your table setting. Plus, homemade always tastes better than store-bought.
Endless Creative Possibilities
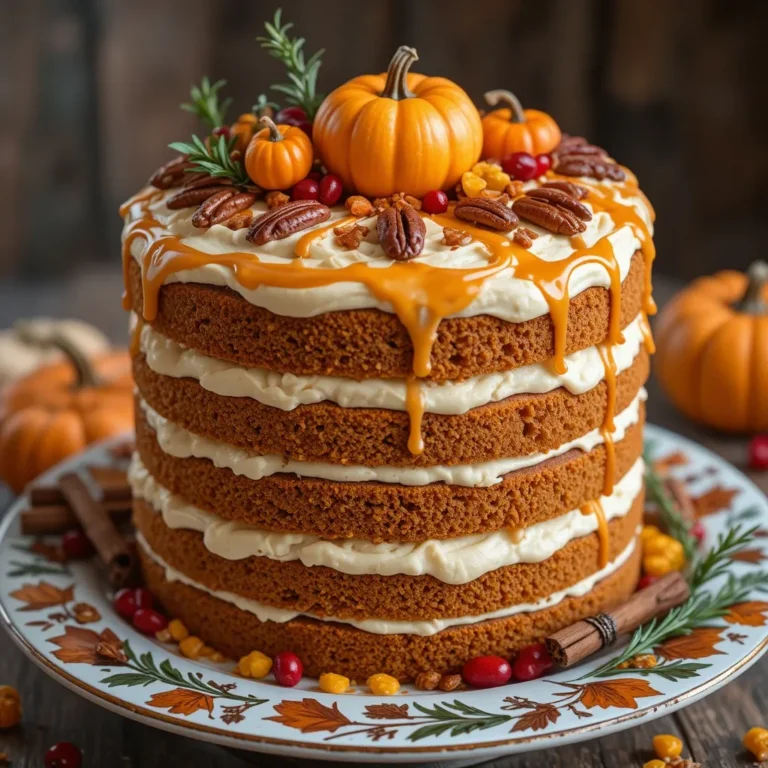
From buttercream autumn leaves to fondant pumpkins, from rustic naked cakes adorned with fresh fruits to elegant tiered creations dripping with caramel. The beauty of Thanksgiving cake decorating is that you can match any skill level and style preference. Love our popular Apple Cider Donut Cake recipe? This decorating guide pairs perfectly with that base!
Ready to roll up your sleeves and create something spectacular? Let’s dive into everything you need to know to make your Thanksgiving cake the talk of the dinner table.
How to Make a Stunning Thanksgiving Decorated Cake
Quick Overview
Creating a beautiful Thanksgiving cake is surprisingly simple when you break it down into manageable steps. You’ll start with your favorite cake base, then move on to creating smooth buttercream layers, and finally add those show-stopping autumn decorations.
The entire process takes about 3-4 hours from start to finish, including baking and cooling time. Most of that is hands-off waiting, so you can prep other dishes while your cake bakes. The actual decorating takes just 45-60 minutes once everything is ready.
Time Breakdown:
- Prep Time: 20 minutes
- Baking Time: 30-35 minutes
- Cooling Time: 2 hours
- Decorating Time: 45-60 minutes
- Total Time: 3-4 hours
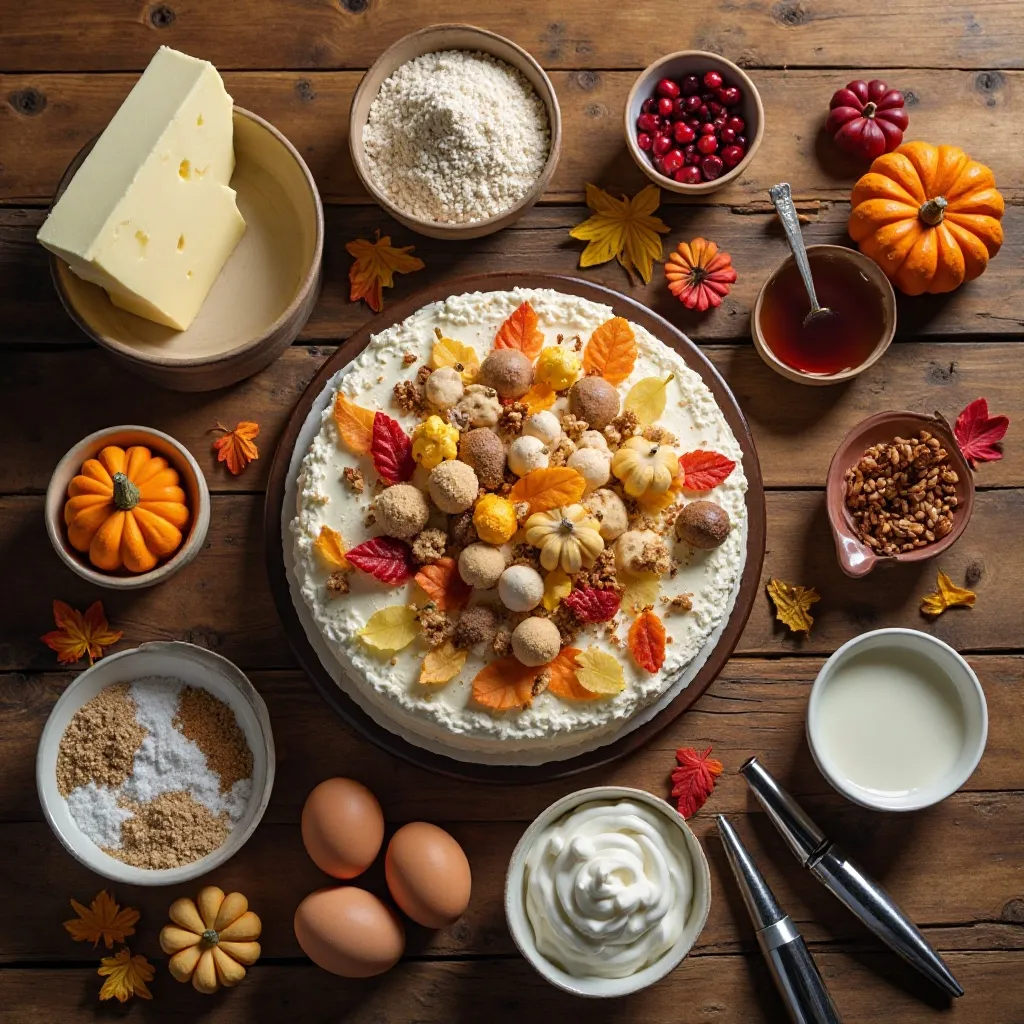
Key Ingredients for Thanksgiving Cake Decorating
For the Cake Base:
- 2 ½ cups all-purpose flour
- 2 cups granulated sugar
- 1 cup unsalted butter, softened
- 4 large eggs, room temperature
- 1 cup whole milk
- 2 teaspoons vanilla extract
- 1 tablespoon baking powder
- ½ teaspoon salt
- 2 teaspoons cinnamon
- 1 teaspoon nutmeg
- ½ teaspoon ginger
For the Buttercream Frosting:
- 2 cups unsalted butter, softened
- 8 cups powdered sugar
- ¼ cup heavy cream
- 2 teaspoons vanilla extract
- Pinch of salt
For Decorating:
- Gel food coloring (orange, red, yellow, brown, burgundy)
- Fondant (optional, for 3D decorations)
- Edible gold dust or luster
- Fresh cranberries
- Candied pecans
- Mini pumpkins or gourds for topping
- Autumn leaves (real or sugar)
- Piping bags and tips (leaf tip #352, round tips #3 and #12)
Step-by-Step Instructions
Step 1: Prepare Your Cake Layers
Preheat your oven to 350°F. Grease and flour three 8-inch round cake pans, then line the bottoms with parchment paper circles. This ensures your cakes release perfectly.
In a large mixing bowl, cream together the softened butter and sugar for 3-4 minutes until light and fluffy. The mixture should look pale and almost doubled in volume. Add eggs one at a time, beating well after each addition. Mix in the vanilla extract.
Step 2: Combine Dry Ingredients
In a separate bowl, whisk together the flour, baking powder, salt, cinnamon, nutmeg, and ginger. These warm spices are what give your cake that signature Thanksgiving flavor.
Step 3: Alternate Adding Wet and Dry Ingredients
With your mixer on low speed, add the flour mixture in three additions, alternating with the milk in two additions. Start and end with the flour. Mix just until combined after each addition. Don’t overmix or your cake will be dense.
Step 4: Bake the Cake Layers
Divide the batter evenly among your three prepared pans. Use a kitchen scale for precision. Bake for 30-35 minutes until a toothpick inserted in the center comes out clean. The tops should spring back when lightly pressed.
Let cakes cool in pans for 10 minutes, then turn out onto wire racks to cool completely. This takes about 2 hours. Never frost warm cake or your buttercream will melt.
Step 5: Make the Buttercream Frosting
Beat the softened butter in a stand mixer for 5 minutes until very pale and fluffy. Gradually add the powdered sugar one cup at a time, mixing on low speed. Add the heavy cream, vanilla, and salt. Beat on high for 3-4 minutes until the frosting is light and airy.
Step 6: Color Your Frosting
Divide your buttercream into separate bowls. Use gel food coloring to create autumn shades: burnt orange, deep red, golden yellow, chocolate brown, and burgundy. Start with tiny amounts of gel color and add more gradually. Colors deepen as they sit.
Step 7: Level and Layer Your Cake
Use a serrated knife or cake leveler to trim any domed tops from your cooled cake layers. Place the first layer on your cake stand or serving plate. Spread about ¾ cup of frosting evenly over the top. Add the second layer and repeat. Top with the final layer, placing it cut-side down for a flat top.
Step 8: Crumb Coat
Apply a thin layer of frosting all over the cake, sealing in any crumbs. This doesn’t need to look perfect. Refrigerate for 30 minutes until firm. This step is crucial for a smooth final coat.
Step 9: Apply Final Frosting Layer
Once the crumb coat is set, apply your final layer of frosting. Use an offset spatula to spread frosting smoothly around the sides. Hold a bench scraper against the side while slowly turning your cake stand for a smooth finish. For a rustic look, create texture with the back of a spoon.
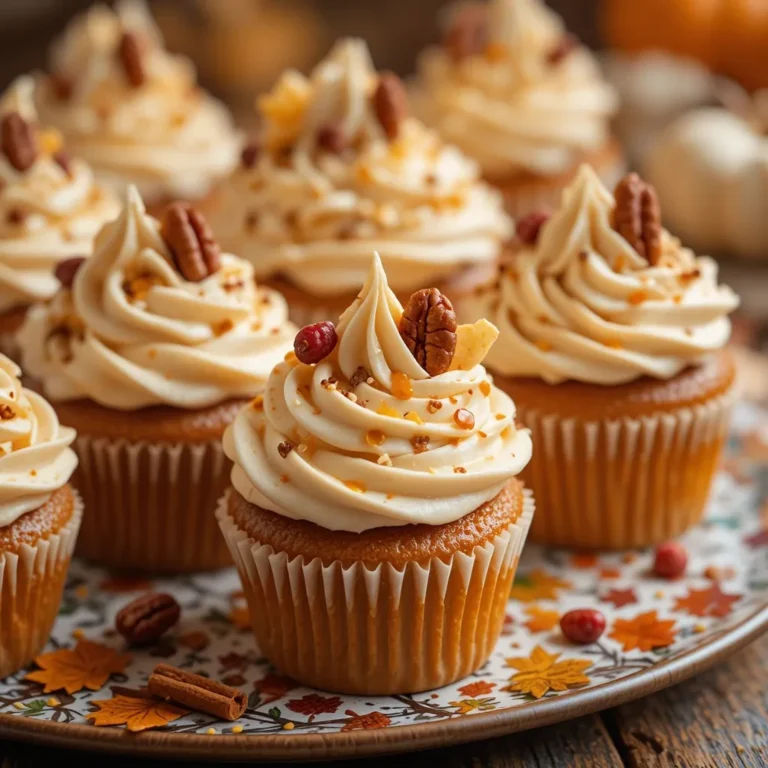
Step 10: Create Autumn Leaf Decorations
Fill piping bags with your colored buttercream. Use a leaf tip (#352) to pipe leaves around the base and cascading down one side of the cake. Hold the bag at a 45-degree angle, squeeze while pulling away, then release pressure and pull to create a pointed tip. Vary your colors for a realistic autumn look.
Step 11: Add Textured Details
Use a small round tip to pipe dots resembling berries. Add swirls and rosettes with different colored frostings. If using fondant, roll it thin and cut out leaf shapes with cookie cutters. Press veins into the leaves with a knife or veining tool.
Step 12: Final Touches and Embellishments
Brush edible gold dust over some leaves for shimmer. Arrange fresh cranberries and candied pecans on top. If you’ve made fondant pumpkins, position them artfully. Add a dusting of cinnamon or edible glitter for extra sparkle. Step back and admire your masterpiece!

What to Serve Thanksgiving Cake With
Your stunning Thanksgiving cake deserves equally impressive accompaniments. Serve slices with a dollop of maple whipped cream or cinnamon ice cream that melts into the warm cake.
A drizzle of salted caramel sauce adds richness, while a side of spiced apple compote provides a fruity contrast. For drinks, pair with hot apple cider, pumpkin spice lattes, or a dessert wine like late-harvest Riesling.
Consider setting up a dessert bar with your cake as the centerpiece, surrounded by pumpkin pie, pecan tarts, and apple crisp. This gives guests options while ensuring your beautiful cake gets the spotlight it deserves.
Top Tips for Perfecting Your Thanksgiving Cake Decorating
Use Room Temperature Ingredients
This is the golden rule of baking. Room temperature eggs, butter, and milk blend together smoothly, creating a tender, evenly-textured cake. Cold ingredients can cause the butter to seize up, resulting in a dense cake with an uneven crumb.
Invest in a Rotating Cake Stand
A turntable makes frosting so much easier. It allows you to keep your spatula steady while the cake spins, creating those smooth, professional-looking sides. You can find quality ones for under $20, and it makes a world of difference.
Practice Piping on Parchment First
Before piping directly onto your cake, practice your leaves and designs on parchment paper. This builds confidence and lets you perfect your technique without risking your cake. You can scrape up the practice frosting and reuse it.
Make Decorations Ahead
Buttercream decorations can be made days in advance. Pipe leaves and flowers onto parchment paper, freeze them until solid, then transfer to an airtight container. On decorating day, just peel them off and place them on your frosted cake.
Don’t Skip the Crumb Coat
Yes, it adds an extra step and refrigeration time, but the crumb coat is what separates amateur cakes from professional ones. It seals in crumbs and creates a smooth base for your final frosting layer.
Keep Your Tools Clean
Wipe your spatula and scraper frequently while frosting. A clean tool gives you cleaner lines and prevents color mixing where you don’t want it.
Chill Between Steps
If your cake starts to soften while decorating, pop it back in the fridge for 15-20 minutes. Cold cake is much easier to work with and your decorations will hold their shape better.
Use Gel Food Coloring, Not Liquid
Liquid food coloring can thin out your frosting and make colors muddy. Gel colors are concentrated, so you need less, and they won’t affect your frosting’s consistency.
Storing and Reheating Tips
Thanksgiving cake decorating creates a dessert that tastes even better the next day as flavors meld together. Store your decorated cake in an airtight container or cover it with a cake dome. It will stay fresh at room temperature for up to 2 days if your kitchen is cool.
For longer storage, refrigerate for up to 5 days. Buttercream hardens in the fridge, so let the cake sit at room temperature for 30-45 minutes before serving to restore its soft, creamy texture.
To freeze, place the undecorated cake layers wrapped tightly in plastic wrap and aluminum foil for up to 3 months. Decorated cakes can be frozen, but some decorations may shift or weep upon thawing. For best results, freeze the cake and add fresh decorations after thawing.
Never microwave cake with buttercream frosting as it will melt into a puddle. If you must reheat, warm individual slices in a 300°F oven for 5-7 minutes.
Frequently Asked Questions
How far in advance can I decorate my Thanksgiving cake?
You can bake and decorate your cake 1-2 days before Thanksgiving. In fact, cake often tastes better after sitting overnight as the flavors develop and the cake becomes more moist. Store it properly covered at room temperature or refrigerated. Add any fresh fruit or delicate decorations on the day of serving.
What’s the easiest Thanksgiving cake design for beginners?
A rustic naked or semi-naked cake is perfect for beginners. Leave the sides partially unfrosted for a trendy, forgiving look. Top with fresh cranberries, rosemary sprigs, and a simple dusting of powdered sugar. No piping skills required, and it looks intentionally elegant.
Can I use store-bought frosting for decorating?
While homemade buttercream tastes better and pipes more smoothly, you can use store-bought in a pinch. Buy plain vanilla frosting and divide it into bowls to color. Add 2-3 tablespoons of powdered sugar per container to stiffen it for better piping.
What cake flavors work best for Thanksgiving?
Classic choices include spiced pumpkin, apple cinnamon, sweet potato, maple walnut, and brown butter. Even a well-spiced yellow or white cake works beautifully. Choose flavors that complement traditional Thanksgiving dishes without competing with them.
How do I transport a decorated cake safely?
Place your cake on a sturdy cake board slightly larger than the cake base. Set it in a large, flat container or cake carrier. If the cake is tall, insert 4-5 wooden skewers through the layers for stability. Drive carefully and keep your car cool. Never leave a decorated cake in a hot car.
What if my buttercream is too soft to pipe?
Buttercream that’s too soft won’t hold detailed decorations. Add more powdered sugar ½ cup at a time until it thickens. Alternatively, refrigerate the frosting for 15-20 minutes, then re-whip before using. Make sure your butter wasn’t too soft to begin with.
Can I make this cake gluten-free?
Absolutely! Substitute the all-purpose flour with a 1:1 gluten-free baking flour blend that contains xanthan gum. The texture will be nearly identical. All the decorating techniques work exactly the same way with gluten-free cake layers.
How do I achieve vibrant fall colors in my frosting?
Use gel food coloring instead of liquid for more intense colors. For burnt orange, mix red and yellow with a tiny bit of brown. For burgundy, use red with a touch of purple. Add colors gradually because they deepen over time. AmeriColor and Wilton make excellent gel colors.
What’s the secret to smooth frosting?
Three things: a crumb coat, a hot spatula, and patience. After your crumb coat sets, dip your offset spatula in hot water, dry it, then smooth your frosting in long, even strokes. The warmth helps the frosting glide smoothly. Take your time and work in sections.
Can I decorate a cake without special piping tips?
Yes! Use a ziplock bag with the corner snipped off for simple designs. For leaves, cut a small V-shape in the corner. For dots and pearls, cut a small round opening. While specialty tips make it easier, you can create beautiful designs with improvised tools.
Nutrition Information
| Nutrient | Per Slice (1/12 of cake) |
|---|---|
| Calories | 520 |
| Total Fat | 28g |
| Saturated Fat | 17g |
| Cholesterol | 115mg |
| Sodium | 180mg |
| Total Carbohydrates | 65g |
| Dietary Fiber | 1g |
| Sugars | 52g |
| Protein | 4g |
Nutritional values are approximate and vary based on specific ingredients and decoration choices.
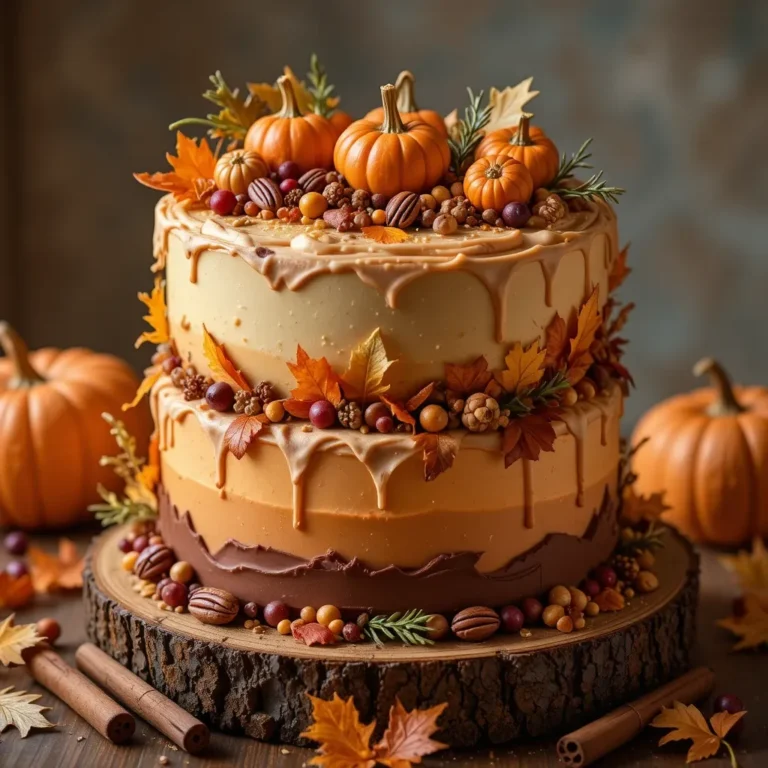
Creative Variations to Try
Ombré Autumn Cake
Create a stunning gradient effect by coloring your frosting in shades from light yellow at the top to deep burgundy at the bottom. Frost horizontal stripes around the cake, then blend where colors meet using a clean spatula. This technique looks incredibly impressive but is surprisingly simple.
Drip Cake with Autumn Colors
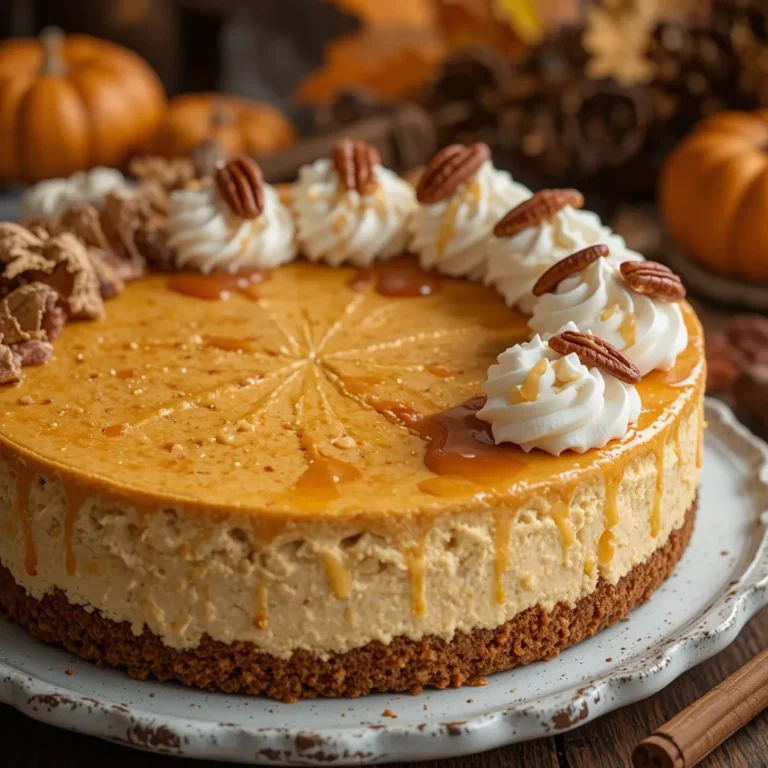
Make a caramel or chocolate ganache and let it drip down the sides of your frosted cake. Top with candied pecans, chocolate leaves, and gold-dusted fondant acorns. The contrast between the smooth frosting and drippy ganache creates visual drama.
Pressed Leaf Technique
Frost your cake smoothly, then press real clean autumn leaves gently into the frosting while it’s still soft. Carefully peel away the leaves to reveal beautiful imprints. Dust with edible gold for an elegant, nature-inspired look.
Textured Bark Effect
Use an offset spatula to create a bark texture in chocolate buttercream around the sides of your cake. Top with fondant mushrooms, sugar moss, and marzipan acorns for a woodland theme that’s perfect for Thanksgiving.
Additional Pro Tips for Show-Stopping Results
Create Depth with Color Shading
Don’t use flat, single-toned colors. Mix darker and lighter versions of each autumn hue. When piping leaves, use darker shades at the base and lighter at the tips. This creates dimension and makes decorations look more realistic and professional.
Use Real Elements Strategically
Fresh cranberries, real autumn leaves (thoroughly cleaned), cinnamon sticks, and small pine cones add authentic texture and aroma. Just remember to let guests know which elements are edible and which are purely decorative.
Master the Offset Spatula
This is your best friend in cake decorating. Hold it at a 45-degree angle for smooth sides. Use the tip for detailed work and the full blade for large, sweeping strokes. Quality matters here—invest in a good one.
Pay Attention to Proportions
Don’t over-decorate. Leave some negative space to let the eye rest. Balance heavy decorations on one side with lighter touches on the other. Step back frequently to assess your work from a distance.
Photograph Before Serving
Natural lighting is best. Photograph your cake near a window before guests arrive. These photos are perfect for sharing and documenting your hard work. Plus, you’ll want to remember your creation!
Final Thoughts
Thanksgiving cake decorating is more than just frosting and sprinkles. It’s about creating a centerpiece that captures the spirit of gratitude, abundance, and togetherness that defines the holiday.
Whether you’re piping delicate buttercream leaves, arranging fresh cranberries, or crafting fondant pumpkins, every element you add tells a story. The best part? Unlike the turkey that takes hours of anxious monitoring, cake decorating is forgiving, creative, and fun.
Don’t stress about perfection. Some of the most beautiful cakes have a homemade charm that no bakery can replicate. Your family will remember the love you put into creating something special far more than they’ll notice if a leaf is piped slightly crooked.
So gather your supplies, preheat that oven, and get ready to create a Thanksgiving dessert that’s as memorable as the feast itself. Your table—and your guests—will thank you.
Happy decorating, and may your Thanksgiving be filled with delicious cake and even sweeter memories!