Easy Thanksgiving Vintage Cake Recipe – Perfect Holiday Dessert
There’s something magical about a Thanksgiving vintage cake that brings generations together around the table. This moist, spiced masterpiece carries the warmth of cinnamon, the richness of brown sugar, and the nostalgia of grandma’s kitchen. Legend has it that vintage cakes became popular during wartime when creative bakers transformed simple ingredients into extraordinary desserts. This…
There’s something magical about a Thanksgiving vintage cake that brings generations together around the table. This moist, spiced masterpiece carries the warmth of cinnamon, the richness of brown sugar, and the nostalgia of grandma’s kitchen. Legend has it that vintage cakes became popular during wartime when creative bakers transformed simple ingredients into extraordinary desserts.
This cake is your ticket to becoming the holiday hero—it’s surprisingly simple, requires just 15 minutes of prep, and delivers that wow-factor your family craves. If you loved our Classic Pumpkin Spice Cake, you’ll absolutely adore this traditional beauty that’s been gracing Thanksgiving tables since the 1950s.
What is Thanksgiving Vintage Cake?
Ever wonder why we call it “vintage” when it tastes so fresh and modern? This beloved cake earned its retro name from its old-fashioned charm and time-honored recipe that’s been passed down through generations
It’s the kind of dessert your great-grandmother would’ve proudly displayed on her finest cake stand, proving that the way to anyone’s heart is truly through their stomach. With its tender crumb and nostalgic spice blend, this cake is calling your name—so grab your mixing bowls and let’s create some delicious memories together!

Why You’ll Love This Thanksgiving Vintage Cake
The Ultimate Crowd-Pleaser
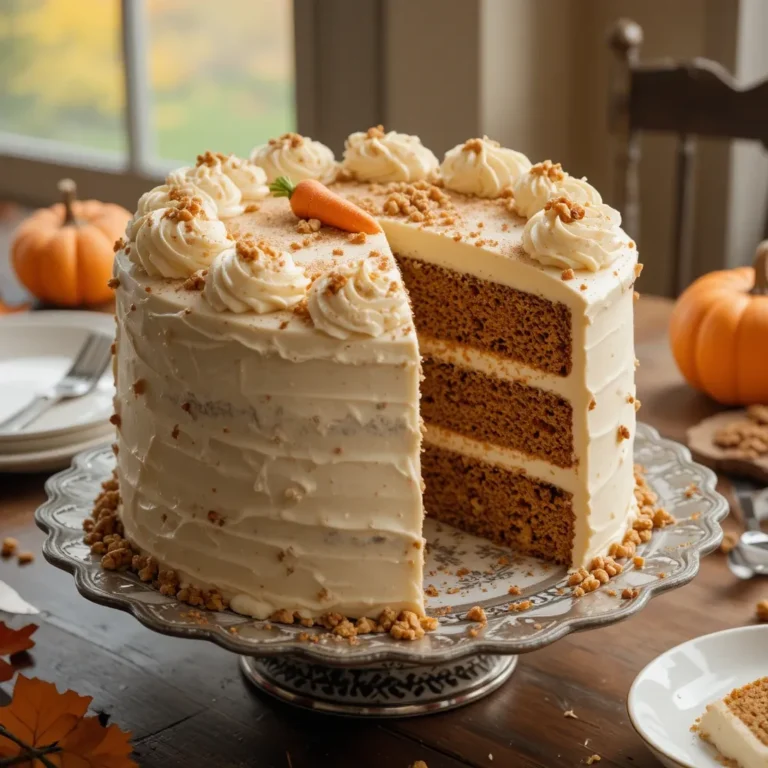
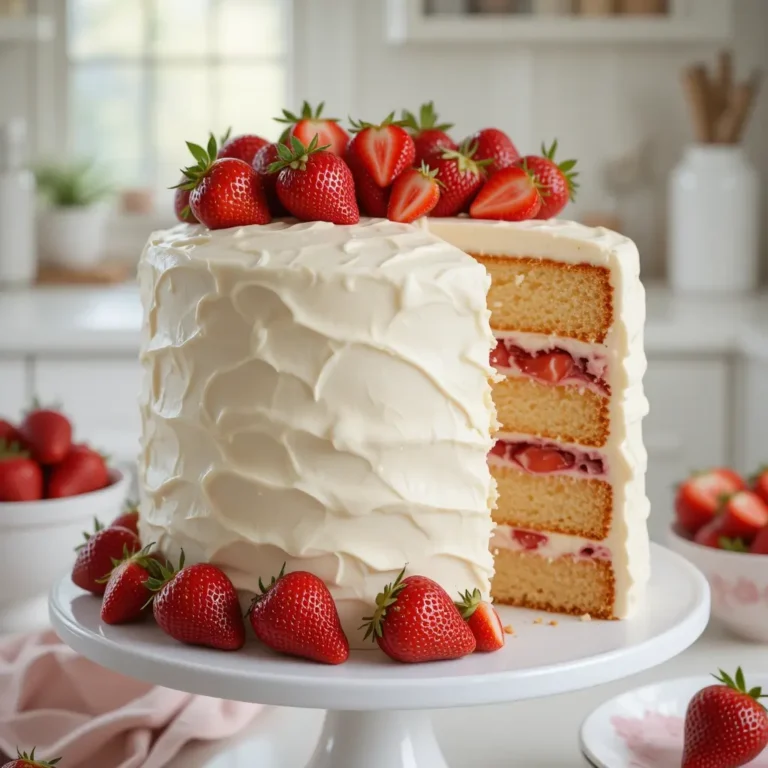
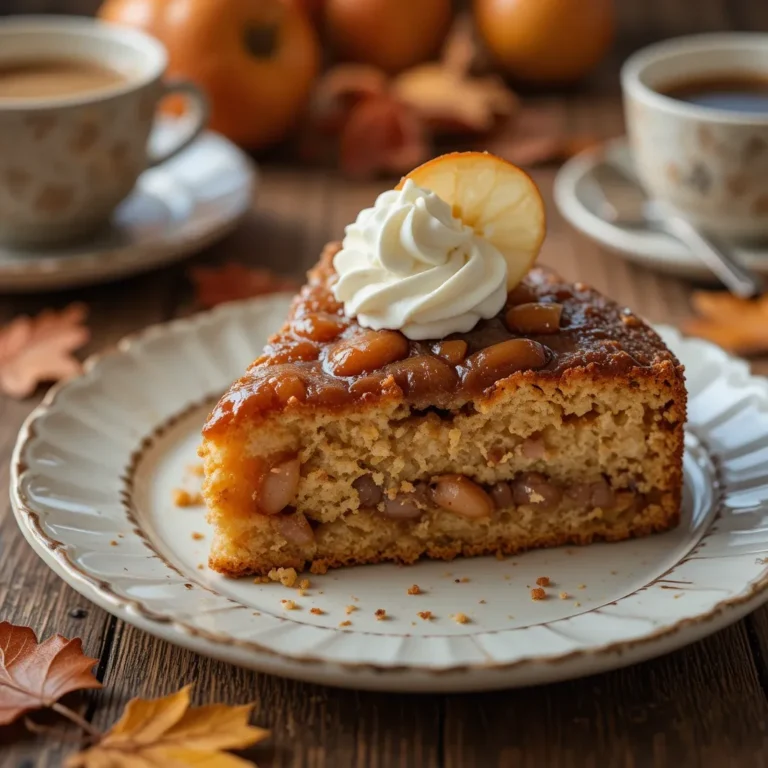
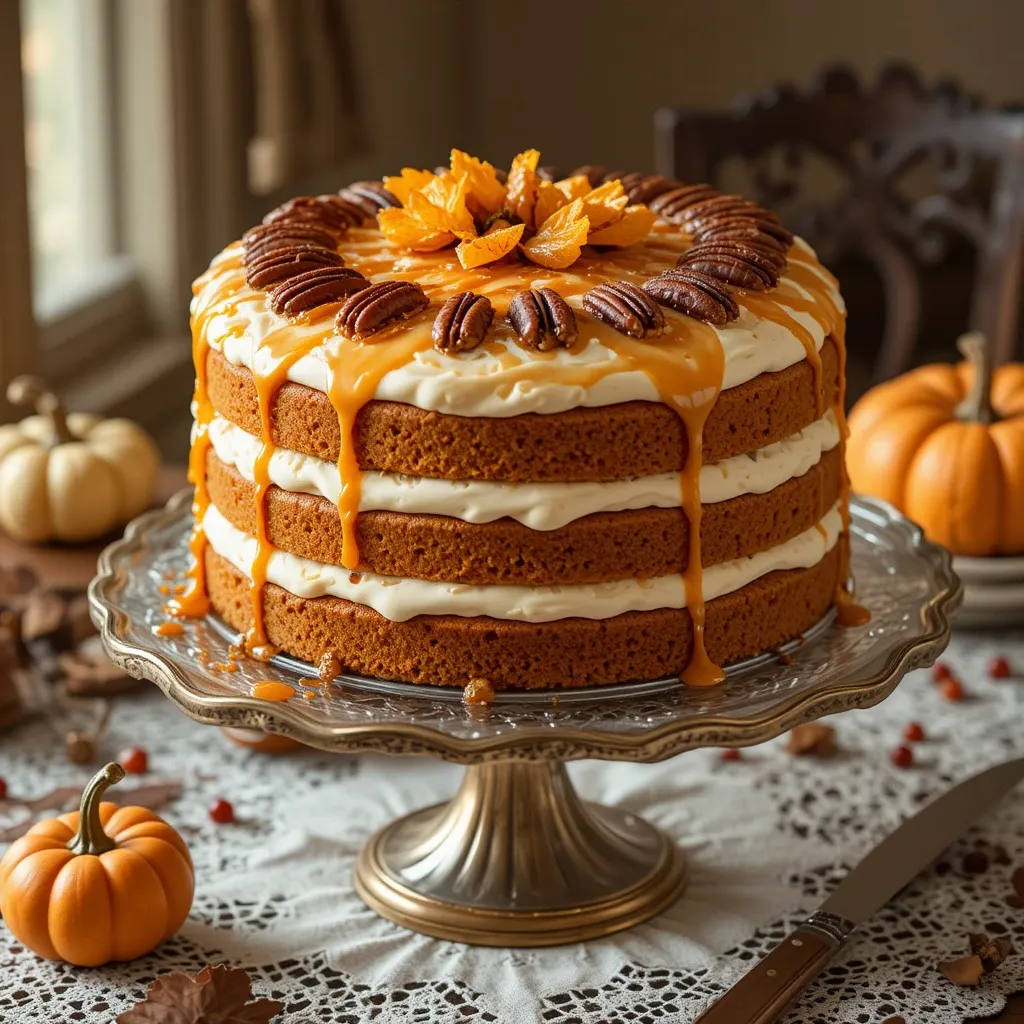
This Thanksgiving vintage cake is everything you want in a holiday dessert—incredibly moist, perfectly spiced, and topped with a luscious cream cheese frosting that melts on your tongue. The combination of warm spices like cinnamon, nutmeg, and cloves creates an aromatic experience that fills your entire home with the essence of fall.
Budget-Friendly Baking
Making this cake at home saves you serious money compared to bakery prices. While a specialty Thanksgiving cake at your local bakery might cost $40-50, you can whip up this beauty for under $12. Plus, you probably already have most ingredients in your pantry—flour, sugar, eggs, and those beloved fall spices.
Flavor Layers That Wow
What truly sets this cake apart is the perfect balance of textures and tastes. The cake itself is tender and fluffy, while the cream cheese frosting adds tangy sweetness. Optional toppings like toasted pecans, a drizzle of caramel, or candied orange peel provide that extra special touch. If you enjoyed our Southern Caramel Cake, you’ll recognize that same attention to flavor detail here. Ready to impress your guests? Let’s get baking and create a dessert that’ll have everyone asking for seconds!
How to Make Thanksgiving Vintage Cake
Quick Overview
This Thanksgiving vintage cake is easier than you think to master. The recipe delivers a tender, spiced cake with old-fashioned charm that tastes like it took hours to prepare.
The secret is in the simple mixing method that ensures a light, fluffy texture every time. The warm spices blend beautifully with brown sugar, creating that signature vintage flavor.
Time Breakdown:
- Prep Time: 15 minutes
- Bake Time: 30-35 minutes
- Cooling Time: 1 hour
- Frosting Time: 15 minutes
- Total Time: 2 hours
Key Ingredients for Thanksgiving Vintage Cake
For the Cake:
- 2 ½ cups all-purpose flour
- 2 teaspoons baking powder
- 1 teaspoon baking soda
- 1 teaspoon salt
- 2 teaspoons ground cinnamon
- ½ teaspoon ground nutmeg
- ¼ teaspoon ground cloves
- ¼ teaspoon ground ginger
- ¾ cup unsalted butter, softened
- 1 cup granulated sugar
- ½ cup packed light brown sugar
- 3 large eggs, room temperature
- 2 teaspoons vanilla extract
- 1 cup buttermilk, room temperature
- ½ cup sour cream
For the Cream Cheese Frosting:
- 8 oz cream cheese, softened
- ½ cup unsalted butter, softened
- 4 cups powdered sugar, sifted
- 2 teaspoons vanilla extract
- 2 tablespoons heavy cream
- Pinch of salt
Optional Toppings:
- ½ cup chopped toasted pecans
- Caramel drizzle
- Candied orange peel
- Fresh cranberries for garnish
Step-by-Step Instructions
Prepare Your Baking Setup
Start by preheating your oven to 350°F (175°C). Grease two 9-inch round cake pans generously with butter or non-stick spray, then line the bottoms with parchment paper circles. This double protection ensures your cakes release perfectly. Dust the sides lightly with flour, tapping out any excess.
Mix the Dry Ingredients
In a large bowl, whisk together the flour, baking powder, baking soda, salt, cinnamon, nutmeg, cloves, and ginger. Whisk for at least 30 seconds to ensure all the spices are evenly distributed throughout the flour. This step is crucial for consistent flavor in every bite. Set this bowl aside.
Cream Butter and Sugars
In your stand mixer fitted with the paddle attachment (or using a hand mixer), beat the softened butter on medium speed for about 2 minutes until it’s light and fluffy. Add both the granulated sugar and brown sugar, then continue beating for another 3-4 minutes. The mixture should look pale and airy—this process incorporates air that helps your cake rise beautifully.
Add Eggs and Vanilla
Add the eggs one at a time, beating well after each addition. Scrape down the sides of the bowl between additions to ensure everything is incorporated. Mix in the vanilla extract until just combined. The mixture might look slightly curdled—that’s perfectly normal and will come together once you add the dry ingredients.
Alternate Wet and Dry Ingredients
In a separate measuring cup, whisk together the buttermilk and sour cream. Now comes the alternating method: Add one-third of the flour mixture to the butter mixture, mix on low speed just until combined. Add half of the buttermilk mixture, mix until combined. Repeat this pattern, ending with the flour mixture. Mix only until you see no more flour streaks—overmixing creates a tough cake.
Bake to Perfection
Divide the batter evenly between your prepared pans. Use a kitchen scale for precision, or simply eyeball it. Smooth the tops with a spatula. Bake for 30-35 minutes, or until a toothpick inserted into the center comes out with just a few moist crumbs. The tops should spring back when lightly pressed. Start checking at 28 minutes to avoid overbaking.
Cool the Cakes
Let the cakes cool in the pans for 15 minutes on a wire rack. This prevents them from breaking when you remove them. Run a knife around the edges, then carefully invert onto the wire rack. Remove the parchment paper and let cool completely—at least 1 hour. Frosting warm cake leads to melting frosting and a messy situation.
Make the Cream Cheese Frosting
While your cakes cool, prepare the frosting. Beat the softened cream cheese and butter together on medium speed for 3 minutes until completely smooth and no lumps remain. Reduce speed to low and gradually add the powdered sugar, one cup at a time. Add the vanilla, heavy cream, and a pinch of salt. Increase speed to medium-high and beat for 2-3 minutes until light and fluffy.
Assemble and Decorate
Place one cake layer on your serving plate. Spread about 1 ½ cups of frosting evenly across the top, leaving a small border around the edge. Place the second layer on top, pressing gently. Apply a thin “crumb coat” of frosting all over the cake to seal in crumbs, then refrigerate for 20 minutes. Finish with the remaining frosting, creating swirls and peaks with an offset spatula. Add your chosen toppings for that extra special touch.
What to Serve Thanksgiving Vintage Cake With
This vintage cake pairs beautifully with a variety of beverages and sides that enhance its spiced, sweet profile.
Serve alongside freshly brewed coffee or a spiced chai latte for a cozy afternoon treat. The warm spices in the drinks complement the cake’s cinnamon and nutmeg notes perfectly.
For dessert time, consider pairing with vanilla bean ice cream or fresh whipped cream. The cool, creamy elements balance the cake’s richness and add textural contrast.
A glass of sweet dessert wine like Moscato or a late-harvest Riesling creates an elegant pairing for special occasions. The wine’s sweetness harmonizes with the cake without overwhelming it.
For a complete Thanksgiving dessert spread, serve this cake alongside Classic Pumpkin Pie and Pecan Tarts, giving your guests delicious variety to choose from.
Top Tips for Perfecting Thanksgiving Vintage Cake
Temperature Matters
Always bring your eggs, buttermilk, and sour cream to room temperature before starting. Cold ingredients don’t emulsify properly with butter, leading to a dense cake. Set them out 30-60 minutes before baking, or quick-warm eggs in a bowl of warm water for 5 minutes.
Don’t Skip the Sifting
Sift your powdered sugar for the frosting to avoid lumps that won’t dissolve. Even pre-sifted sugar develops clumps in the bag. Take the extra 30 seconds—your smooth, professional-looking frosting will thank you.
Measure Flour Correctly
Spoon flour into your measuring cup and level it off with a knife. Scooping directly from the bag compacts the flour, giving you up to 25% more than the recipe calls for. This creates a dry, tough cake. If you have a kitchen scale, use it—2 ½ cups equals 300 grams.
Test for Doneness Early
Ovens vary significantly in temperature accuracy. Start checking your cake at 28 minutes with a toothpick test. The toothpick should come out with a few moist crumbs—not wet batter, but not bone dry either. Overbaking is the number one cause of dry cake.
Level Your Layers
If your cakes dome in the center, level them with a serrated knife before frosting. This creates professional-looking layers and prevents sliding. Save the scraps for snacking or crumble them over ice cream.
Substitution Success
No buttermilk? Make your own by adding 1 tablespoon of lemon juice or white vinegar to regular milk. Let it sit for 5 minutes until it curdles slightly. Can’t find sour cream? Greek yogurt works beautifully as a 1:1 substitute. For a dairy-free version, use coconut cream and dairy-free butter, though the flavor will be slightly different.
Frosting Too Soft?
If your frosting is too soft to spread, refrigerate it for 15-20 minutes to firm up. Too stiff? Add cream or milk, one teaspoon at a time, until you reach the desired consistency. The ideal frosting should hold peaks but spread smoothly.
Storing and Reheating Tips
Room Temperature Storage
This cake stays fresh at room temperature for up to 2 days when stored in an airtight cake keeper or covered with a cake dome. The cream cheese frosting contains enough sugar to stay stable without refrigeration for this short period. Keep it away from direct sunlight and heat sources.
Refrigerator Storage
For longer storage, refrigerate the cake in an airtight container for up to 5 days. The cream cheese frosting makes refrigeration the safer choice if your kitchen runs warm. Let slices sit at room temperature for 20-30 minutes before serving for the best flavor and texture. Cold cake can taste muted.
Freezing Instructions
This cake freezes beautifully for up to 3 months. Wrap unfrosted cake layers tightly in plastic wrap, then aluminum foil. Freeze frosted cake on a baking sheet until solid (about 2 hours), then wrap the same way. Thaw overnight in the refrigerator, still wrapped, to prevent condensation from making the cake soggy.
Individual Slice Freezing
Freeze individual slices wrapped in plastic wrap, then stored in a freezer bag. This lets you grab a single serving whenever a craving hits. Microwave frozen slices for 20-30 seconds for a warm, fresh-from-the-oven taste.
Reheating Guidelines
While this cake is delicious at room temperature, you can gently warm unfrosted slices in the microwave for 15-20 seconds. For frosted slices, let them come to room temperature naturally to prevent the frosting from melting. Never reheat the entire frosted cake—warm frosting slides right off.
Tips for Avoiding Common Baking Mistakes
Mistake: Dense, Heavy Cake
This usually happens from overmixing the batter once you add flour. Mix only until the flour disappears—those final few streaks will incorporate as you scrape the bowl. Overmixed gluten creates a tough, chewy texture instead of tender crumb.
Mistake: Cake Sticking to Pan
Prevent this disaster by properly greasing your pans AND using parchment paper on the bottom. Don’t skip either step. Also, let cakes cool in the pan for exactly 15 minutes—removing them too soon causes breaking, waiting too long makes them stick.
Mistake: Dry Cake Texture
Overbaking is the culprit 90% of the time. Check your oven temperature with an oven thermometer—many ovens run 25° hotter than the dial indicates. Also, measure flour correctly by spooning and leveling, not scooping directly from the bag.
Mistake: Cake Layers Sliding
This happens when you frost warm cake or your frosting is too soft. Always cool cakes completely—be patient! If your frosting is too soft, refrigerate it for 15 minutes. A crumb coat layer that’s been chilled also acts as “glue” between layers.
Mistake: Lumpy Frosting
Ensure your cream cheese and butter are truly softened (should leave an indent when pressed). Beat them together thoroughly before adding sugar. If you still get lumps, press the frosting through a fine-mesh strainer—tedious but effective.
Mistake: Uneven Layers
Use a kitchen scale to divide batter evenly between pans. Each pan should have the same weight of batter. Spread batter to the edges and tap pans on the counter to release air bubbles before baking.
Mistake: Cracked Cake Top
Oven temperature too high causes this. Also, opening the oven door in the first 20 minutes of baking lets heat escape and causes cakes to sink or crack. Resist the urge to peek until at least 25 minutes in.
Mistake: Bland Flavor
Fresh spices make a huge difference. Check the dates on your cinnamon, nutmeg, and cloves—spices lose potency after 6 months. For maximum flavor, toast whole spices and grind them yourself, or buy new jars if yours are old.
Frequently Asked Questions
Can I make this Thanksgiving vintage cake ahead of time?
Yes! You can bake the cake layers 2 days in advance, wrap them tightly in plastic wrap, and store at room temperature. Frost the day you plan to serve for the freshest taste. Alternatively, freeze unfrosted layers for up to 3 months—just thaw overnight before frosting.
What makes a cake “vintage” style?
Vintage cakes typically feature old-fashioned recipes from the 1940s-1960s that use simple ingredients and classic techniques. They often include warm spices, buttermilk for tenderness, and traditional cream cheese or buttercream frosting. The term celebrates nostalgic, time-tested recipes that have been family favorites for generations.
Can I use regular milk instead of buttermilk?
While buttermilk gives the best texture and tang, you can substitute it easily. Add 1 tablespoon of white vinegar or lemon juice to 1 cup of regular milk. Let it sit for 5 minutes to curdle before using. This homemade “buttermilk” reacts with the baking soda to create a tender, fluffy cake.
Why did my cake turn out dense instead of fluffy?
Dense cake usually results from overmixing after adding flour, using too much flour (from incorrect measuring), or expired leavening agents. Make sure your baking powder and baking soda are fresh (less than 6 months old). Mix only until flour disappears, and measure by spooning flour into the cup and leveling it off.
How do I know when the cake is done baking?
Insert a toothpick into the center of the cake—it should come out with a few moist crumbs, not wet batter. The cake should also spring back when lightly pressed, and the edges should just begin pulling away from the pan sides. Start checking at 28 minutes to avoid overbaking.
Can I make this as a sheet cake instead of layers?
Absolutely! Pour the batter into a greased 9×13-inch pan and bake for 35-40 minutes. Sheet cakes are perfect for casual gatherings and easier to transport. You’ll use the same amount of frosting, just spread it all on top instead of between layers.
What’s the best way to get smooth frosting on my cake?
Start with a crumb coat—a thin layer of frosting that seals in crumbs. Chill for 20 minutes, then apply the final frosting layer. Use an offset spatula and dip it in hot water, then dry it before smoothing. For perfectly smooth sides, hold a bench scraper against the cake while slowly rotating the cake stand.
Can I reduce the sugar in this recipe?
Sugar does more than sweeten—it keeps cakes moist and tender. You can reduce the granulated sugar by up to ¼ cup without major texture issues, but I don’t recommend reducing more than that. The brown sugar should stay the same as it adds moisture and flavor.
What other frosting options work with this cake?
While cream cheese frosting is traditional, try caramel buttercream, maple cream cheese frosting, or brown butter frosting for delicious variations. A simple dusting of powdered sugar works beautifully for a less sweet option. Whipped cream cheese frosting offers a lighter alternative.
How do I prevent my cake layers from doming?
Use cake strips (wet fabric strips) around your pans to insulate the sides and promote even rising. Lower your oven temperature by 25°F and bake slightly longer. You can also create a slight well in the center of the batter before baking. If layers still dome, level them with a serrated knife before frosting.
Can I make this recipe gluten-free?
Yes! Substitute the all-purpose flour with a 1:1 gluten-free baking flour blend that contains xanthan gum. Brands like King Arthur or Bob’s Red Mill work well. The texture will be slightly different but still delicious. Don’t use almond flour or coconut flour alone—these require recipe modifications.
Why is my cream cheese frosting too runny?
Runny frosting happens when the cream cheese or butter is too warm, or you’ve added too much liquid. Make sure both are softened but still cool to the touch—not melted or greasy. If your frosting is runny, refrigerate it for 20-30 minutes, then beat again. You can also add more powdered sugar, ¼ cup at a time, to thicken it.
Nutrition Information
| Nutrient | Per Slice (1/12 of cake) |
|---|---|
| Calories | 485 |
| Total Fat | 24g |
| Saturated Fat | 15g |
| Cholesterol | 110mg |
| Sodium | 340mg |
| Total Carbohydrates | 63g |
| Dietary Fiber | 1g |
| Sugars | 47g |
| Protein | 5g |
| Vitamin A | 18% DV |
| Calcium | 8% DV |
| Iron | 10% DV |
Nutrition values are approximate and based on a 12-slice serving. Values may vary based on specific ingredients used and portion sizes.
Final Thoughts
This Thanksgiving vintage cake is more than just a dessert—it’s a connection to cherished memories and family traditions. The warm spices, tender crumb, and luscious frosting create a symphony of flavors that capture the essence of the holiday season.
Whether you’re continuing a family tradition or starting a new one, this cake delivers impressive results without intimidating techniques. The straightforward instructions ensure success even for novice bakers.
As you slice into this beautiful creation at your Thanksgiving table, you’ll understand why some recipes stand the test of time. The smiles on your loved ones’ faces and the requests for seconds will confirm you’ve made something truly special.
So tie on that apron, preheat your oven, and get ready to create a Thanksgiving vintage cake that will have everyone asking for your secret recipe. Happy baking, and may your holidays be filled with sweetness and joy!
Have you tried this Thanksgiving vintage cake recipe? Share your experience in the comments below! Don’t forget to pin this recipe for later and follow us for more delicious holiday baking ideas.