Red Velvet Cake Decoration Thanksgiving – Easy Step-by-Step Tutorial
Thanksgiving with red velvet cake decoration thanksgiving tips. Easy and elegant designs help you craft a festive dessert centerpiece for family
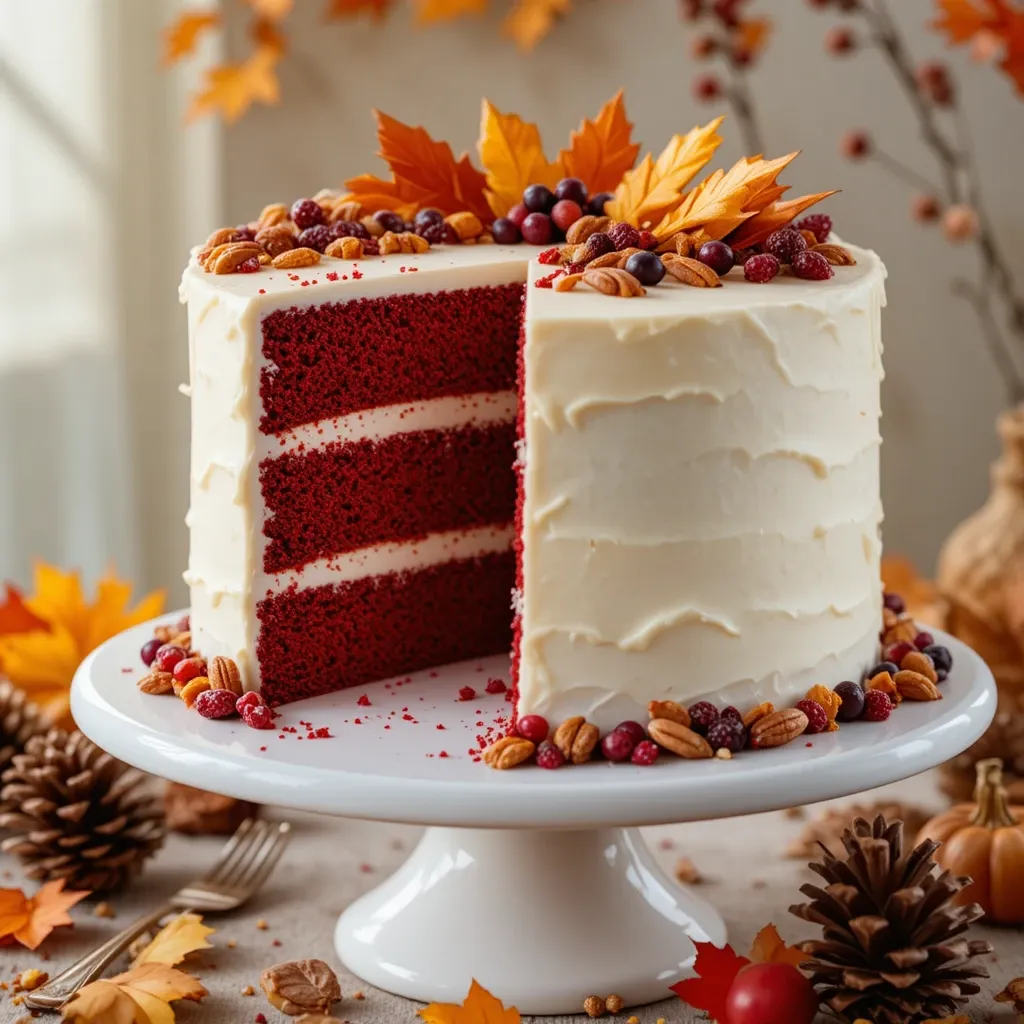
There’s something magical about slicing into a perfectly decorated red velvet cake at Thanksgiving dinner. The striking crimson layers peeking through silky cream cheese frosting never fail to earn gasps of delight from guests. I still remember my first Thanksgiving hosting—my aunt walked in, saw my decorated red velvet cake, and declared it “too pretty to eat” (she ate two slices anyway!).
This stunning dessert combines the beloved tangy-sweet flavor of traditional red velvet with festive autumn decorations that’ll make your dessert table Instagram-worthy. It’s surprisingly simple to create, taking just 90 minutes from start to finish, and appeals to everyone from picky kids to discerning in-laws.
Much like my popular pumpkin cheesecake recipe, this showstopper proves homemade holiday desserts don’t require pastry chef skills. Let’s transform your Thanksgiving spread into something truly unforgettable!
What is Red Velvet Cake Decoration Thanksgiving?
Ever wondered why we go absolutely bonkers decorating red velvet cakes for Thanksgiving? It’s not just cake—it’s edible art that steals the spotlight from turkey! This tradition combines the classic Southern red velvet cake with autumn-inspired decorations like buttercream leaves, candied pecans, and elegant piping that screams “fall festivity.”
Some say the vibrant red represents gratitude and warmth, while the cream cheese frosting symbolizes abundance. My grandmother always said, “the way to a man’s heart is through his stomach,” but honestly, a beautifully decorated Thanksgiving cake wins everyone’s heart!
The name simply captures the essence of taking America’s favorite velvet cake and giving it that special holiday treatment. Ready to become the Thanksgiving dessert hero? Let’s dive in!
Why You’ll Love This Red Velvet Cake Decoration Thanksgiving
The Ultimate Thanksgiving Showstopper
This isn’t just dessert—it’s the grand finale your holiday feast deserves. The gorgeous contrast between deep red cake layers and pristine white frosting creates a visual masterpiece that photographs like a dream. When you add autumn-themed decorations like maple leaves, rosettes, and gold accents, you’ve got a centerpiece that rivals even the most elaborate store-bought creations. The subtle cocoa flavor pairs perfectly with tangy cream cheese frosting, creating that signature red velvet taste everyone craves.
Budget-Friendly Holiday Elegance
Forget spending $60-$80 at fancy bakeries! Making this decorated red velvet cake at home costs roughly $15-$20, depending on your decoration choices. You’ll have complete control over ingredient quality, freshness, and portion size. Plus, you can customize decorations to match your Thanksgiving color scheme—whether that’s traditional orange and gold or modern burgundy and sage green.
Flavor Combinations That Wow
The classic cream cheese frosting is just the beginning. Layer in hints of vanilla, add a touch of cinnamon to your buttercream borders, or incorporate crushed pecans between layers for added texture. The cake itself features that distinctive red velvet flavor—a subtle cocoa taste with a hint of tanginess from buttermilk.
If you loved my chocolate bourbon pecan pie recipe, you’ll appreciate how this red velvet cake brings similar Southern charm to your dessert table. Every bite delivers the perfect balance of sweet, tangy, and rich that keeps guests coming back for seconds.
Make This Your Signature Thanksgiving Tradition
Transform your holiday baking routine and create memories that last. Your family will request this cake year after year, and you’ll love how it brings everyone together. Start your red velvet cake decoration Thanksgiving journey today!
How to Make Red Velvet Cake Decoration Thanksgiving
Quick Overview
This red velvet cake decoration Thanksgiving project is easier than you think! You’ll bake moist, tender cake layers with that signature crimson color, then frost them with luxurious cream cheese frosting before adding beautiful autumn decorations.
The entire process breaks down simply:
- Prep Time: 30 minutes
- Baking Time: 30-35 minutes
- Cooling Time: 1 hour
- Decorating Time: 45-60 minutes
- Total Time: Approximately 2 hours 45 minutes
- Servings: 12-16 slices
The result? A bakery-quality cake with professional-looking decorations that’ll have everyone asking for your secret!
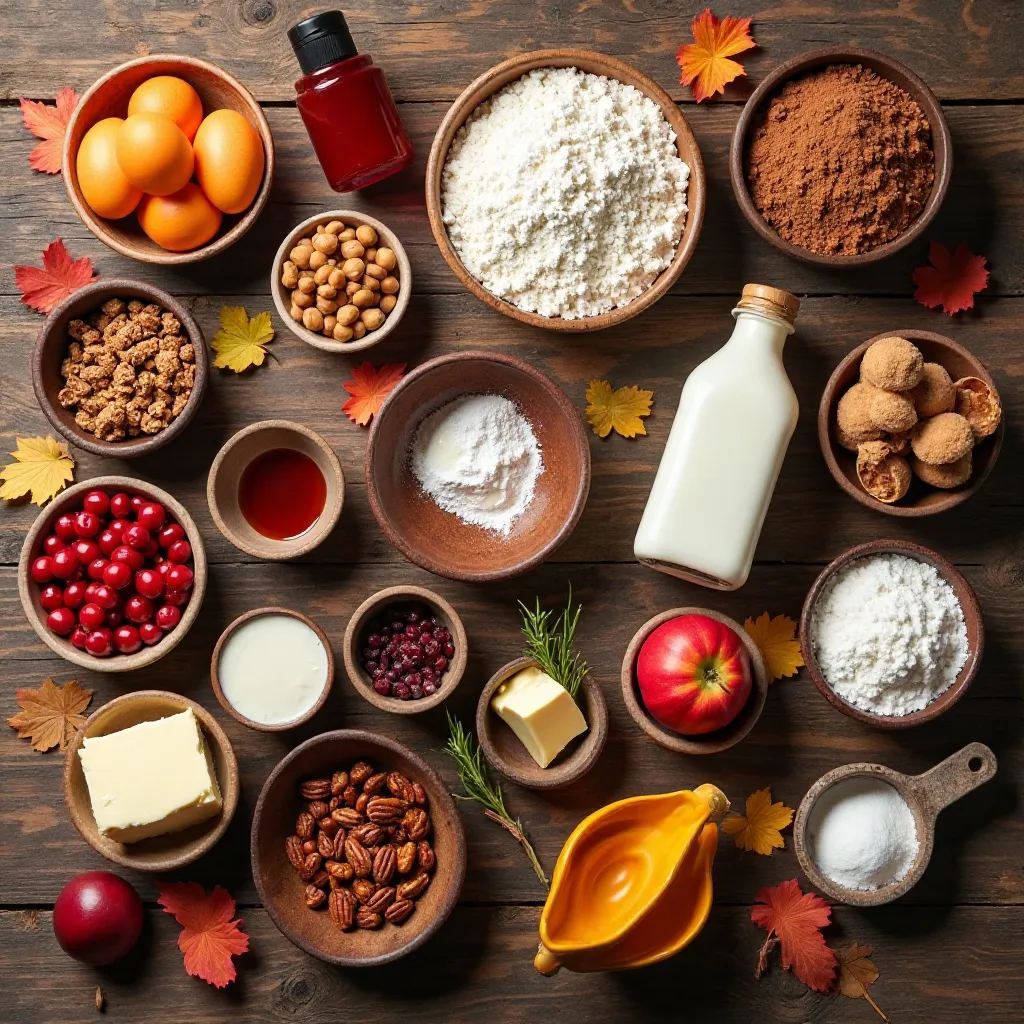
Key Ingredients for Red Velvet Cake Decoration Thanksgiving
For the Red Velvet Cake:
- 2½ cups all-purpose flour
- 2 cups granulated sugar
- 3 tablespoons unsweetened cocoa powder
- 1 teaspoon baking soda
- 1 teaspoon salt
- 2 large eggs, room temperature
- 1½ cups vegetable oil
- 1 cup buttermilk, room temperature
- 2 tablespoons red food coloring (liquid or gel)
- 2 teaspoons vanilla extract
- 1 teaspoon white vinegar
For the Cream Cheese Frosting:
- 16 ounces cream cheese, softened
- 1 cup unsalted butter, softened
- 6 cups powdered sugar
- 2 teaspoons vanilla extract
- Pinch of salt
For Thanksgiving Decorations:
- Autumn fondant or buttercream leaves (store-bought or homemade)
- Candied pecans or walnuts
- Edible gold leaf or gold dust (optional)
- Fresh cranberries
- Rosemary sprigs
- Orange or copper luster dust
- Piping bags and decorating tips (star tip, leaf tip, round tip)
- Food coloring gels (orange, yellow, brown, green)
Step-by-Step Instructions
Step 1: Prepare Your Baking Setup
Preheat your oven to 350°F (175°C). This is crucial—an properly heated oven ensures even baking. Grease three 9-inch round cake pans with butter or non-stick spray, then line the bottoms with parchment paper circles. This double protection prevents sticking. Dust lightly with flour and tap out excess. Set pans aside.
Step 2: Mix the Dry Ingredients
In a large mixing bowl, sift together flour, sugar, cocoa powder, baking soda, and salt. Sifting is essential—it removes lumps and aerates the flour, creating a lighter cake texture. Whisk everything together for 30 seconds to ensure even distribution. The cocoa powder should be fully incorporated with no visible streaks.
Step 3: Combine Wet Ingredients
In a separate bowl, whisk together eggs and oil until well blended, about 1 minute. Add buttermilk, red food coloring, vanilla extract, and vinegar. Whisk until the mixture turns a vibrant, uniform red color. Don’t worry if it seems thin—red velvet batter is naturally more liquid than regular cake batter.
Step 4: Create the Batter
Make a well in the center of your dry ingredients. Pour the wet mixture into the well and use a hand mixer on low speed (or whisk vigorously by hand) to combine. Mix for 2-3 minutes until the batter is smooth and lump-free. Scrape down the sides of the bowl to catch any flour pockets. The batter should flow smoothly off your whisk like thick cream.
Step 5: Bake the Layers
Divide batter evenly among the three prepared pans—about 2¾ cups per pan. Tap each pan firmly on the counter 3-4 times to release air bubbles. Bake for 30-35 minutes. Test doneness by inserting a toothpick into the center; it should come out with just a few moist crumbs. The cake should spring back when lightly touched. Let cakes cool in pans for 10 minutes, then turn out onto wire racks to cool completely—this takes about 1 hour. Never frost warm cake!
Step 6: Make Cream Cheese Frosting
While cakes cool, beat softened cream cheese and butter together using a stand mixer or hand mixer on medium speed for 3-4 minutes until fluffy and completely smooth. Gradually add powdered sugar, one cup at a time, beating on low speed after each addition. Once all sugar is incorporated, add vanilla and salt, then beat on medium-high speed for 2 minutes. The frosting should be creamy, spreadable, and hold stiff peaks. If too soft, refrigerate for 15 minutes.
Step 7: Level and Layer the Cake
Once cakes are completely cool, use a long serrated knife to level the tops, creating flat surfaces. Place the first layer on your cake stand or serving plate. Spread about ¾ cup of frosting evenly across the top, going right to the edges. Add the second layer, press down gently, and repeat with another ¾ cup frosting. Top with the third layer, flat-side up.
Step 8: Apply the Crumb Coat
Spread a thin layer of frosting over the entire cake—top and sides. This “crumb coat” traps loose crumbs and creates a smooth base for final decoration. Don’t worry about perfection here; you’ll see the cake through the frosting. Refrigerate for 30 minutes until the frosting firms up.
Step 9: Apply Final Frosting Layer
Remove cake from refrigerator. Using an offset spatula, apply a generous layer of frosting to the entire cake, smoothing as you go. For ultra-smooth sides, hold your spatula at a 45-degree angle and rotate the cake stand while keeping the spatula still. For a rustic look, create swoops and swirls with the back of a spoon. Reserve about 2 cups of frosting for decorative piping.
Step 10: Create Thanksgiving Decorations
Now for the fun part! Divide remaining frosting into small bowls and tint with food coloring—create autumn shades like burnt orange, golden yellow, deep burgundy, and forest green. Fill piping bags fitted with different tips. Using a leaf tip, pipe buttercream leaves around the top border. With a star tip, create rosettes or small florets. Add texture with a grass tip for a rustic feel.
Step 11: Add Final Embellishments
Strategically place candied pecans among the buttercream decorations. Arrange fresh cranberries in small clusters for pops of color. Tuck rosemary sprigs between decorations for an elegant, natural touch. If using edible gold leaf, carefully apply small pieces using a dry brush—the shimmer adds instant elegance. For extra wow-factor, dust certain areas lightly with orange or copper luster dust. Step back and admire your masterpiece!
Step 12: Chill and Serve
Refrigerate the decorated cake for at least 2 hours before serving. This sets the frosting and makes slicing much cleaner. Remove from refrigerator 30 minutes before serving so the cake returns to room temperature—this brings out maximum flavor. Use a sharp knife dipped in hot water (and wiped clean) between each slice for picture-perfect servings.
What to Serve Red Velvet Cake Decoration Thanksgiving With
Classic Coffee and Tea Pairings
A rich, dark roast coffee perfectly balances the sweetness of cream cheese frosting. The slight bitterness cuts through the richness beautifully. Alternatively, serve spiced chai tea or cinnamon tea for a warming autumn complement. Earl Grey tea with its bergamot notes also pairs wonderfully with the tangy cream cheese.
Complementary Desserts
If you’re creating a full dessert spread, pair this cake with lighter options like pumpkin mousse or apple crisp. The variety in textures and flavors keeps your dessert table interesting. A scoop of vanilla bean ice cream alongside a warm slice creates an irresistible hot-and-cold contrast.
Festive Beverages
Serve with spiced apple cider, mulled wine, or bourbon-spiked hot chocolate for adult guests. For family-friendly options, offer sparkling cranberry juice or caramel-vanilla steamers. These drinks enhance the Thanksgiving experience and complement the cake’s flavors without overwhelming them.
Cheese and Fruit Boards
Create a post-dinner grazing spread with aged cheddar, creamy brie, fresh pear slices, and clusters of grapes. The savory elements provide a perfect counterpoint to the sweet cake, giving guests options to alternate between flavors throughout the evening.
Top Tips for Perfecting Red Velvet Cake Decoration Thanksgiving
Use Room Temperature Ingredients
This is the number one rule for perfect red velvet cake! Cold eggs and buttermilk don’t emulsify properly with oil, creating a dense, uneven texture. Set eggs, buttermilk, cream cheese, and butter out 1-2 hours before baking. If you forget, place eggs in warm water for 5 minutes and microwave buttermilk for 15 seconds.
Don’t Overmix the Batter
Mix just until ingredients are combined and no flour streaks remain. Overmixing develops too much gluten, resulting in tough, chewy cake instead of the tender, velvety crumb you want. When you think you’re done mixing, you probably are!
Invest in Gel Food Coloring
Liquid food coloring works, but gel or paste coloring delivers more vibrant red without adding excess liquid to your batter. Start with 2 tablespoons and add more if needed—remember, the color deepens slightly as it bakes. Don’t skip the cocoa powder either; it enhances the red color naturally.
Master the Crumb Coat Technique
Many decorators skip this step and regret it! The crumb coat seals in loose crumbs, preventing them from mixing into your final frosting layer. Be patient—let it chill fully before applying the final coat. This extra step makes the difference between amateur and professional-looking results.
Chill Your Frosting Between Decorating Sessions
If frosting becomes too soft while decorating, pop it in the refrigerator for 10-15 minutes. This is especially important on warm days or if your kitchen is heated. Properly chilled frosting holds its shape when piped, creating crisp, defined decorations.
Practice Piping on Parchment First
Before decorating your cake, practice piping techniques on parchment paper. This helps you get comfortable with pressure control and lets you test how your frosting flows through different tips. Once you’re confident, transfer your skills to the actual cake.
Use a Turntable for Smooth Frosting
A rotating cake stand (even an inexpensive one) makes frosting infinitely easier. It allows you to keep your spatula steady while spinning the cake, creating professional-looking smooth sides. If you don’t have one, slowly rotate your serving plate, though it’s trickier.
Plan Your Color Palette
Choose 3-5 autumn colors for decorations rather than using every color available. Cohesive color schemes look more sophisticated and intentional. Classic Thanksgiving combinations include burgundy-orange-gold, sage-cream-copper, or rustic brown-orange-deep red.
Storing and Reheating Tips
Refrigerator Storage
Red velvet cake with cream cheese frosting must be refrigerated due to the dairy content. Store in an airtight container or cover tightly with plastic wrap for up to 5 days. The cake actually tastes better on day two as flavors meld together! For decorated cakes, refrigerate uncovered for 30 minutes first to firm up decorations, then cover loosely with plastic wrap—this prevents decorations from smudging.
Freezing Instructions
This cake freezes beautifully for up to 3 months! Wrap individual slices tightly in plastic wrap, then aluminum foil, and store in freezer bags. For whole cakes, freeze uncovered for 1 hour until frosting hardens, then wrap thoroughly. Thaw overnight in the refrigerator, then bring to room temperature for 30 minutes before serving. Note: Fresh cranberries and rosemary decorations don’t freeze well, so add these after thawing.
Bringing to Room Temperature
Always let refrigerated cake sit at room temperature for 20-30 minutes before serving. Cold cake tastes muted, and the frosting becomes stiff and less enjoyable. Room temperature allows the butter in the frosting to soften and the cake’s flavors to fully bloom. Your patience will be rewarded with the perfect taste and texture!
Transporting Your Decorated Cake
If bringing this cake to someone else’s Thanksgiving, transport it in its refrigerated state to keep frosting stable. Use a sturdy cake box and drive carefully (I learned this the hard way!). Let it come to room temperature at your destination. For extra security, insert 4-5 long wooden skewers through all layers before frosting—this keeps layers from sliding.
Avoiding Common Baking Mistakes for Red Velvet Cake
Mistake #1: Using Old Baking Soda
Baking soda loses potency over time, and expired leavening agents won’t give you the rise and texture you need. Always check the expiration date! Test your baking soda by dropping a bit into vinegar—if it fizzes vigorously, it’s still good. Old baking soda results in dense, flat cakes that won’t have that characteristic light crumb.
Mistake #2: Opening the Oven Door Too Early
I know it’s tempting to peek, but opening the oven before the 25-minute mark causes temperature drops that make cakes sink in the middle. Use your oven light to check progress instead. Only open the door for the toothpick test after 30 minutes of baking.
Mistake #3: Skipping the Vinegar
The vinegar reacts with baking soda to create that signature red velvet texture—light, tender, and velvety. Don’t substitute or omit it! This chemical reaction is what makes red velvet different from regular chocolate cake. White vinegar works best, but apple cider vinegar works in a pinch.
Mistake #4: Over-Softening Cream Cheese
Cream cheese should be softened, not melted or warm. Over-softened cream cheese creates runny frosting that won’t hold decorations. Remove from refrigerator 1-2 hours ahead—it should still hold its shape but mix easily. If you accidentally over-soften it, refrigerate for 20 minutes before making frosting.
Mistake #5: Frosting Warm Cake Layers
This is the fastest way to ruin your hard work! Frosting melts on warm cake, creating a soupy mess and causing layers to slide. Be patient and let cakes cool completely—yes, all the way through. Room temperature is essential. If you’re in a rush, refrigerate cooled layers for 20 minutes to speed up the process.
Mistake #6: Using Too Much Food Coloring
More isn’t always better! Excessive food coloring can create a bitter, chemical taste and even affect texture. Start with the recommended amount and add gradually. Remember, the color will intensify as the cake bakes and the crumb looks more dramatic when you slice it than it appears in batter.
Mistake #7: Not Measuring Flour Correctly
Scooping flour directly from the bag compacts it, giving you too much flour and resulting in dry, dense cake. Always spoon flour into your measuring cup and level with a knife, or better yet, weigh it (2½ cups = 315 grams). This simple change transforms your baking results!
Frequently Asked Questions
How far in advance can I bake and decorate my red velvet cake for Thanksgiving?
You can bake cake layers up to 2 days ahead and store them wrapped tightly at room temperature, or freeze them for up to one month. Frost and decorate the cake 1-2 days before Thanksgiving and refrigerate. Add fresh decorations like rosemary and cranberries the day of serving for the freshest look. This advance preparation actually benefits the cake—flavors deepen and meld beautifully!
Can I use natural food coloring instead of artificial red dye?
Absolutely! Use beet powder or natural red food coloring, though the shade will be more burgundy or brownish-red rather than bright crimson. You’ll need about 3-4 tablespoons of beet powder. Some bakers love this earthier, more natural-looking color for Thanksgiving. Just know the flavor might be slightly different with beet powder.
What’s the best way to achieve smooth frosting sides?
The key is a good crumb coat, properly chilled frosting, and a warm offset spatula. Dip your spatula in hot water, wipe dry, and smooth frosting using long, continuous strokes. A bench scraper also works brilliantly for this purpose. Rotate your cake stand slowly while holding the scraper still against the cake side. Practice makes perfect!
How do I prevent my cake layers from doming or cracking?
Use baking strips (wet fabric strips wrapped around pans) to promote even baking. Also, don’t overfill pans—stick to 2¾ cups batter per 9-inch pan. Lower oven temperature by 25°F if your oven runs hot. Dome tops aren’t a disaster though—just level them with a serrated knife before stacking!
Can I make this cake gluten-free?
Yes! Substitute a high-quality gluten-free baking flour blend (one that contains xanthan gum) in a 1:1 ratio for all-purpose flour. Bob’s Red Mill and King Arthur both make excellent options. The texture will be slightly denser but still delicious. Don’t use almond flour or coconut flour alone—they won’t provide the right structure.
Why did my cream cheese frosting turn out runny?
This usually happens when ingredients are too warm or over-beaten. Make sure cream cheese and butter are softened but still cool to touch. If frosting is runny, refrigerate for 30 minutes and re-whip. Adding an extra ½-1 cup of powdered sugar also helps thicken it. In hot weather, reduce butter slightly (use ¾ cup instead of 1 cup).
What piping tips do I need for Thanksgiving decorations?
Essential tips include: #104 petal tip for ruffles, #352 leaf tip for autumn leaves, #1M or #2D star tip for rosettes and borders, and #3 or #5 round tip for writing and dots. Wilton and Ateco make reliable, inexpensive tip sets. Start with these basics and build your collection over time.
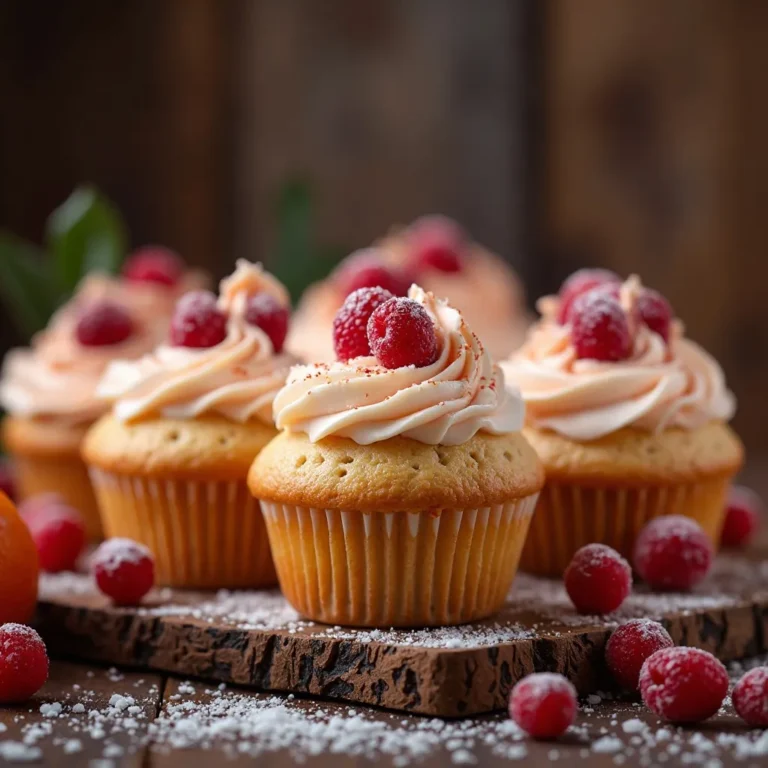
Can I use this recipe to make cupcakes instead?
Definitely! This batter makes approximately 30 cupcakes. Fill liners 2/3 full and bake at 350°F for 18-22 minutes. Decorate each cupcake with piped buttercream leaves and a candied pecan for individual Thanksgiving treats. They’re perfect for larger gatherings where slicing cake becomes impractical.
How do I transport a decorated cake safely?
Use a sturdy cake carrier with a locking lid or a deep cardboard cake box. Place a damp paper towel in the bottom to create grip. Drive carefully, avoiding sudden stops. Keep the car cool—turn on AC if necessary. If possible, have someone hold the box steady in their lap. Transport refrigerated and let come to room temperature at your destination.
What if I don’t have buttermilk?
Make your own! Add 1 tablespoon white vinegar or lemon juice to 1 cup regular milk and let sit for 5-10 minutes until curdled. This DIY buttermilk works perfectly in red velvet cake. You can also use plain yogurt thinned with a bit of milk to reach pourable consistency.
Nutrition Information
| Nutrient | Per Slice (1/12 of cake) |
|---|---|
| Calories | 645 |
| Total Fat | 38g |
| Saturated Fat | 15g |
| Cholesterol | 95mg |
| Sodium | 340mg |
| Total Carbohydrates | 74g |
| Dietary Fiber | 1g |
| Sugars | 58g |
| Protein | 6g |
| Vitamin A | 12% DV |
| Calcium | 6% DV |
| Iron | 8% DV |
Nutritional values are approximate and may vary based on specific ingredients used and portion sizes.
Final Thoughts
Creating a beautifully decorated red velvet cake for Thanksgiving isn’t just about the dessert—it’s about creating a moment. That collective “ooh” when you bring it to the table. The pride you feel when someone asks if you really made it yourself. The way it becomes part of your family’s holiday story.
I’ve made this cake dozens of times now, and each Thanksgiving it gets a little easier, a little prettier. Some years I go elaborate with fondant decorations and gold dust. Other years I keep it simple with buttercream swirls and fresh cranberries. Both versions disappear just as quickly!
The beauty of this red velvet cake decoration Thanksgiving project is its flexibility. Make it yours. Use your family’s favorite autumn colors. Add decorations that reflect your personal style. Turn on some music, pour yourself something delicious, and enjoy the process.
Your Thanksgiving dessert table is about to become the star of the show. Happy baking, and even happier Thanksgiving!
Did you make this red velvet cake decoration Thanksgiving recipe? I’d love to see your creation! Tag me on Instagram @yourblogname or leave a comment below with your decorating tips and tricks. Don’t forget to pin this recipe for next year’s Thanksgiving planning!