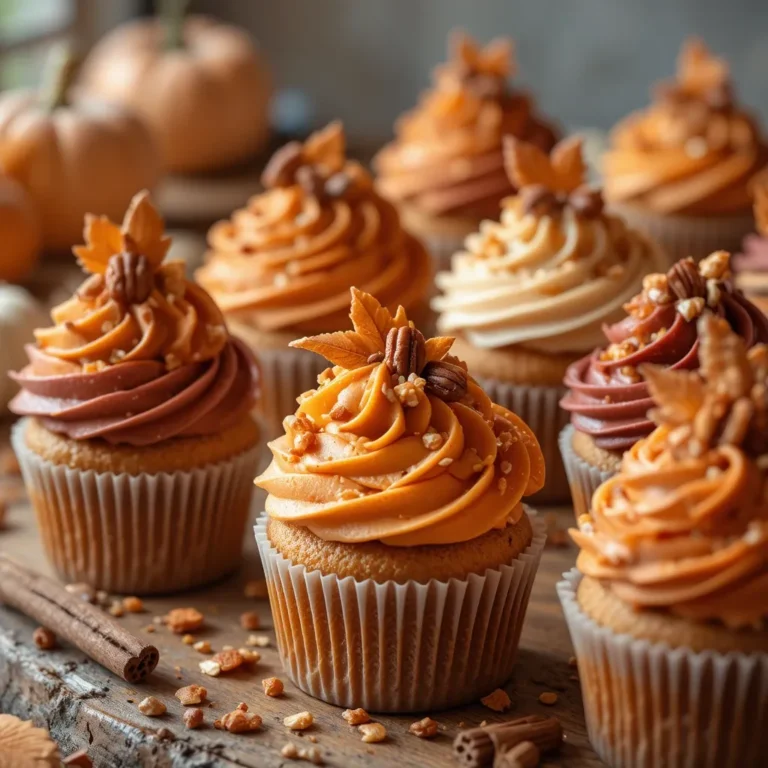
Easy Thanksgiving Cupcake Pie You’ll Ever Make So Easy
Thanksgiving cupcake pie ideas to delight your guests, festive mini pies that bring holiday cheer and sweet flavors to your dessert spread.
Picture this: It’s 9 PM the night before Thanksgiving, and I’m staring at my kitchen counter covered in flour, butter wrappers, and the remnants of what was supposed to be a beautiful lattice-top pie. My crust had cracked for the third time, and I was seriously considering just buying pies from the store.
That’s when my sister texted me a photo of these adorable little cupcake-sized pies she’d just pulled from her oven. “Why didn’t I think of this sooner?” I muttered to myself as I frantically searched for a muffin tin. That midnight baking session changed everything. I’ve been making Thanksgiving cupcake pies for the past four years now, and honestly, I’ll never go back to full-sized pies for holiday gatherings.
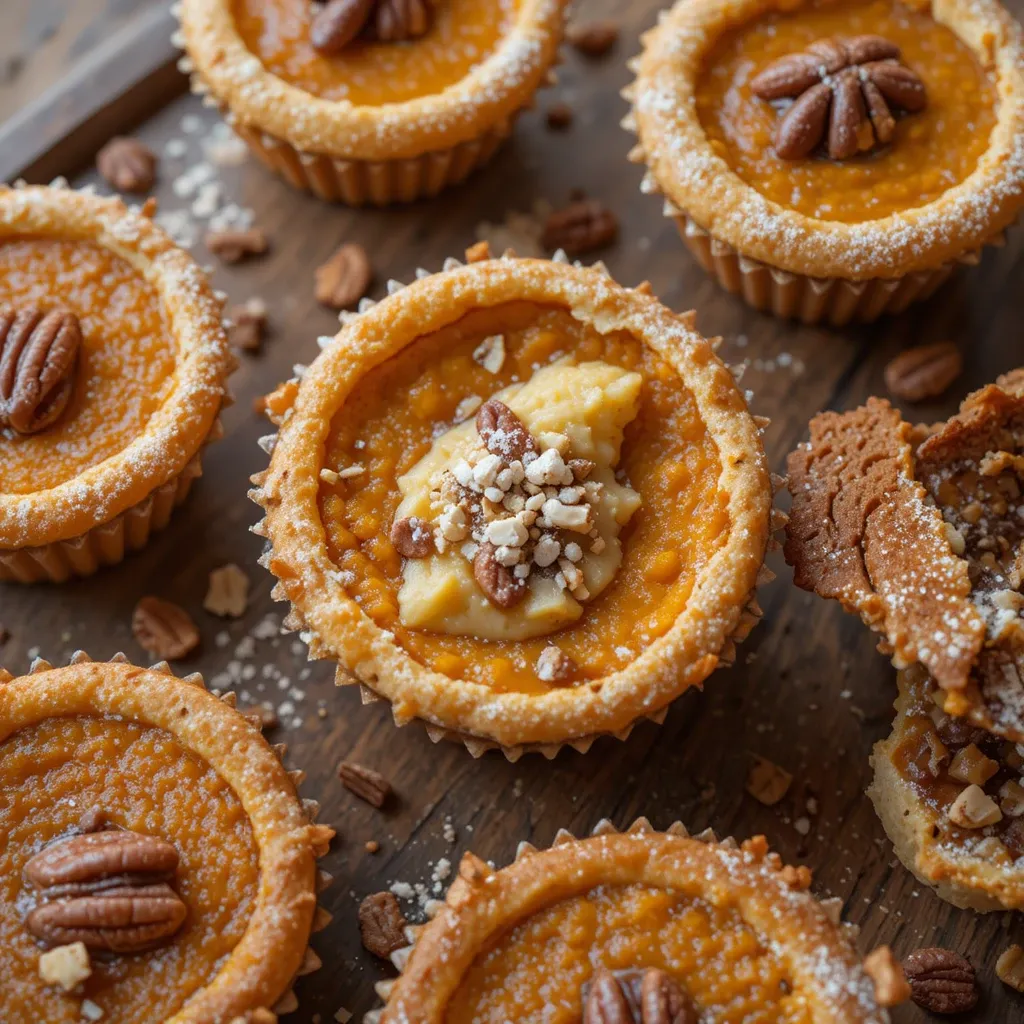
These miniature versions give you all the nostalgic flavors of traditional Thanksgiving pie—buttery crust, spiced pumpkin or pecan filling, that gorgeous golden top—without the stress of pie-cutting drama or worrying whether your crust will hold up.
The genius of thanksgiving cupcake pie is that everyone gets their own perfectly portioned dessert. No arguments over who got the bigger slice, no sad-looking pie server with filling oozing everywhere, and best of all, you can make multiple flavors without committing to three full-sized pies. Plus, they look absolutely adorable on a dessert table, and your guests will think you spent hours on them (we’ll keep the “actually super easy” part as our little secret).
Why Thanksgiving Cupcake Pie Deserves a Spot on Your Holiday Table
After testing this recipe eight times—yes, eight, because my family has strong opinions about Thanksgiving desserts—I’ve figured out exactly what makes these little pies so special. The first time I made them, I was just trying to save time. Now? They’ve become the most requested dessert at our family gatherings, and my neighbor actually asked if she could “commission” a batch for her Thanksgiving dinner party last year.
Here’s the thing: traditional Thanksgiving baking can be intimidating. I’ve seen experienced bakers stress over pie dough, worry about soggy bottoms (thanks, Great British Bake Off, for making us all paranoid), and frantically Google “how to fix cracked pie crust” at 2 AM. Thanksgiving cupcake pie solves all of these problems while delivering that same warm, spiced, utterly comforting dessert experience we all crave during the holidays.
Quick to Assemble (Like, Really Quick)
In my opinion, the biggest advantage of this recipe is the time factor. A traditional pie takes me at least 90 minutes from start to finish, not counting cooling time. These cupcake pies? I can have them in the oven in 35 minutes flat. The small size means the dough is easier to work with—no rolling out giant circles or nervously transferring delicate dough to a pie plate while praying it doesn’t tear.
Perfect for Flavor Variety
My family can never agree on one pie flavor. My dad wants pecan, my mom insists on pumpkin, and my brother-in-law lobbies for apple every single year. With cupcake-sized portions, I make a dozen of each flavor, and everyone’s happy. Trust me, this alone has saved multiple Thanksgiving arguments in my house.
They Actually Bake More Evenly
I’ve noticed that traditional pies often have issues with undercooked centers or over-browned edges. The smaller format of thanksgiving cupcake pie means more consistent baking. The first time I made these, I was shocked at how evenly golden they turned out—no pale soggy centers, no burnt crust edges. Just perfectly baked mini pies, every single time.
Makes Portion Control Easy
Let’s be real: after a massive Thanksgiving dinner, sometimes you just want a taste of pie without committing to a huge slice. These little guys are the perfect two-or-three-bite dessert. Plus, if someone wants more (and they will), they can just grab another one without the guilt of cutting a second slice.
Kid-Friendly and Party-Perfect
Children absolutely lose their minds over these. There’s something about getting their own individual pie that makes them feel special. And for parties? Forget about plates and forks—these can be eaten right from the muffin liner. Easy cleanup, happy guests.
Recipe Details
| Thanksgiving Cupcake Pie | |
|---|---|
| Prep Time | 25 minutes |
| Cook Time | 28 minutes |
| Total Time | 53 minutes |
| Servings | 12 cupcake pies |
| Difficulty | Easy |
| Calories | 245 per pie |
| Protein | 4g |
| Carbs | 32g |
| Fat | 12g |
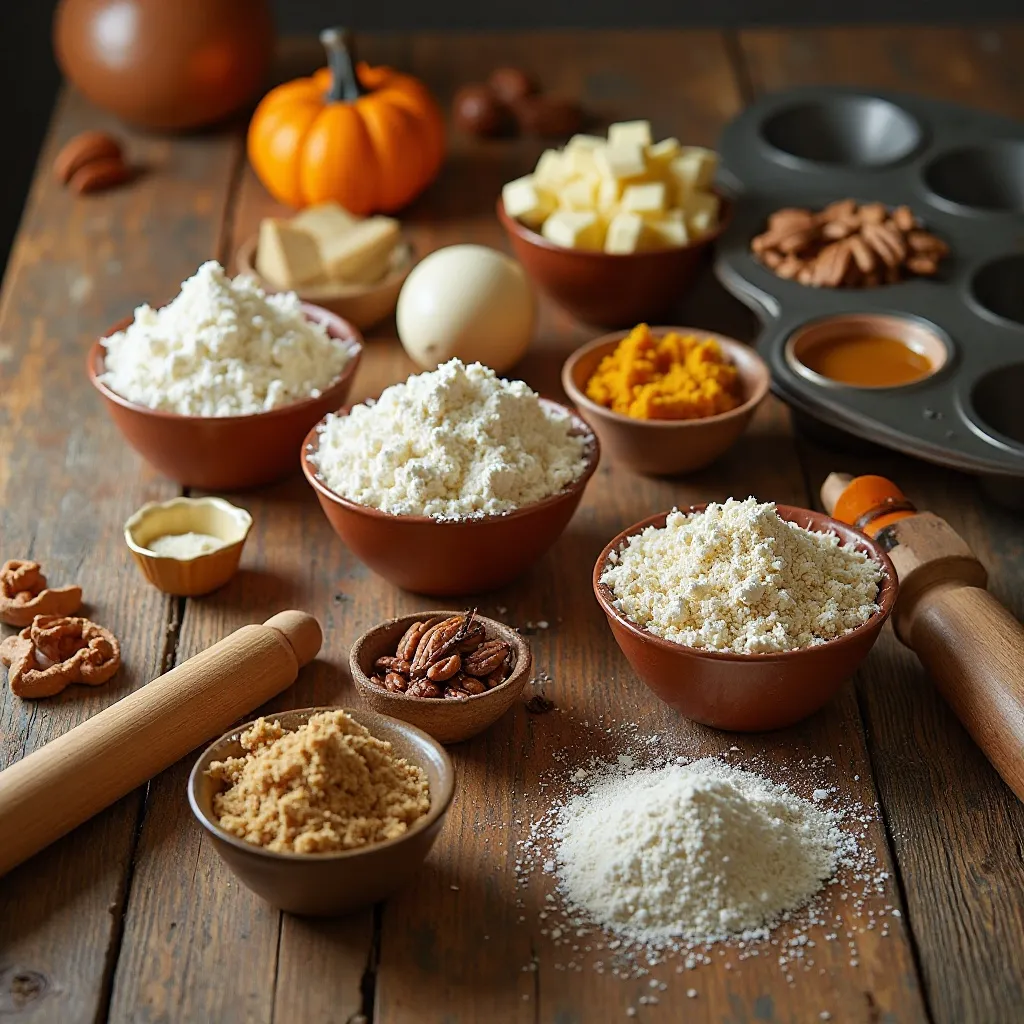
What You Need for Thanksgiving Cupcake Pie
Before you start, let me share what I’ve learned about ingredients after making these dozens of times. The quality of your butter matters—I once tried a store-brand butter that was on sale, and the crust just wasn’t as flaky. Now I always spring for the good stuff (European-style butter if I’m feeling fancy). Also, don’t skip the egg wash step. I learned this the hard way when my first batch came out pale and sad-looking. That golden-brown shine? All thanks to a simple egg wash.
For the Crust:
- 2 ½ cups all-purpose flour
- 2 tablespoons granulated sugar
- 1 teaspoon salt
- 1 cup (2 sticks) cold unsalted butter, cubed
- 6-8 tablespoons ice water
- 1 egg beaten with 1 tablespoon water (for egg wash)
- Coarse sugar for sprinkling (optional but makes them look bakery-worthy)
For the Pumpkin Filling (makes about 12):
- 1 cup pumpkin puree (not pumpkin pie filling—I made that mistake once)
- ½ cup heavy cream
- ⅓ cup packed brown sugar
- 2 eggs
- 1 ½ teaspoons pumpkin pie spice
- ½ teaspoon vanilla extract
- ¼ teaspoon salt
For the Pecan Filling (makes about 12):
- ¾ cup corn syrup
- ⅓ cup packed brown sugar
- 3 tablespoons melted butter
- 2 eggs
- 1 teaspoon vanilla extract
- Pinch of salt
- 1 ½ cups chopped pecans
My Substitution Tips:
I always keep extra pie crust in my freezer because life happens. You can absolutely use store-bought refrigerated pie dough for this recipe—just let it come to room temperature for about 10 minutes before working with it. No shame in shortcuts, especially during the holiday chaos.
For the pumpkin spice, if you don’t have the pre-mixed blend, use ¾ teaspoon cinnamon, ½ teaspoon ginger, and ¼ teaspoon each of nutmeg and cloves. Works like a charm.
How to Make Thanksgiving Cupcake Pie
Okay, here’s where the magic happens. The first time I made these, I was so nervous about the crust sticking to the muffin tin that I over-greased the cups and ended up with oily-tasting pies. Learn from my mistake: a light coating of non-stick spray or butter is plenty.
Quick Overview
This process is simpler than you’d think. You’ll make a basic pie dough (or cheat with store-bought), press it into muffin cups, fill with your choice of filling, add cute little crust cutouts on top, and bake until golden. The whole thing comes together in under an hour, and most of that is hands-off baking time. After making this recipe probably 20 times at this point, I can do it in 40 minutes from start to oven.
Step-by-Step Instructions
Step 1: Make the Pie Dough
In a large bowl, whisk together the flour, sugar, and salt. Add the cold butter cubes and use a pastry cutter (or your fingers—I prefer fingers, honestly) to work the butter into the flour until the mixture resembles coarse crumbs with some pea-sized butter chunks remaining. Those butter chunks are your friends; they create the flaky layers everyone loves. Drizzle in the ice water one tablespoon at a time, stirring with a fork until the dough just comes together. You’ll know it’s ready when you can squeeze a handful and it holds together without being sticky. If it’s too dry and crumbly, add another tablespoon of water.
Step 2: Rest the Dough
Form the dough into a disk, wrap it in plastic wrap, and refrigerate for at least 20 minutes. I usually use this time to make my filling and clean up the flour explosion on my counter. Don’t skip this step—I tried once because I was in a hurry, and the dough was so soft and sticky that I wanted to cry. Cold dough is manageable dough.
Step 3: Prep Your Muffin Tin and Preheat
Preheat your oven to 375°F (190°C). Lightly grease a standard 12-cup muffin tin with non-stick spray or butter. You can also use cupcake liners if you want easier removal, but I find the crust gets a better texture when it bakes directly in the greased tin.
Step 4: Roll and Cut the Dough
On a lightly floured surface, roll out the chilled dough to about ⅛-inch thickness. Use a 4-inch round cutter (or a drinking glass—works great in a pinch) to cut out 12 circles. Gently press each circle into a muffin cup, making sure it comes up the sides. The dough should reach just to the top edge or slightly over. Pro tip: if the dough tears, just patch it with a small piece and press to seal. No one will ever know.
Step 5: Add Your Filling
This is where you get to choose your adventure. For pumpkin filling, whisk together all the pumpkin ingredients in a bowl until smooth, then spoon about 2-3 tablespoons into each crust-lined cup, filling them about three-quarters full. For pecan filling, whisk together the corn syrup, brown sugar, butter, eggs, vanilla, and salt, then divide the chopped pecans among the cups and pour the syrup mixture over them. The secret that took me years to figure out is to not overfill—they puff up while baking, and I’ve had more than one batch overflow onto my oven floor (not fun to clean).
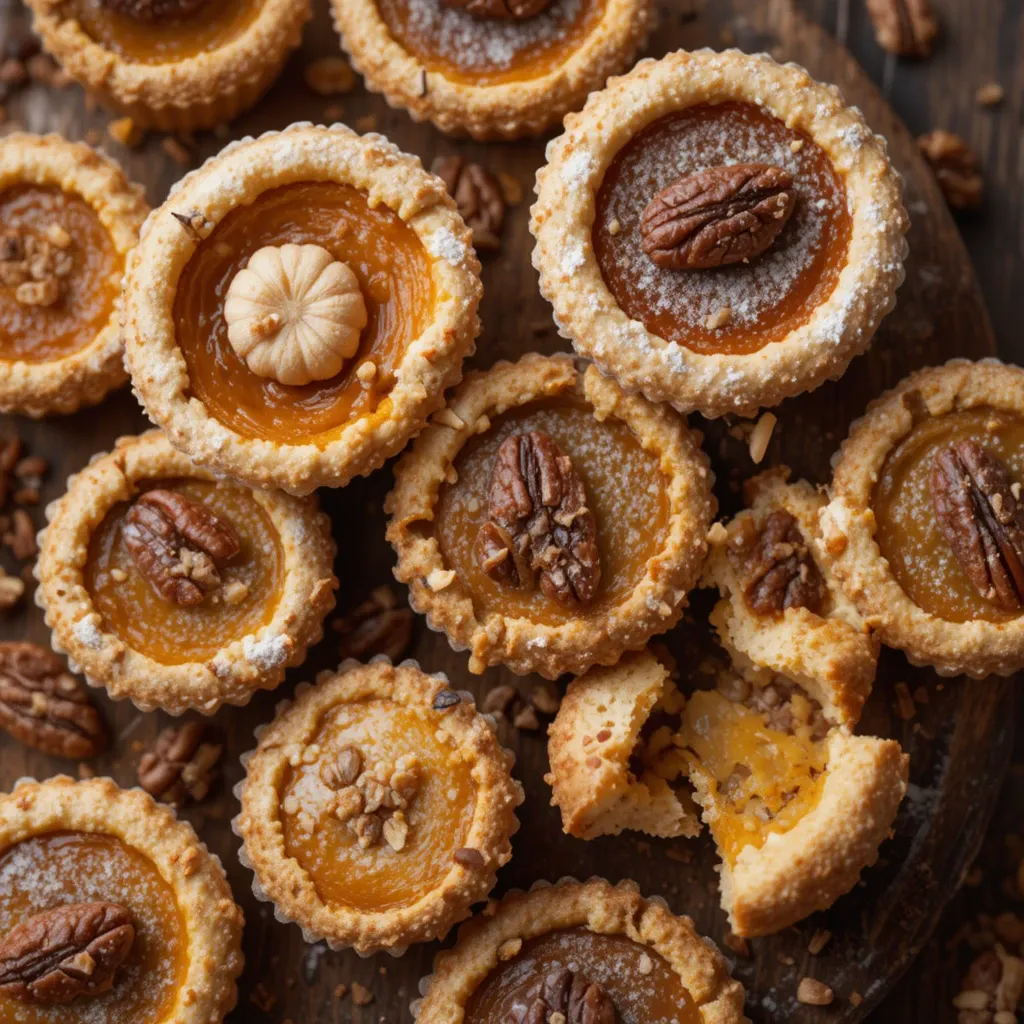
Step 6: Create the Crust Toppers
Roll out any remaining dough scraps and cut out small shapes with mini cookie cutters—I love using leaf shapes for Thanksgiving, but stars, circles, or even tiny pumpkins work beautifully. You can also cut thin strips and arrange them in a mini lattice pattern if you’re feeling ambitious (I save this for when I’m showing off). Place 2-3 cutouts on top of each filled cupcake pie.
Step 7: Egg Wash and Sugar
Brush the tops of the crusts with the egg wash mixture. This is what gives them that gorgeous golden-brown shine that makes everyone think you went to pastry school. Sprinkle with coarse sugar if using—it adds a delightful crunch and sparkle. When I first made this, I learned that the egg wash makes the biggest visual difference. Without it, they look homemade. With it? They look professional.
Step 8: Bake to Golden Perfection
Bake for 25-28 minutes, until the crust is golden brown and the filling is set but still has a slight jiggle in the center when you gently shake the pan. My kitchen smells like heaven for hours after making these—that combination of buttery crust and warm spices is intoxicating. Let them cool in the pan for 10 minutes (I know it’s hard to wait, but trust me), then carefully run a knife around the edges and lift them out onto a cooling rack.
My Favorite Ways to Serve These
After testing this recipe with different presentations, I’ve found that thanksgiving cupcake pie works beautifully for all kinds of serving situations. Last year, I arranged them on a tiered cake stand with little name cards indicating which flavor was which, and people couldn’t stop photographing them. But honestly, they’re just as good piled on a simple platter.
I love serving these slightly warm with a dollop of freshly whipped cream on top. The contrast of warm pie and cold cream is just perfection. For the pecan version, a small scoop of vanilla ice cream turns it into an absolute showstopper. My brother-in-law insists on having both whipped cream AND ice cream on his, which seems excessive but also kind of genius?
For a fancier presentation, I sometimes drizzle the pumpkin ones with salted caramel sauce or dust them with powdered sugar and a sprinkle of cinnamon. The pecan version is amazing with a tiny drizzle of melted dark chocolate—sounds weird with pecan, but the slight bitterness of the chocolate balances the sweet syrup perfectly.
If you’re making these for a potluck or taking them to someone’s house, they transport beautifully in a muffin tin covered with foil. I’ve also arranged them in a shallow box lined with parchment paper, and they stayed perfect during a 20-minute car ride.
Complete Your Thanksgiving Dessert Table: Pair these with my Classic Pumpkin Cheesecake Bars for chocolate lovers who want options, or serve alongside Maple Pecan Tarts for a nut-focused spread. I also love having a big bowl of Bourbon Whipped Cream available for people to top their cupcake pies.
Pro Tips from My Kitchen
These tips come from actual mistakes and happy accidents I’ve had while perfecting this recipe. I wish someone had told me these things before my first attempt!
Should I blind bake the crust first?
Nope! That’s the beauty of these little pies. The smaller size and thinner crust mean they bake through perfectly without blind baking. I tried blind baking once (because I’m paranoid about soggy bottoms), and it was a complete waste of time. The crusts got too dark and hard. Just fill and bake—it works every time.
Use room temperature eggs
This might seem fussy, but cold eggs can cause your filling to seize up or not combine smoothly, especially in the pecan filling. I just take my eggs out when I start prepping my other ingredients, and by the time I need them, they’re perfect. If you forget, place them in a bowl of warm (not hot) water for five minutes.
Don’t skip the muffin tin cooling time
The first time I made thanksgiving cupcake pie, I tried to remove them immediately after baking because I was impatient. Half of them stuck to the pan, and the other half lost their bottoms. Ten minutes of cooling allows the crust to firm up just enough to release cleanly. It’s the difference between perfect pies and a frustrating mess.
The secret to extra flavor
Add a tablespoon of bourbon or dark rum to your pecan filling. It deepens the flavor and adds complexity that makes people ask, “What’s your secret ingredient?” Also, toasting your pecans for 5 minutes before adding them to the filling creates an incredible nutty richness. I learned this trick from my grandmother, and it’s a game-changer.
My foolproof timing trick
Set a timer for 23 minutes, then check the pies. If the crust edges are golden and the center jiggles slightly when you shake the pan, they’re done. If the crust is still pale, give them another 3-5 minutes. Every oven is different—mine runs hot, so I’ve learned to check early. You’ll know they’re perfect when the edges are golden brown and slightly crispy, and your kitchen smells like a bakery.
Can I make these ahead of time?
Absolutely! Bake them the day before, let them cool completely, then store them in an airtight container at room temperature. They actually taste even better the next day because the flavors have time to meld. I’ve been making these the night before Thanksgiving for three years now, and it’s eliminated so much morning stress. Just warm them in a 300°F oven for 5-7 minutes before serving if you want that fresh-baked warmth.
Make-Ahead and Storage Guide
One of the best things about thanksgiving cupcake pie is how well they hold up, which is crucial during the chaos of holiday meal prep. After years of making these, I’ve figured out exactly how to time everything for maximum freshness with minimum stress.
Refrigerator Storage
Store cooled cupcake pies in an airtight container in the refrigerator for up to 4 days. I like to place parchment paper between layers if I’m stacking them. The crust will soften slightly in the fridge (moisture is the enemy of crispy crusts), but a quick 5-minute reheat in a 325°F oven will crisp them right back up. The pumpkin version actually tastes better after a day in the fridge—the spices have time to really develop.
Freezer Instructions
These freeze beautifully! Wrap each cooled pie individually in plastic wrap, then place them all in a freezer-safe bag or container. They’ll keep for up to 3 months. To serve, thaw in the refrigerator overnight, then warm in a 300°F oven for 10 minutes. I once forgot about a batch in my freezer and found them two months later—they tasted just as good as fresh.
Best Way to Reheat
Microwave reheating will make the crust soggy (learned this the hard way), so always use your oven. Place the pies on a baking sheet and warm at 300°F for 5-8 minutes if they’re at room temperature, or 10-12 minutes if they’re coming straight from the fridge. You want them warm but not hot—overheating can make the filling watery.
How Long Do They Last?
At room temperature (covered), they’re good for about 2 days, but I recommend refrigerating them after day one, especially the pumpkin version since it contains dairy. Honestly, they never last more than a day at my house anyway—people devour them!
Recipe FAQs
Can I use store-bought pie crust for this?
Yes! Use two refrigerated pie crusts (the kind that come rolled up in the box). Let them sit at room temperature for about 10 minutes, then unroll and cut your circles. It’s a huge time-saver, and no judgment here—I use store-bought when I’m in a rush.
What if I don’t have pumpkin pie spice?
Mix your own with ¾ teaspoon cinnamon, ½ teaspoon ground ginger, ¼ teaspoon nutmeg, and ¼ teaspoon ground cloves. I actually prefer making my own blend because I like a little extra ginger kick.
Can I make these in a mini muffin tin for bite-sized versions?
Absolutely! You’ll get about 36 mini pies. Reduce the baking time to 15-18 minutes. I made these for a holiday party once, and they disappeared in about 10 minutes. Perfect for cocktail parties where people want just a taste.
Why is my crust soggy on the bottom?
This usually means your oven temperature was too low or you overfilled the cups. Make sure your oven is fully preheated to 375°F (use an oven thermometer to verify—mine was running 25 degrees cool for months before I checked). Also, fill the cups only three-quarters full to prevent overflow that can seep under the crust.
Can I make savory versions of these?
You bet! I’ve experimented with mushroom and gruyere filling, caramelized onion and goat cheese, and even a mini chicken pot pie version. The crust recipe works perfectly for savory applications—just omit the sugar in the dough and add a pinch of herbs like thyme or rosemary.
What’s the best way to get the cupcake pies out of the tin?
Let them cool for 10 minutes, then run a thin knife or offset spatula around the edge of each pie. Gently lift straight up—they should pop right out. If one is stubborn, wiggle the knife gently around the edge again. I’ve found that silicone muffin pans make removal even easier, but they don’t give quite as crispy of a crust.
Can I double the recipe?
Yes! Just make sure you have enough muffin tins or work in batches. The dough can be made ahead and refrigerated for up to 2 days or frozen for a month, which makes doubling less overwhelming. I usually make a triple batch the weekend before Thanksgiving and freeze the unbaked filled pies, then bake them fresh on the day.
Variations You’ll Love
Once you’ve mastered the basic thanksgiving cupcake pie, the possibilities are endless. I love experimenting with different flavors, and these variations have become family favorites in their own right.
Make It Chocolate
Add ⅓ cup of cocoa powder to the pumpkin filling and reduce the pumpkin puree to ⅔ cup. Top with chocolate ganache after cooling for a decadent chocolate-pumpkin hybrid. My chocolate-loving husband requests these year-round.
Apple Pie Version
Dice 2 cups of peeled apples (I like Granny Smith for tartness) and toss with 2 tablespoons flour, ⅓ cup sugar, 1 teaspoon cinnamon, and a squeeze of lemon juice. Spoon into the crust-lined cups and dot with butter before adding the top crust. These smell absolutely incredible while baking.
Maple Pecan Twist
Replace half the corn syrup in the pecan filling with pure maple syrup, and add a tablespoon of maple extract. The maple flavor is more subtle than you’d think but adds gorgeous depth. I drizzle these with extra maple syrup before serving.
Sweet Potato Version
Swap the pumpkin puree for mashed roasted sweet potato. The texture is a bit denser, and the flavor is earthier and less sweet—I actually prefer it. Add a pinch of cardamom to the spice mix for something really special.
Final Thoughts
If you’ve made it this far, you’re probably as excited as I am about these adorable little pies! Making thanksgiving cupcake pie has genuinely changed how I approach holiday baking—less stress, more creativity, and way more flexibility. Whether you’re hosting a crowd or bringing dessert to someone else’s celebration, these cupcake-sized pies deliver all the nostalgic Thanksgiving flavor in the most convenient, shareable format.
I’d love to hear how your cupcake pies turn out! Drop a comment below and let me know which filling you tried—pumpkin or pecan? Or did you get wild and try both? Tag me in your photos on Instagram @[yourbloghandle] so I can see your beautiful creations. And if you have any questions while making these, I’m always here to help troubleshoot!
Pro Tip: Pin this recipe now so you can find it easily when Thanksgiving planning starts getting hectic. Trust me, future you will thank present you!