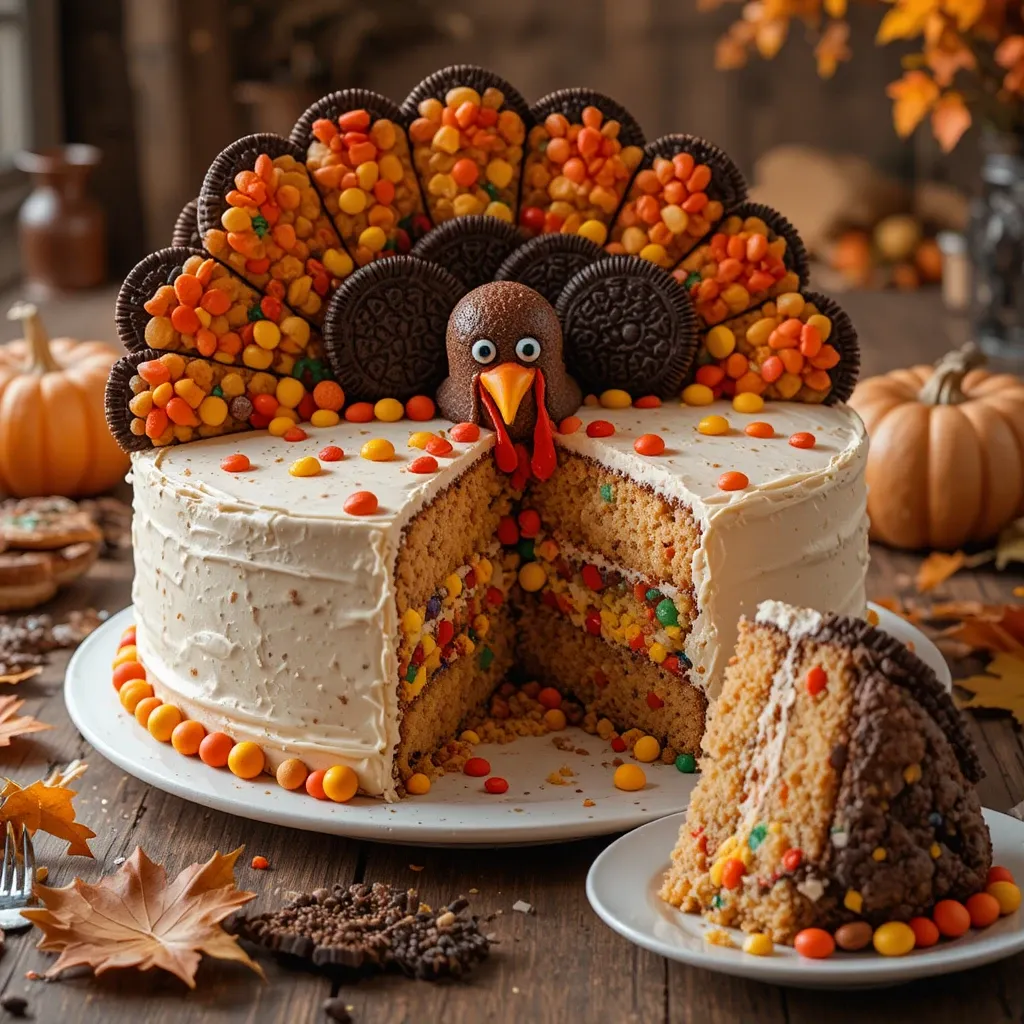
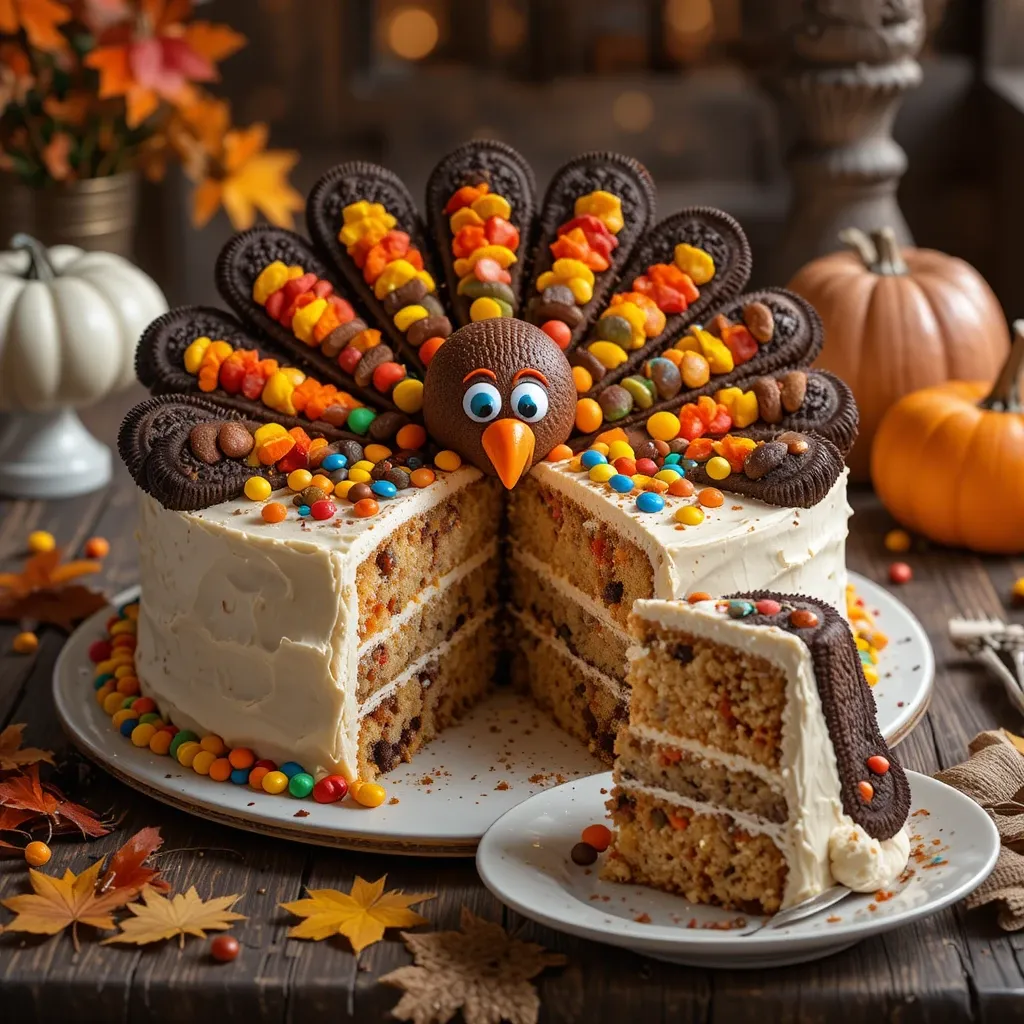
How to Decorate a Turkey Cake Easier Than You Think
Picture this: You’re hosting Thanksgiving dinner, and you want to serve something memorable for dessert. Something that makes everyone at the table pull out their phones for a picture before digging in. That’s exactly what happened at my house last year when I made my first turkey cake, and honestly, I’ve been hooked ever since….
Picture this: You’re hosting Thanksgiving dinner, and you want to serve something memorable for dessert. Something that makes everyone at the table pull out their phones for a picture before digging in. That’s exactly what happened at my house last year when I made my first turkey cake, and honestly, I’ve been hooked ever since.
The first time I attempted to How to decorate a turkey cake, I was terrified it would turn into a Pinterest fail. I’d seen those gorgeous photos online and thought, “There’s no way I can pull that off.” But here’s the thing—it turned out to be way easier than I expected. My niece (she’s eight) couldn’t stop giggling at the “turkey with candy feathers,” and my mother-in-law asked for the recipe three times. Success.
I’ve made this dessert four times now, tweaking my technique each time, and I’m excited to share everything I’ve learned. Whether you’re a baking novice or someone who decorates cakes regularly, this guide will walk you through creating a turkey cake that looks impressive but doesn’t require professional skills. Trust me, if I can do it with my chaotic kitchen and two kids running around, you absolutely can too.
Why This Turkey Cake Will Be Your New Thanksgiving Tradition
Listen, I’ve tried plenty of themed desserts over the years. Some were disasters (looking at you, melted chocolate cornucopia), and others were just… meh. But this turkey cake? It hits differently. Let me tell you why this recipe has earned a permanent spot in my Thanksgiving lineup.
It’s Actually Beginner-Friendly
I know the photos might look intimidating, but I promise the decorating process is more forgiving than you’d think. You don’t need fancy piping skills or years of cake decorating experience. Most of the decoration involves arranging cookies and candies—basically, if you can place items in a circle, you’ve got this. The first time I made it, I finished the whole thing in about 45 minutes of decorating time, and that included stopping to referee a toy dispute between my kids.
Kids Go Absolutely Crazy For It
Real talk: getting children excited about Thanksgiving dessert can be tough when they’re already sugar-crashed from sneaking pie throughout the day. But something about a cake shaped like a turkey just works. My daughter, who normally picks at desserts, asked if we could make “the turkey cake” for her birthday. In March. That’s the power we’re working with here.
It’s a Conversation Starter
Every single time I’ve served this cake, it becomes the centerpiece of the table. People gather around, take photos, and everyone wants to know how you made it. It’s one of those desserts that makes you look like a baking genius even though the secret is that it’s mostly assembly work. I love that.
The Flavor Combinations Are Endless
Here’s what took me a couple of tries to figure out: you can customize this cake to match your family’s taste preferences. Chocolate cake with chocolate frosting? Perfect. Vanilla with cream cheese frosting? Absolutely. Spice cake with caramel buttercream? Now you’re talking. The decoration technique works with any flavor combination, so you’re not locked into one specific recipe.
How to Decorate a Turkey Cake: Recipe Details
| Recipe Details | |
|---|---|
| Prep Time | 30 minutes (plus baking/cooling time) |
| Decorating Time | 35-45 minutes |
| Total Time | 3 hours (including cooling) |
| Servings | 12-14 servings |
| Difficulty | Easy to Medium |
| Calories | 420 per serving |
| Protein | 4g |
| Carbs | 58g |
| Fat | 19g |
What You Need for How to Decorate a Turkey Cake
Before we dive into the decorating magic, let’s talk about what you’ll actually need. I’ve refined this list over multiple attempts, and these are the items that make the biggest difference.
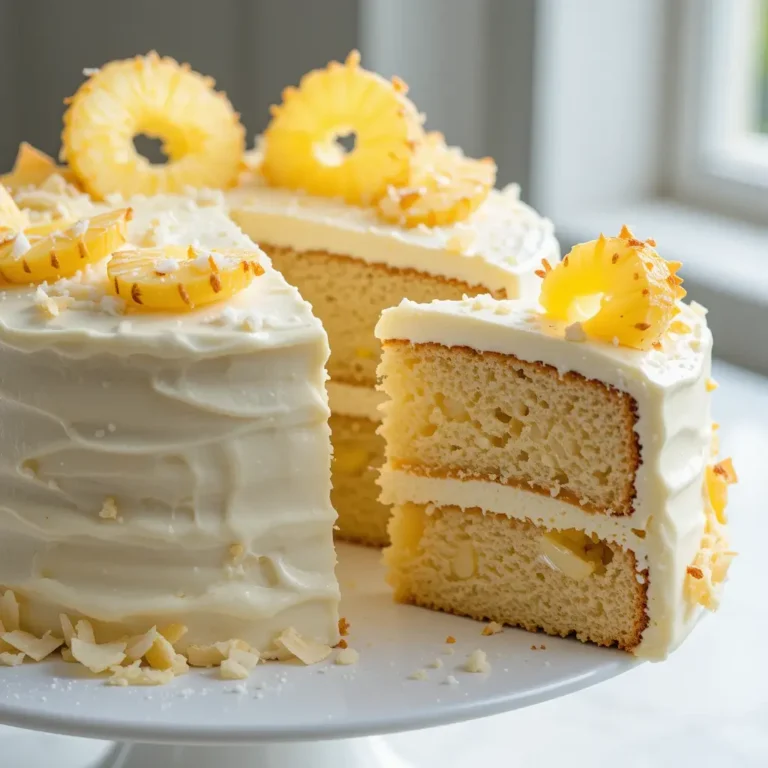
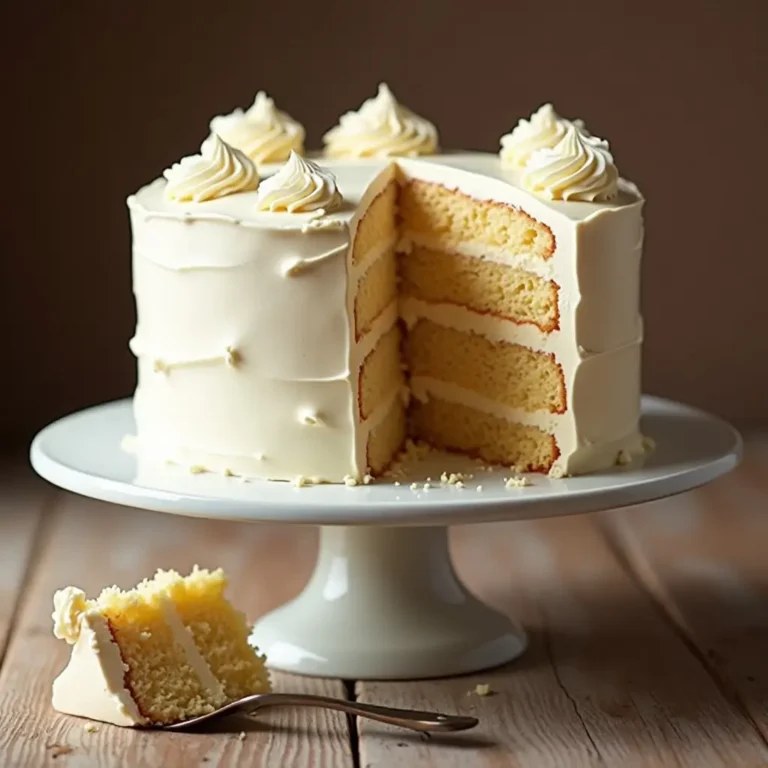
The foundation of your turkey cake is obviously the cake itself—I typically use a standard 9-inch round cake (two layers) because it gives you the perfect size for decorating. You’ll also need frosting, and this is where I have opinions. After testing with different types, I’ve found that a sturdy buttercream works best because it holds the decorations in place better than cream cheese frosting, which can be too soft. That said, if you’re team cream cheese, just refrigerate it for 20 minutes before decorating.
For the actual turkey decoration, you’ll need Oreos or similar chocolate sandwich cookies (these become the feather base), candy corn (classic choice for feathers), chocolate candies like M&Ms or Reese’s Pieces (for additional feather colors), a Reese’s Peanut Butter Cup or large chocolate truffle (this is your turkey body), candy eyes (or you can pipe them with frosting), and orange frosting or a small piece of orange candy for the beak and wattle.
My substitution tip: Don’t stress if you can’t find candy eyes at the store. I once used mini white chocolate chips with a tiny dot of black frosting, and it worked perfectly. Also, if you’re not a candy corn person (I get it, they’re divisive), you can use colored Jordan almonds or even cut-up fruit leather.
The Simple Process to Decorate Your Turkey Cake
Okay, let’s get into the fun part. I’m going to walk you through exactly how I decorate this cake, including the little tricks I’ve picked up along the way.
Quick Overview
Here’s the quick version before we dive in: You’re basically going to frost a round cake, create a fan of cookie “feathers” around the back edge, fill in those feathers with colorful candy, and then add a chocolate turkey body to the front. The whole process takes about 40 minutes once your cake is baked and cooled, and most of that time is arranging candies (which is honestly the fun part).
Step-by-Step Instructions
Step 1: Bake and Cool Your Cake
Start with two 9-inch round cake layers, baked according to your favorite recipe or box mix (no shame in the box mix game—I use it all the time). Let them cool completely, and I mean completely. I learned this the hard way when my frosting melted into a sad puddle because I got impatient. While they’re cooling, make your frosting. I usually make about 3 cups of buttercream, tinted in a fall color like orange, brown, or even keeping it classic with white.
Step 2: Assemble and Frost
Stack your cooled cake layers with a generous layer of frosting between them. Then apply a thin crumb coat all over the outside and let it set for about 15 minutes in the fridge. This step changed my cake decorating life—it keeps all those pesky crumbs from showing up in your final frosting layer. After the crumb coat sets, apply your final layer of frosting smoothly across the top and sides. Don’t stress about making it perfect; once you add the decorations, minor imperfections disappear completely.
Step 3: Create the Feather Base
This is where it gets fun. Take your Oreos (I use about 15-18 cookies) and gently press them into the frosting around the back half of the cake’s top edge. Arrange them in a fan pattern, standing upright, with each cookie slightly overlapping the next one. They should look like a semicircle of feathers spreading out from where your turkey body will go. Pro tip: if the cookies won’t stay upright, your frosting might be too soft. Pop the whole thing in the fridge for 10 minutes, then try again.
Step 4: Add Candy Corn Feathers
Now comes the part that makes this cake Instagram-worthy. Take candy corn pieces and insert them between the Oreos, pointed end up, creating additional feather layers. I usually use about 2-3 pieces of candy corn between each Oreo. The white ends will stick into the frosting while the orange and yellow tips create this gorgeous feather effect. When I first made this, I was worried about symmetry, but honestly, a slightly imperfect arrangement looks more organic and realistic.
Step 5: Fill in with Colorful Candies
This is where you can get creative. I use M&Ms, Reese’s Pieces, or Skittles to add pops of color throughout the feathers. Press them gently into the frosting around and between the cookies. There’s no wrong way to do this—I let my kids help with this part, and their random placement actually looks amazing. You want to create a colorful, full look that resembles elaborate turkey plumage.
Step 6: Create the Turkey Body
For the turkey’s body, I use a Reese’s Peanut Butter Cup (the standard size, unwrapped). Place it in the center front of the cake, where all your feathers are pointing toward. This becomes your turkey’s body. If you want to get fancy, you can use a Ferrero Rocher or any round chocolate candy.
Step 7: Add the Face Details
Press two candy eyes onto the Reese’s Cup. If you’re using the store-bought kind, they usually stick right into the chocolate. For the beak, I pipe a small triangle of orange frosting or use a small piece of orange candy. The wattle (that’s the red thing hanging under a turkey’s beak) can be a tiny piece of red fruit leather, a Red Hot candy, or a small dollop of red-tinted frosting. I’ll be honest—the first time I made this, I completely forgot about the wattle and nobody noticed until I pointed it out.
Step 8: Final Touches
Take a step back and look at your creation. This is when I add any final candies to fill in gaps or add extra color pops. Sometimes I’ll sprinkle a few pieces of candy corn at the base of the cake on the serving plate for a festive touch. The whole thing should look abundant and celebratory—like a turkey that went all out for Thanksgiving.
My Favorite Ways to Serve This Cake
After making this cake several times, I’ve figured out the best ways to present and serve it to really wow your guests.
The traditional approach is to place the turkey cake in the center of your dessert table, surrounded by fall leaves, mini pumpkins, or cinnamon sticks for that full autumn aesthetic. I once scattered some real fall leaves around the cake board (washed and dried, obviously), and the photos turned out gorgeous.
For serving, I recommend bringing the whole cake to the table before cutting it so everyone can appreciate the design. Kids especially love this moment. Then, use a sharp knife to cut slices—each piece will have some of those feather decorations, which makes every serving look special. I usually serve it with a dollop of whipped cream or a scoop of vanilla ice cream on the side.
If you’re serving this at a Thanksgiving potluck or bringing it somewhere, transport it on a sturdy cake board and keep it refrigerated until serving time, especially if your kitchen is warm. The frosting can soften in heat, and your carefully placed decorations might shift during transport. I learned this lesson when I hit a pothole on the way to my sister’s house and arrived with slightly lopsided feathers. Still delicious, just not as pristine.
Pro Tips from My Kitchen
Let me share the tricks I wish I’d known before my first attempt at decorating a turkey cake.
Make the cake layers a day ahead
One thing I’ve learned after years of holiday baking: you don’t want to be doing everything on the same day. I bake my cake layers the night before, wrap them in plastic wrap, and store them at room temperature. They actually frost easier when they’ve had time to settle, and it’s one less thing to stress about on the big day.
Room temperature frosting is your friend
Cold frosting straight from the fridge is impossible to work with for this project. Let your buttercream sit at room temperature for about 30 minutes before you start decorating. It should be soft enough to spread easily but still hold its shape. If it gets too warm and starts sliding, pop it in the fridge for 10 minutes.
Don’t skimp on the feather layers
The first time I made this, I used fewer Oreos and less candy because I thought it would be plenty. It looked sparse and sad. Now I go generous with the decorations—it should look abundant and festive. You want that “wow” factor when people see it.
The freezer is your emergency backup
If at any point your decorations start sliding or the frosting gets too soft, stick the whole cake in the freezer for 10-15 minutes. It’s like hitting the reset button. I’ve done this at least twice per cake, and it works every time.
Press decorations in firmly
Those Oreos and candies need to be pressed into the frosting enough that they’ll stay put, but not so hard that you smoosh your frosting or crack the cookies. It takes a gentle but confident touch. After testing this multiple times, I’d say press until you feel slight resistance, then stop.
Plan your color scheme ahead
This might sound overly fancy, but thinking about your candy colors before you start makes a difference. I go for traditional fall colors—orange, yellow, red, brown—but you could do a whole different vibe. My friend made one with blue and purple candies for her son’s “Friendsgiving,” and it was stunning.
Storing Your Turkey Cake
Let’s talk about what happens after you’ve made this masterpiece, because you might have leftovers (though in my experience, this cake disappears fast).
Refrigerator Storage
Store any leftover turkey cake covered in the refrigerator. I use a large cake container or loosely tent aluminum foil over it, being careful not to let the foil touch the decorations. It’ll keep for 3-4 days, though the candy corn might start to get a bit sticky from the humidity. The cake itself stays moist and delicious—in fact, I think it tastes even better on day two when all the flavors have melded together.
Can You Freeze It?
Honestly, I don’t recommend freezing a decorated turkey cake. The candy decorations don’t thaw well, and the Oreos can get soggy. However, you can absolutely freeze unfrosted cake layers up to 3 months in advance. Wrap them tightly in plastic wrap and then foil, and they’ll be perfect when you’re ready to decorate.
Make-Ahead Strategy
Here’s my tried-and-true timeline: Bake the cake layers two days before Thanksgiving and store them wrapped at room temperature. Make the frosting one day before and refrigerate it. On Thanksgiving morning (or the night before if you’re ambitious), frost and decorate the cake. This way, everything tastes fresh, but you’re not scrambling to do everything at once.
Variations Worth Trying
After making the classic version several times, I’ve experimented with some fun twists that have been huge hits.
Chocolate Lover’s Version
Use a rich chocolate cake with chocolate buttercream, then decorate with chocolate cookies (Oreos work, or try Chips Ahoy), peanut butter M&Ms, and Reese’s Pieces. The orange and brown candies still give you that fall vibe, but everything’s chocolate-forward. My husband, who isn’t usually a cake person, requests this version specifically.
Allergy-Friendly Turkey Cake
I’ve made this for friends with nut allergies by using nut-free chocolate candies and ensuring all ingredients are safe. You can also make it gluten-free by using your favorite GF cake recipe and gluten-free cookies. The decoration technique works exactly the same way.
Mini Turkey Cakes
Instead of one large cake, make individual cupcakes decorated as tiny turkeys. Use one Oreo per cupcake for feathers, 3-4 pieces of candy corn, and a Reese’s Miniature for the body. These are perfect for kids’ Thanksgiving parties, and they’re actually easier to decorate because you’re working on a smaller scale. I made two dozen of these for my daughter’s preschool party, and they were gone in minutes.
Frequently Asked Questions
How far in advance can I decorate the turkey cake?
I’ve found that decorating it the day before serving is ideal. The decorations have time to set into the frosting, but the cake still tastes fresh. I wouldn’t go more than two days in advance because the candy can start to bleed color into lighter frostings.
Can I use store-bought frosting?
Absolutely! I’ve used canned frosting in a pinch, and it works fine. Just know that it tends to be a bit softer than homemade buttercream, so you might need to refrigerate the cake more often while decorating to keep things stable.
What if my cookies won’t stand up in the frosting?
This usually means your frosting is too soft or too hard. If it’s too soft, refrigerate the cake for 15 minutes and try again. If it’s too hard, let it come to room temperature a bit. You can also use a tiny dab of extra frosting as “glue” on the bottom of each cookie before pressing it in.
Do I need special baking skills for this?
Not at all. If you can bake a basic cake (or buy one from a bakery and remove it from its container), you can make this. The decoration is more about arrangement than technique. I’ve taught my eleven-year-old nephew how to do this, and his turned out great.
What’s the best cake flavor for a turkey cake?
In my opinion, fall-spiced cakes work beautifully—think pumpkin spice, apple cinnamon, or spice cake with caramel frosting. But classic vanilla or chocolate are always crowd-pleasers too. I’ve made it with all these flavors, and they’ve all been hits.
Can I make this cake vegan?
Yes! Use your favorite vegan cake recipe and vegan buttercream. Most candy corn is vegan (check the label), and there are plenty of vegan chocolate candy options now. Oreos are actually vegan, which surprises people.
Help! My turkey looks more like a peacock. What went wrong?
This made me laugh because my first attempt looked exactly like a peacock! It usually happens when you spread the feathers too wide. Keep them in more of a semicircle fan behind the turkey body rather than going all the way around the cake. Think turkey tail, not peacock display.
How do I transport this cake without ruining it?
Place it on a sturdy cake board or serving platter, then put that inside a large, flat box. I’ve used pizza boxes before—they work great. Keep it level, drive carefully, and refrigerate it as soon as you arrive at your destination. If any decorations shift during transport, you can easily reposition them.
My Final Thoughts on This Thanksgiving Showstopper
Here’s the thing about learning how to decorate a turkey cake: it’s become one of my favorite Thanksgiving traditions, not just because it tastes amazing or looks impressive, but because making it brings me joy. There’s something therapeutic about arranging those colorful candies and watching the turkey come to life.
Every year, I find myself looking forward to baking day. My kitchen smells like vanilla and butter, there’s Christmas music playing even though it’s not quite time for that yet, and I’m creating something that I know will make people smile. That’s what good holiday baking should feel like.
Whether this is your first time attempting a decorated cake or you’re a Thanksgiving baking veteran looking for something new, I hope you’ll give this turkey cake a try. Don’t stress about making it perfect—some of the best cakes I’ve made were the ones where things went slightly wrong, but they still tasted delicious and made everyone happy.
Now it’s your turn! Try decorating your own turkey cake and let me know how it goes. What candy combinations did you use? Did your kids help? Did it become the star of your dessert table? Drop a comment below—I love hearing about your baking adventures.