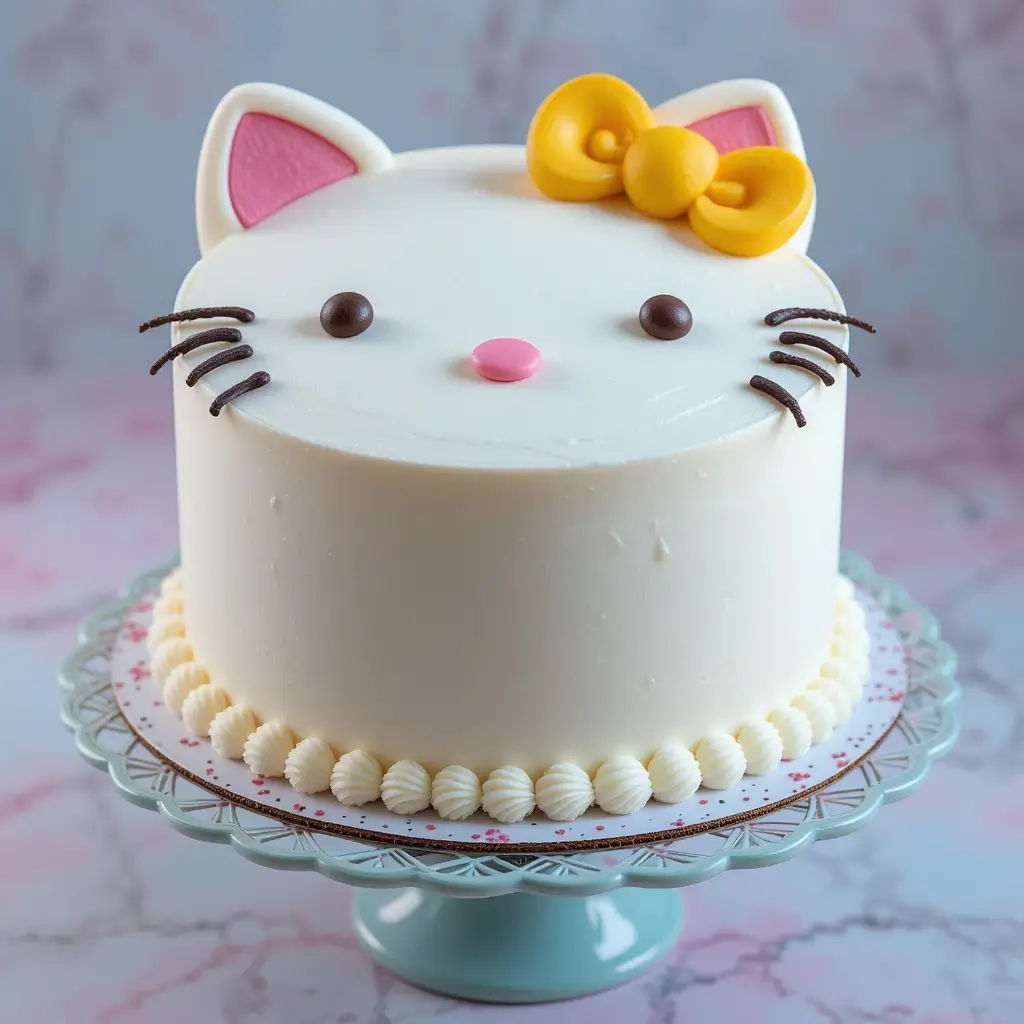
Easy Hello Kitty Cake Design
Ready to bake a new party favorite? Learn to create an amazing Hello Kitty birthday cake. This simple guide provides solutions for a sweet, stunning
Picture this: your little one’s eyes lighting up as they see their favorite Hello Kitty character transformed into a delicious, fluffy cake masterpiece. This hello kitty cake design combines the beloved Sanrio character’s iconic features with moist vanilla cake layers and creamy buttercream frosting.
What makes this recipe truly special is its beginner-friendly approach – you don’t need professional decorating skills to create something magical. Unlike our popular unicorn cake tutorial, this design focuses on simple shapes and classic colors that anyone can master in just a few hours.
What is Hello Kitty Cake Design?
Ever wondered why this adorable white kitten has captured hearts worldwide for decades? Our hello kitty cake design brings Sanrio’s most famous character to life in edible form! This isn’t just any ordinary cake – it’s a celebration centerpiece that transforms simple ingredients into pure joy.
As they say, “the way to a child’s heart is through their birthday cake,” and nothing beats the magic of seeing their favorite character come to life. Ready to create some unforgettable memories?
Why You’ll Love This Hello Kitty Cake Design:
Perfect for Beginners
This hello kitty cake design eliminates intimidating decorating techniques while delivering professional-looking results. The simple round cake base and basic piping skills make it accessible for any home baker, regardless of experience level.
Budget-Friendly Alternative
Skip expensive custom bakery cakes that can cost $50-100! Making this at home costs under $15 and feeds 12-15 people. You’ll have leftover ingredients for future baking adventures too.
Customizable and Delicious
The vanilla cake base provides the perfect canvas for Hello Kitty’s features, while pink buttercream roses and yellow bow details add those signature touches. Unlike our chocolate fudge cake recipe, this lighter flavor appeals to kids and adults alike. Why not gather the family and start baking this weekend?
How to Make Hello Kitty Cake Design:
Quick Overview
This delightful hello kitty cake design features two layers of moist vanilla cake, creamy white buttercream frosting, and simple decorative elements that create Hello Kitty’s iconic face. The magic happens with basic piping techniques and food coloring.
Prep Time: 45 minutes
Baking Time: 25-30 minutes
Decorating Time: 1 hour
Total Time: 2 hours 15 minutes
Serves: 12-15 people
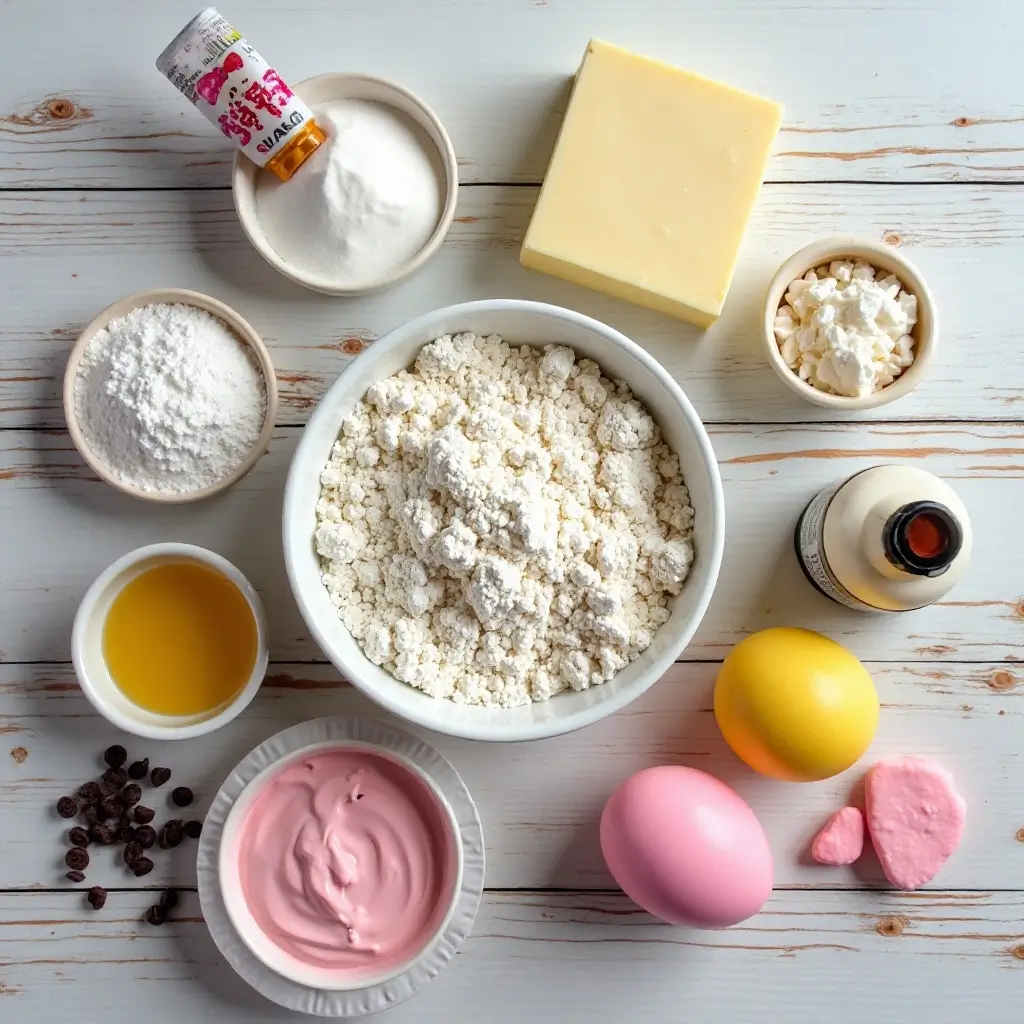
Key Ingredients for Hello Kitty Cake Design:
For the Vanilla Cake:
- 2½ cups all-purpose flour
- 2½ teaspoons baking powder
- ½ teaspoon salt
- ¾ cup unsalted butter, softened
- 1¾ cups granulated sugar
- 4 large eggs, room temperature
- 2 teaspoons vanilla extract
- 1¼ cups whole milk, room temperature
For the Buttercream Frosting:
- 1 cup unsalted butter, softened
- 4 cups powdered sugar, sifted
- ¼ cup heavy cream
- 2 teaspoons vanilla extract
- Pink food coloring
- Yellow food coloring
- Black food coloring
For Decoration:
- 2 chocolate chips (for eyes)
- Yellow candy or fondant (for bow)
- Pink candy or fondant (for nose)
Step-by-Step Instructions:
Step 1: Prepare Your Workspace Preheat oven to 350°F (175°C). Grease two 9-inch round cake pans with butter and dust with flour. Line bottoms with parchment paper for easy removal.
Step 2: Make the Cake Batter In medium bowl, whisk together flour, baking powder, and salt. In large bowl, cream softened butter and sugar using electric mixer for 3-4 minutes until light and fluffy. Add eggs one at a time, beating well after each addition. Mix in vanilla extract.
Step 3: Combine Wet and Dry Ingredients Alternately add flour mixture and milk to butter mixture, beginning and ending with flour mixture. Mix on low speed until just combined – don’t overmix or cake will be tough.
Step 4: Bake the Layers Divide batter evenly between prepared pans. Bake 25-30 minutes or until toothpick inserted in center comes out clean. Cool in pans 10 minutes, then turn out onto wire racks to cool completely.
Step 5: Prepare Buttercream Beat softened butter with electric mixer until light and fluffy, about 3 minutes. Gradually add powdered sugar, beating until smooth. Add cream and vanilla, beat until creamy and pipeable.
Step 6: Divide and Color Frosting Reserve 2 cups white frosting for base. Color ½ cup pink for nose and inner ears. Color ¼ cup yellow for bow. Keep small amount white for details.
Step 7: Assemble the Cake Place first layer on serving plate. Spread thin layer of white frosting on top. Add second layer and crumb coat entire cake with thin layer of frosting. Refrigerate 30 minutes to set.
Step 8: Create Hello Kitty’s Face Apply final layer of white frosting, smoothing with offset spatula. Use round piping tip to create Hello Kitty’s ear shapes with white frosting. Fill ears with pink frosting using smaller round tip.
Step 9: Add Facial Features Press chocolate chips gently into frosting for eyes, spacing them evenly. Use pink frosting to pipe small triangular nose. Create bow with yellow frosting using star tip, or place yellow fondant bow on top of head.
Step 10: Final Details Use black food coloring mixed with small amount of frosting to pipe whiskers with fine tip. Add any final touches and refrigerate cake 15 minutes to set decorations.
What to Serve Hello Kitty Cake Design With:
This adorable hello kitty cake design pairs beautifully with strawberry milk, pink lemonade, or vanilla ice cream for the perfect birthday party spread. Consider serving alongside fresh strawberries and whipped cream for added elegance.
Create a themed dessert table with Hello Kitty cookies, pink macarons, or white chocolate-covered strawberries. For drinks, try bubble tea or fruit punch in pink cups to maintain the color scheme.
Hot beverages like vanilla chai or strawberry hot chocolate complement the cake’s sweet vanilla flavors perfectly for adult guests.
Top Tips for Perfecting Hello Kitty Cake Design:
Temperature Matters
Ensure all ingredients are at room temperature before mixing. Cold eggs and milk won’t incorporate properly, leading to dense cake texture. Take ingredients out 2 hours before baking.
Frosting Consistency
If buttercream becomes too soft while decorating, refrigerate 15 minutes to firm up. If too stiff, add cream one teaspoon at a time until pipeable.
Clean Piping Tips
Keep damp paper towels nearby to clean piping tips between colors. This prevents color bleeding and maintains crisp lines for Hello Kitty’s features.
Cake Leveling
Use serrated knife to level cake layers if they dome during baking. This ensures stable stacking and professional appearance.
Color Preparation
Mix food coloring into frosting gradually – colors deepen over time. Start with less than you think you need, especially with pink and yellow.
Storing and Reheating Tips:
Store your finished hello kitty cake design covered in refrigerator for up to 4 days. The buttercream frosting maintains best texture when chilled.
For longer storage, wrap unfrosted cake layers tightly in plastic wrap and freeze up to 3 months. Thaw completely before decorating.
Buttercream frosting can be made 3 days ahead and stored in refrigerator. Bring to room temperature and re-whip before using.
If cake becomes too cold, let sit at room temperature 30 minutes before serving for best flavor and texture.
Never freeze decorated cake as frosting decorations may lose their shape and colors may bleed when thawed.
Frequently Asked Questions
Can I use a different cake flavor for this Hello Kitty design?
Absolutely! Strawberry, funfetti, or even chocolate cake work wonderfully. Just ensure the cake color complements Hello Kitty’s white appearance.
How far in advance can I make this cake?
Bake cake layers up to 2 days ahead and store wrapped at room temperature. Decorate the day before serving for best results.
What if I don’t have piping bags?
Use zip-top bags with corners snipped off, or spread frosting with offset spatula and add features with toothpicks.
Can I make this cake dairy-free?
Yes! Substitute plant-based butter and milk alternatives. The texture will be slightly different but still delicious.
How do I transport this decorated cake?
Use a cake carrier or large covered container. Refrigerate until 30 minutes before departure to keep decorations stable.
What’s the best food coloring to use?
Gel food coloring provides vibrant colors without thinning the frosting. Liquid coloring works but may require more to achieve desired shade.
Nutrition Information
| Nutrient | Per Slice (1/12 of cake) |
|---|---|
| Calories | 420 |
| Total Fat | 18g |
| Saturated Fat | 11g |
| Cholesterol | 95mg |
| Sodium | 180mg |
| Total Carbs | 65g |
| Dietary Fiber | 1g |
| Sugars | 58g |
| Protein | 5g |
Additional Expert Tips for Success:
Troubleshooting Common Issues: If your cake layers crack during baking, your oven temperature may be too high. Use an oven thermometer to verify accuracy.
Make-Ahead Strategy: Prepare frosting components separately and store in labeled containers. This saves time on decoration day and ensures consistent results.
Kid-Friendly Modifications: Let children help with simple tasks like mixing frosting colors or placing chocolate chip eyes. This creates lasting memories and teaches basic baking skills.
Professional Presentation: Place cake on decorative stand or colorful plate that complements Hello Kitty’s pink and yellow color scheme. Add themed decorations around the base.
Photography Tips: Natural lighting showcases the cake’s colors best. Photograph from slightly above to capture Hello Kitty’s complete facial features.
This hello kitty cake design transforms any celebration into a magical experience that guests will remember long after the last bite. The combination of simple techniques and stunning results makes it perfect for both novice and experienced bakers looking to create something truly special.