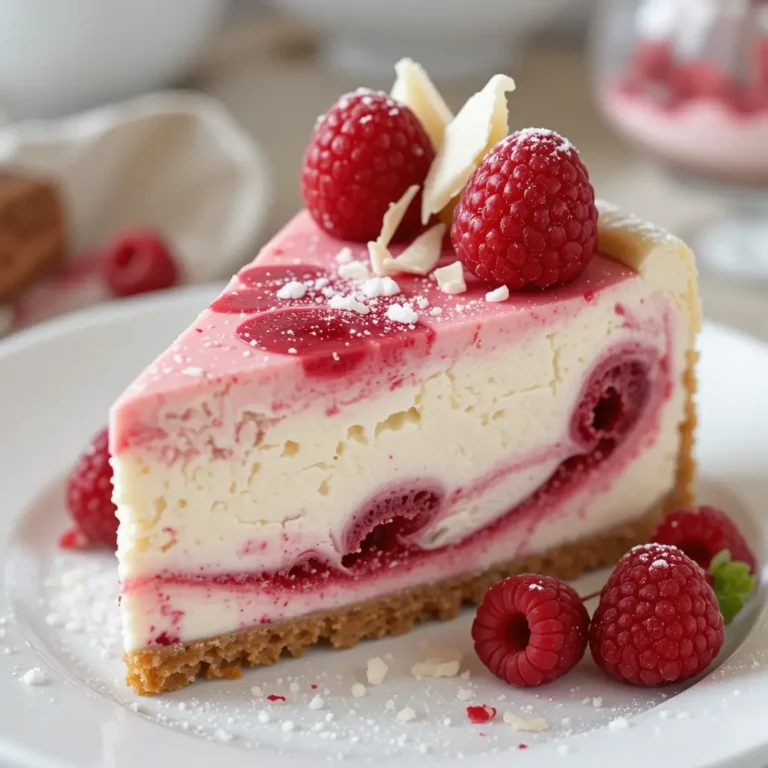
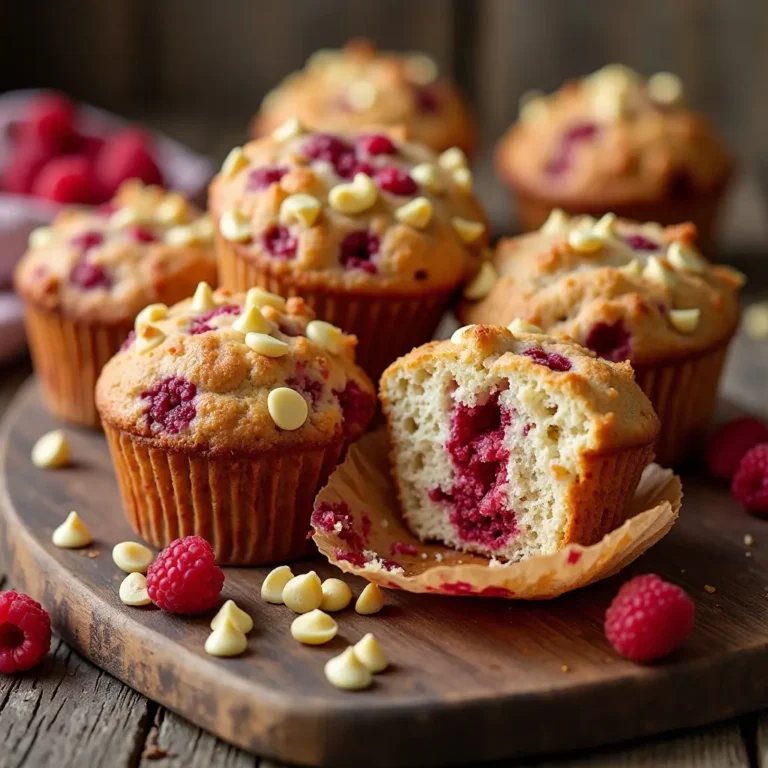
30 Minute Raspberry Cheesecake Bars
Looking for a stunning dessert that’s easy to make? Our ultimate raspberry cheesecake bars recipe brings a sweet and tangy flavor to your kitchen.
Picture this: silky smooth cheesecake meets tangy-sweet raspberries in perfect harmony, all nestled on a buttery graham cracker crust. These raspberry cheesecake bars are pure magic in every bite! Did you know that raspberries were once considered so precious that only royalty could afford them?
Today, we’re bringing that royal treatment to your kitchen with a recipe that’s surprisingly simple yet absolutely stunning. These bars combine the elegance of traditional cheesecake with the convenience of grab-and-go portions, making them perfect for busy families, potluck dinners, or when you’re craving something special without the fuss.
Unlike our popular chocolate chip cookies that require individual shaping, these bars bake all at once, saving you precious time while delivering maximum wow factor.
What Are Raspberry Cheesecake Bars?
Ever wondered why we call them “bars” when they taste like pure heaven? These delightful treats get their name from their rectangular shape – think of them as cheesecake’s laid-back cousin who decided to ditch the fancy round pan for something more practical!
Legend has it that bars became popular in American kitchens because busy home cooks needed desserts that could feed a crowd without all the fuss. As they say, “the way to a man’s heart is through his stomach,” and these bars definitely know the shortcut! Ready to create some magic in your kitchen?
Why You’ll Love This Raspberry Cheesecake Bars Recipe
Rich and Creamy Texture That Melts in Your Mouth
The star of these bars is undoubtedly the velvety cheesecake layer that strikes the perfect balance between rich and light. Each bite delivers that signature tangy-sweet flavor that makes cheesecake so irresistible, while the cream cheese creates an incredibly smooth texture that practically melts on your tongue.
Budget-Friendly Homemade Goodness
Making these bars at home costs a fraction of what you’d pay at a bakery or restaurant. With simple ingredients you likely already have in your pantry, you can create a dessert that rivals any professional bakery. Compare that to spending $25-30 for a whole cheesecake, and you’ll see why homemade is the way to go!
Burst of Fresh Raspberry Flavor
The real magic happens when fresh or frozen raspberries meet the creamy cheesecake base. These little ruby gems add natural sweetness, beautiful color, and a delightful tartness that cuts through the richness perfectly. The combination creates a flavor profile that’s both sophisticated and comforting.
Similar to our beloved strawberry shortcake recipe, these bars celebrate the beauty of berry desserts but offer a more elegant presentation. Why not bookmark both recipes and create your own berry dessert collection? Your taste buds will thank you for bringing these restaurant-quality treats into your home kitchen!
How to Make Raspberry Cheesecake Bars
Quick Overview
These raspberry cheesecake bars are remarkably easy to make, requiring just basic mixing and baking skills. The secret lies in the layered approach – a buttery graham cracker crust provides the perfect foundation, while the creamy cheesecake filling creates that signature rich texture we all crave. The fresh raspberries add natural sweetness and beautiful color, making these bars as stunning as they are delicious.
Prep Time: 20 minutes
Bake Time: 35-40 minutes
Chill Time: 4 hours
Total Time: 5 hours
Serves: 16 bars
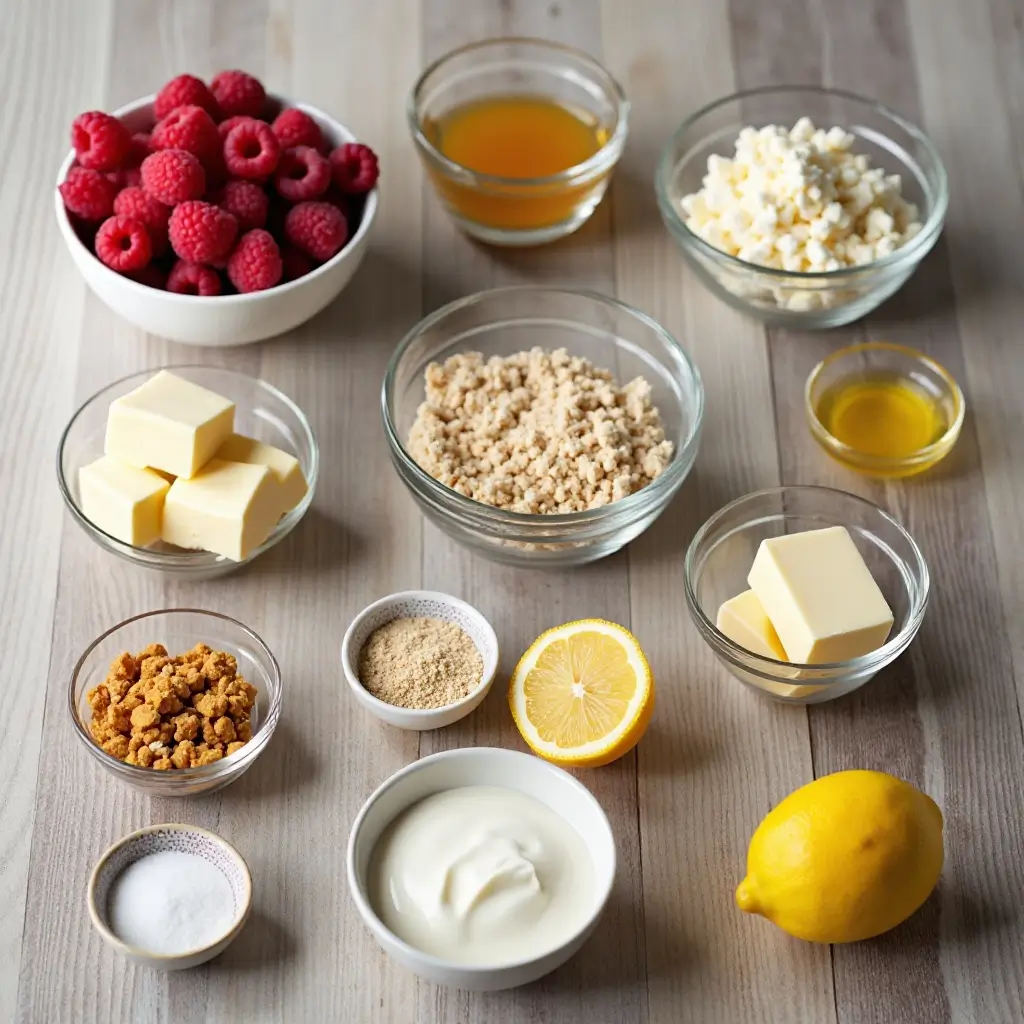
Key Ingredients for Raspberry Cheesecake Bars
For the Crust:
- 1 ½ cups graham cracker crumbs
- ⅓ cup granulated sugar
- 6 tablespoons unsalted butter, melted
- Pinch of salt
For the Cheesecake Filling:
- 16 oz (2 packages) cream cheese, room temperature
- ½ cup granulated sugar
- 2 large eggs, room temperature
- 1 teaspoon vanilla extract
- ¼ cup sour cream
- 2 tablespoons all-purpose flour
For the Raspberry Topping:
- 1 ½ cups fresh raspberries (or frozen, thawed and drained)
- 3 tablespoons granulated sugar
- 1 tablespoon cornstarch
- 1 tablespoon lemon juice
- ¼ teaspoon vanilla extract
Step-by-Step Instructions
Step 1: Prepare Your Pan and Oven Preheat your oven to 325°F (163°C). Line an 8×8-inch baking pan with parchment paper, leaving overhang for easy removal. Lightly grease the parchment with cooking spray.
Step 2: Make the Graham Cracker Crust In a medium bowl, combine graham cracker crumbs, sugar, and salt. Pour in melted butter and mix until the mixture resembles wet sand and holds together when pressed. Press the mixture firmly into the bottom of your prepared pan using the bottom of a measuring cup for even distribution.
Step 3: Pre-bake the Crust Bake the crust for 10 minutes until lightly golden. Remove from oven and set aside to cool while you prepare the filling.
Step 4: Prepare the Raspberry Topping In a small saucepan, combine raspberries, sugar, cornstarch, lemon juice, and vanilla. Cook over medium heat for 3-4 minutes, gently mashing some berries while leaving others whole. The mixture should thicken slightly. Remove from heat and let cool completely.
Step 5: Make the Cheesecake Filling In a large bowl, beat cream cheese with an electric mixer until smooth and fluffy, about 2-3 minutes. Gradually add sugar, beating until well combined. Add eggs one at a time, beating just until incorporated. Mix in vanilla, sour cream, and flour until smooth. Don’t overmix.
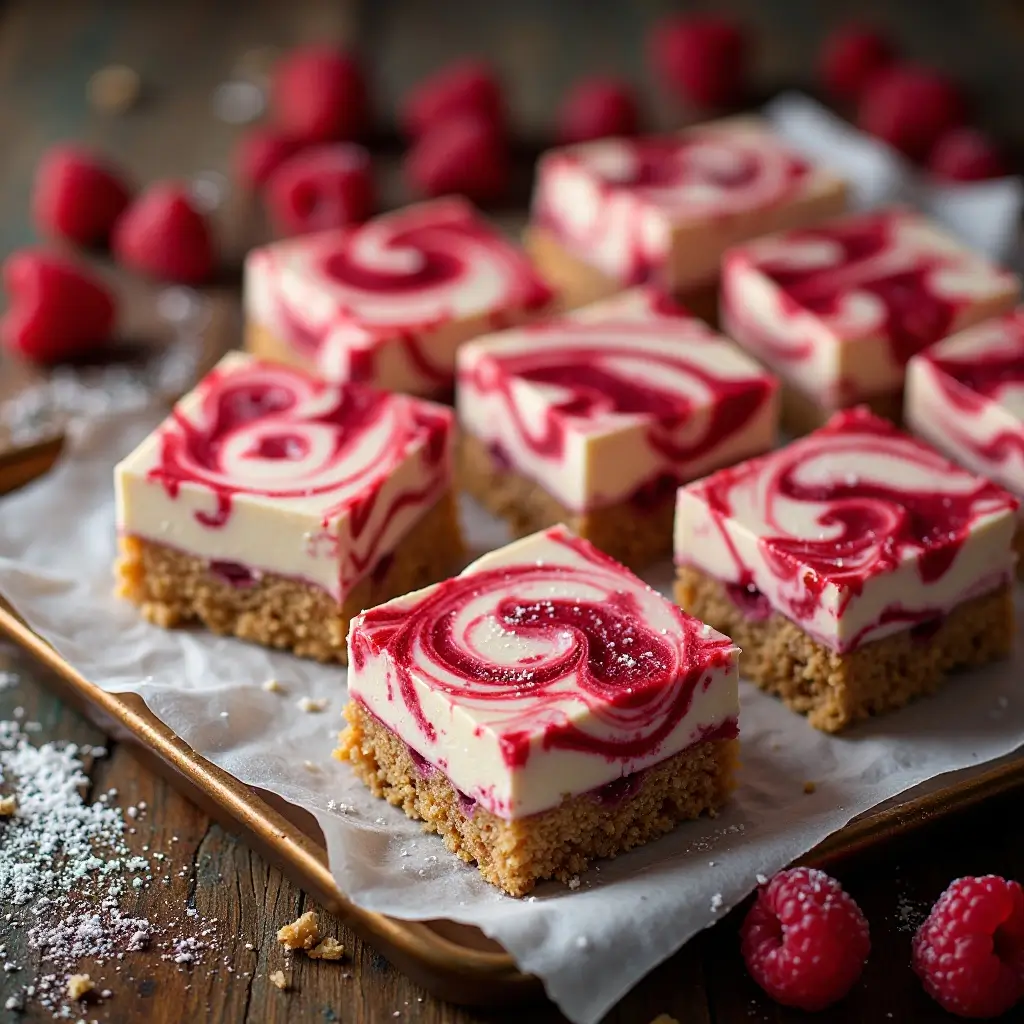
Step 6: Assemble the Bars Pour the cheesecake filling over the cooled crust, spreading evenly. Drop spoonfuls of the raspberry mixture over the cheesecake filling. Use a knife to create swirl patterns, being careful not to cut through to the crust.
Step 7: Bake to Perfection Bake for 35-40 minutes, or until the center is almost set but still slightly jiggly. The edges should be lightly golden and pulling away slightly from the sides.
Step 8: Cool and Chill Allow bars to cool completely at room temperature, then refrigerate for at least 4 hours or overnight. This chilling time is crucial for achieving the perfect sliceable texture.
Step 9: Cut and Serve Using the parchment overhang, lift the bars from the pan. Cut into 16 squares using a sharp knife wiped clean between cuts for neat edges.
What to Serve Raspberry Cheesecake Bars With
These versatile bars pair beautifully with a variety of accompaniments:
Hot Beverages: Serve alongside freshly brewed coffee, Earl Grey tea, or hot chocolate for a cozy dessert experience.
Fresh Fruit: Complement with additional fresh berries, sliced strawberries, or a fruit salad for added freshness.
Whipped Cream: A dollop of freshly whipped cream or vanilla ice cream elevates these bars to restaurant-quality dessert status.
Wine Pairing: For adult gatherings, these bars pair wonderfully with a glass of Moscato, Riesling, or even a light Pinot Noir.
Top Tips for Perfecting Raspberry Cheesecake Bars
Use Room Temperature Ingredients
Ensure your cream cheese and eggs are at room temperature before mixing. This prevents lumps and creates a silky smooth filling. Take them out of the refrigerator 1-2 hours before baking.
Don’t Overmix the Filling
Once you add the eggs, mix just until combined. Overmixing incorporates too much air, which can cause cracks during baking.
Test for Doneness Properly
The bars are done when the center is almost set but still slightly jiggly. They’ll continue cooking from residual heat and firm up during chilling.
Create Clean Cuts
For picture-perfect bars, wipe your knife clean between each cut. Dipping the knife in warm water also helps create smooth edges.
Ingredient Substitutions
- Cream Cheese: Greek yogurt cream cheese works well for a slightly tangier flavor
- Sour Cream: Plain Greek yogurt can substitute in equal amounts
- Fresh Raspberries: Frozen raspberries work perfectly – just thaw and drain excess liquid first
- Graham Crackers: Vanilla cookies or digestive biscuits make excellent alternatives
Storing and Reheating Tips
Refrigerator Storage: Store covered raspberry cheesecake bars in the refrigerator for up to 5 days. Cover tightly with plastic wrap or store in an airtight container to prevent them from absorbing other flavors.
Freezer Storage: These bars freeze beautifully for up to 3 months. Wrap individual bars in plastic wrap, then place in a freezer-safe container. For whole pan freezing, wrap the entire pan in plastic wrap followed by aluminum foil.
Thawing Instructions: Frozen bars should be thawed in the refrigerator overnight. Never thaw at room temperature as this can cause condensation and soggy texture.
Serving Temperature: These bars taste best when served chilled directly from the refrigerator. There’s no need to reheat – the flavors are most pronounced when cold.
Make-Ahead Tips: These bars actually improve in flavor after a day in the refrigerator, making them perfect for entertaining. Prepare them up to 2 days in advance for optimal taste and texture.
Nutritional Information
| Nutrient | Per Bar (1/16 of recipe) |
|---|---|
| Calories | 245 |
| Total Fat | 15g |
| Saturated Fat | 9g |
| Cholesterol | 65mg |
| Sodium | 180mg |
| Total Carbs | 25g |
| Dietary Fiber | 2g |
| Sugars | 20g |
| Protein | 4g |
| Vitamin C | 8% DV |
Nutritional values are approximate and may vary based on specific ingredients used.
Frequently Asked Questions
Can I use frozen raspberries instead of fresh?
Absolutely! Frozen raspberries work perfectly in this recipe. Just make sure to thaw them completely and drain any excess liquid before using. The texture will be slightly softer, but the flavor remains delicious.
Why did my cheesecake bars crack?
Cracking usually occurs from overmixing the batter (which incorporates too much air) or overbaking. Make sure to mix just until ingredients are combined and remove from oven when center is still slightly jiggly.
Can I make these bars gluten-free?
Yes! Simply substitute the graham crackers with gluten-free graham crackers or crushed gluten-free vanilla cookies. Replace the all-purpose flour with gluten-free flour blend or cornstarch.
How do I know when the bars are fully set?
The bars are ready when the edges are set and lightly golden, but the center still has a slight jiggle when you gently shake the pan. They’ll continue to set as they cool and chill.
Can I double this recipe for a larger crowd?
Definitely! Double all ingredients and use a 9×13-inch pan instead. Increase baking time to 45-50 minutes, but keep an eye on the doneness indicators.
What’s the best way to cut clean bars?
Use a sharp knife dipped in warm water and wiped clean between each cut. This prevents the creamy filling from sticking to the blade and creates professional-looking edges.
Can I substitute the sour cream in the recipe?
Yes, you can use plain Greek yogurt, heavy cream, or even cream cheese for a richer flavor. Each substitution will slightly alter the texture and taste, but all work well.
How far in advance can I make these bars?
These bars are actually better when made 1-2 days ahead! The flavors meld together beautifully, and the texture becomes perfectly set. They’ll stay fresh in the refrigerator for up to 5 days.
Pro Baker Secrets for Success
Temperature Control: Use an oven thermometer to ensure accurate temperature. Even a 25-degree difference can affect the final texture of your bars.
Quality Ingredients Matter: Invest in good-quality cream cheese and real vanilla extract. These foundational ingredients significantly impact the final flavor.
The Toothpick Test: Insert a toothpick near the center – it should come out with just a few moist crumbs, not wet batter.
Prevent Cracks: Place a shallow pan of hot water on the bottom oven rack while baking. This creates steam and prevents the surface from drying out too quickly.
Flavor Variations: Try mixing in lemon zest, almond extract, or swapping raspberries for blueberries, blackberries, or strawberries for delicious variations.
These raspberry cheesecake bars prove that impressive desserts don’t have to be complicated. With simple ingredients and straightforward techniques, you can create a bakery-worthy treat that will have everyone asking for the recipe. Whether you’re entertaining guests or treating your family, these bars deliver big on flavor while keeping preparation stress-free. Happy baking!