Best Chocolate and Vanilla Marble Cake Step by Step Guide
Easy Yet Impressive! Swirling chocolate and vanilla batter creates a gorgeous pattern—no fancy skills needed. Beginner-friendly
Picture this: silky chocolate swirled with creamy vanilla in perfect harmony, creating a cake so beautiful it looks like edible art. This chocolate and vanilla marble cake combines the best of both worlds in one stunning dessert that’s surprisingly simple to make.
Here’s a fun fact – marble cake dates back to the 1850s when bakers first discovered the magic of combining light and dark batters. What makes this recipe special is its foolproof technique that guarantees gorgeous swirls every time, plus it takes just 15 minutes to prep.
Just like our popular vanilla pound cake, this marble beauty is perfect for beginners and guaranteed to impress your family and friends at any gathering.
Table of Contents
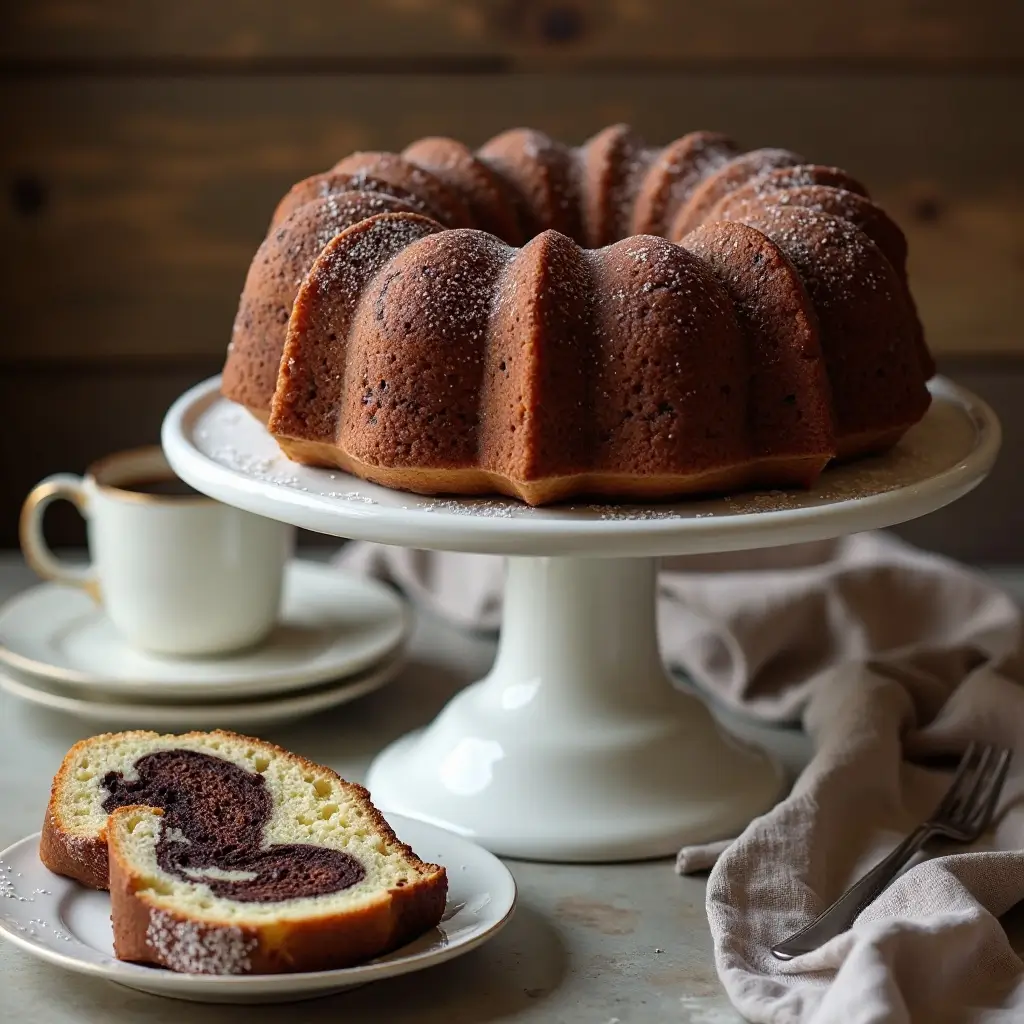
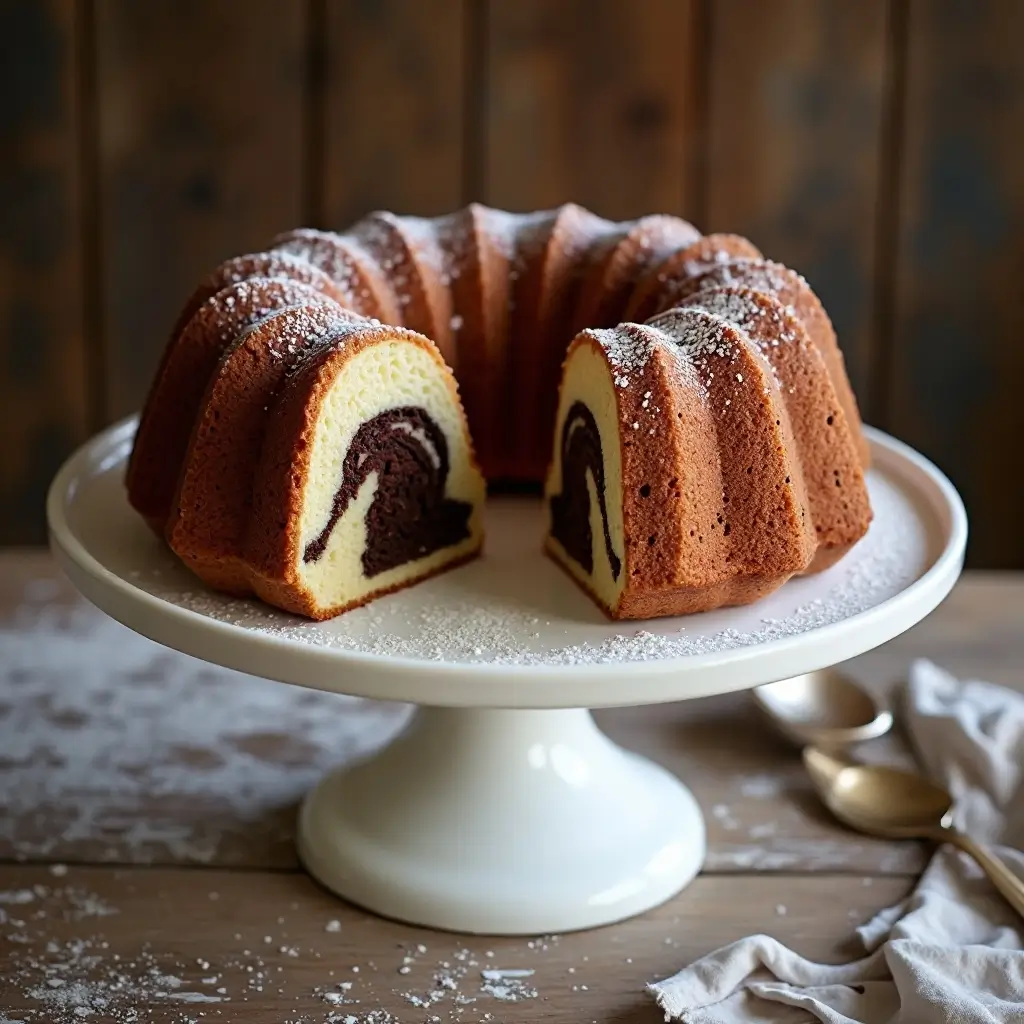
What is Chocolate and Vanilla Marble Cake?
Ever wondered why this stunning dessert got its name? One look at those gorgeous swirls and you’ll understand – it literally looks like polished marble stone! The beautiful contrast between rich chocolate and creamy vanilla creates patterns that would make Michelangelo jealous.
Legend has it that Victorian bakers called it “marble cake” because guests would gasp at its beauty before taking their first bite. As they say, “the way to a man’s heart is through his stomach,” and this cake definitely takes the scenic route! Ready to create your own edible masterpiece?
Why You’ll Love This Chocolate and Vanilla Marble Cake:
The Perfect Flavor Balance
This marble cake delivers the ultimate taste experience with rich, fudgy chocolate ribbons dancing through moist vanilla cake. Each bite offers a delightful surprise as your taste buds encounter different flavor combinations. The contrast creates a complex yet comforting dessert that satisfies both chocolate lovers and vanilla enthusiasts.
Budget-Friendly Home Baking
Making this gorgeous cake at home costs a fraction of what you’d pay at a bakery. You probably already have most ingredients in your pantry – flour, sugar, eggs, and butter. Compare this to spending $25-40 on a similar cake from a specialty bakery, and you’ll see why homemade is the way to go.
Impressive Presentation, Simple Technique
The stunning marble effect looks incredibly sophisticated but requires no special skills or equipment. Unlike our intricate rainbow layer cake, this beauty comes together with basic mixing and a simple swirling technique. Your guests will think you’re a professional baker, but you’ll know the delicious secret of how easy it really was.
Ready to surprise everyone with your baking prowess? Let’s dive into this foolproof recipe!
How to Make Chocolate and Vanilla Marble Cake:
Quick Overview
This marble cake is your ticket to bakery-quality results with minimal effort. The secret lies in creating two perfectly balanced batters – one vanilla, one chocolate – then swirling them together for that signature marbled look.
Prep Time: 15 minutes
Bake Time: 45-50 minutes
Total Time: 1 hour 5 minutes
Serves: 12 slices
The cake features a tender, moist crumb with beautiful contrast between rich chocolate and sweet vanilla. What makes this recipe special is the foolproof swirling technique that creates professional-looking results every time.
Key Ingredients for Chocolate and Vanilla Marble Cake:
For the Base Batter:
- 2¾ cups all-purpose flour
- 1 tablespoon baking powder
- ½ teaspoon salt
- 1 cup unsalted butter, softened
- 1¾ cups granulated sugar
- 4 large eggs, room temperature
- 2 teaspoons vanilla extract
- 1¼ cups whole milk, room temperature
For the Chocolate Batter:
- ⅓ cup unsweetened cocoa powder
- ¼ cup hot water
- 2 tablespoons melted butter
For the Pan:
- Butter for greasing
- 2 tablespoons flour for dusting
Step-by-Step Instructions:
Prepare Your Pan and Oven
Preheat oven to 350°F (175°C). Generously butter a 12-cup bundt pan, making sure to get into all the grooves. Dust with flour, tapping out excess. This step is crucial for easy removal.
Make the Cocoa Mixture
In a small bowl, whisk together cocoa powder and hot water until smooth. Stir in melted butter until well combined. Set aside to cool slightly.
Create the Base Batter
In a medium bowl, whisk together flour, baking powder, and salt. In a large bowl, cream softened butter and sugar with an electric mixer for 3-4 minutes until light and fluffy.
Add Eggs and Vanilla
Beat in eggs one at a time, mixing well after each addition. Add vanilla extract and mix until combined.
Combine Wet and Dry Ingredients
Alternate adding the flour mixture and milk to the butter mixture, beginning and ending with flour. Mix just until combined – don’t overmix.
Divide and Flavor the Batter
Transfer 2 cups of batter to a separate bowl. Stir the cooled cocoa mixture into this portion until evenly combined.
Create the Marble Effect
Dollop alternating spoonfuls of vanilla and chocolate batter into the prepared pan. Use a knife to gently swirl through the batter, creating a marbled pattern. Don’t overmix – you want distinct swirls.
Bake to Perfection
Bake for 45-50 minutes, or until a toothpick inserted in center comes out with just a few moist crumbs. Cool in pan for 15 minutes before inverting onto a wire rack.
What to Serve Chocolate and Vanilla Marble Cake With:
This versatile cake pairs beautifully with numerous accompaniments:
Beverages: Fresh coffee, cold milk, hot chocolate, or Earl Grey tea complement the cake’s flavors perfectly.
Toppings: Dust with powdered sugar, drizzle with chocolate ganache, or serve with vanilla ice cream for extra indulgence.
Sides: Fresh berries add a bright, tart contrast, while whipped cream provides a light, airy complement to the rich cake.
Top Tips for Perfecting Chocolate and Vanilla Marble Cake:
Room Temperature Ingredients Matter
Ensure eggs, milk, and butter are at room temperature for optimal mixing. Cold ingredients can cause the batter to curdle or mix unevenly.
Don’t Overmix the Swirl
When creating the marble effect, use gentle motions with your knife. Over-swirling will muddy the colors instead of creating distinct patterns.
Test for Doneness Carefully
Insert a toothpick in several spots since the chocolate portions may look underdone even when properly baked. Look for moist crumbs, not wet batter.
Proper Pan Preparation is Key
Use butter and flour (not cooking spray) for bundt pans. The flour helps create a barrier that ensures clean release.
Storing and Reheating Tips:
Room Temperature Storage: Cover tightly and store for up to 3 days at room temperature.
Refrigerator Storage: Wrap well and refrigerate for up to 1 week. The cake actually becomes more moist after a day or two.
Freezing Instructions: Wrap individual slices or the whole cake in plastic wrap, then aluminum foil. Freeze for up to 3 months.
Reheating: Bring refrigerated cake to room temperature before serving, or warm individual slices in the microwave for 10-15 seconds.
Frequently Asked Questions
Can I make this cake without a bundt pan?
Yes! Use two 9-inch round pans and reduce baking time to 25-30 minutes. You can also use a 9×13 inch rectangular pan.
Why did my marble pattern disappear?
Over-mixing is usually the culprit. Swirl gently with just a few strokes to maintain distinct color patterns.
Can I substitute the cocoa powder?
Absolutely! You can use melted chocolate instead. Use 2 ounces of melted dark chocolate and reduce the hot water to 2 tablespoons.
How do I know when it’s done baking?
The cake should spring back when lightly touched, and a toothpick should come out with just a few moist crumbs attached.
Can I make this cake ahead of time?
Yes! This cake actually improves in flavor after a day. Make it up to 2 days ahead and store covered at room temperature.
What if I don’t have buttermilk?
Regular whole milk works perfectly in this recipe. For extra tang, you can substitute up to half the milk with buttermilk.
Nutrition Information
| Nutrient | Per Slice |
|---|---|
| Calories | 385 |
| Total Fat | 12g |
| Saturated Fat | 7g |
| Cholesterol | 85mg |
| Sodium | 245mg |
| Total Carbs | 65g |
| Dietary Fiber | 2g |
| Sugars | 42g |
| Protein | 6g |
Nutrition values are approximate and based on 12 servings
Pro Baker Secrets
Want to take your marble cake to the next level? Here are some insider tips:
The Temperature Test: Your butter should be soft enough to leave a fingerprint but not melty. This ensures proper creaming.
The Ribbon Test: When beating butter and sugar, the mixture should fall in ribbons when lifted with the beater. This creates the perfect light texture.
The Gentle Fold: When adding flour, use a large spoon to fold rather than the electric mixer. This prevents tough, dense cake.
The Perfect Swirl: Drop spoonfuls of batter in alternating colors around the pan, then use a knife to make figure-8 motions through the layers.
This chocolate and vanilla marble cake proves that sometimes the most beautiful things in life are also the simplest to create. With its stunning appearance and incredible flavor, it’s destined to become your go-to recipe for special occasions and everyday celebrations alike!