Easy Chocolate Cake Pops Recipe
Indulgent, bite-sized, and irresistibly chocolatey – chocolate cake pops are the perfect treat that combines the rich flavors of moist chocolate cake with a smooth candy coating. These adorable little spheres on sticks have become a party favorite and gift-giving sensation for good reason! Fun fact: cake pops were popularized by baker Starbucks Bakerella in…
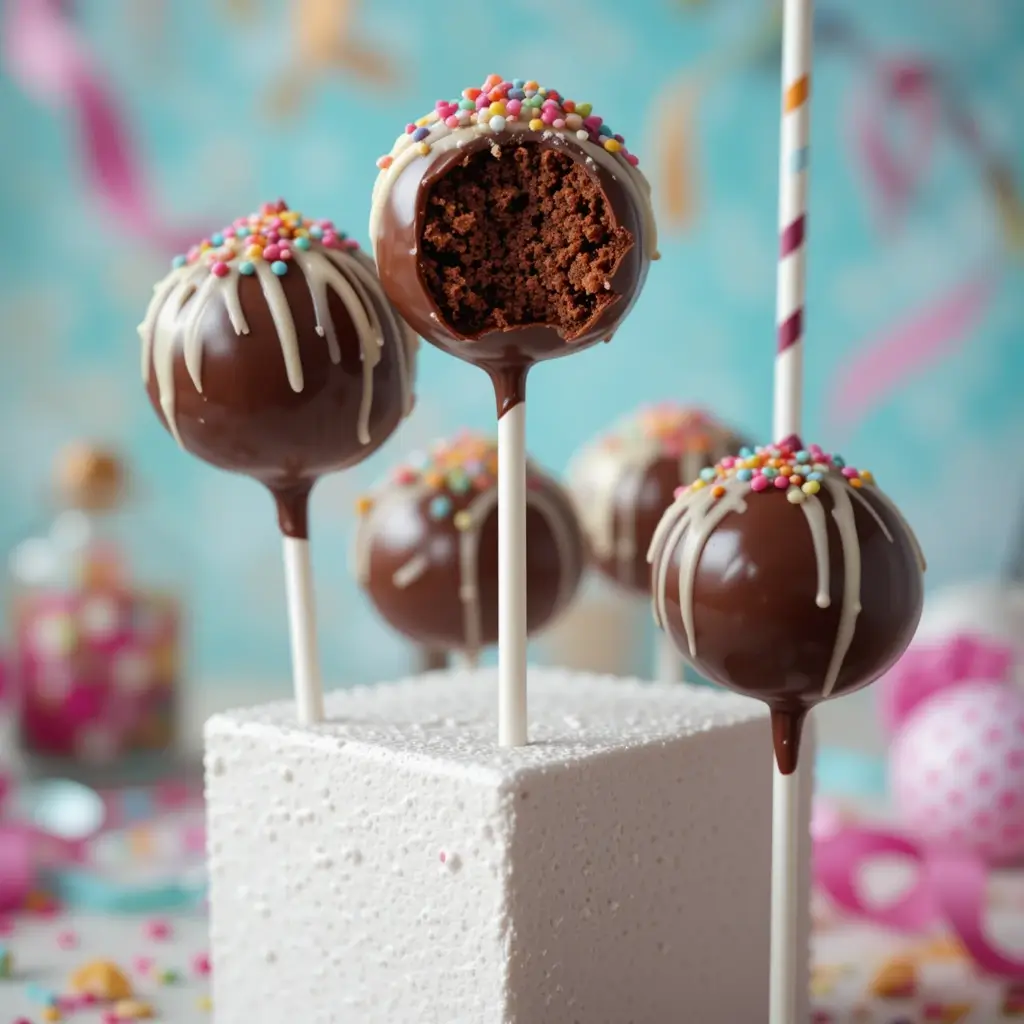
Indulgent, bite-sized, and irresistibly chocolatey – chocolate cake pops are the perfect treat that combines the rich flavors of moist chocolate cake with a smooth candy coating. These adorable little spheres on sticks have become a party favorite and gift-giving sensation for good reason!
Fun fact: cake pops were popularized by baker Starbucks Bakerella in the early 2000s, transforming leftover cake into Instagram-worthy treats. What makes chocolate cake pops special is their incredible versatility and foolproof nature – they’re surprisingly simple to make, require no special baking skills, and can be customized with endless decorating possibilities.
Unlike our popular chocolate chip cookies that require precise timing, cake pops are forgiving and perfect for beginners. Get ready to impress your family and friends with these delightful chocolate cake pops!
Table of Contents
What are Chocolate Cake Pops?
Ever wondered why these little treats on sticks have taken the dessert world by storm? Chocolate cake pops are essentially cake truffles disguised as lollipops – genius, right? They’re made by combining crumbled chocolate cake with frosting, rolling the mixture into balls, and dipping them in melted chocolate or candy coating.
The name “cake pop” is pretty self-explanatory, but the magic lies in their transformation from humble cake scraps to elegant party treats. As they say, “the way to a man’s heart is through his stomach,” and these pops definitely pave that path with chocolate! Ready to create some edible art in your kitchen?
Why You’ll Love This Chocolate Cake Pops Recipe
Rich, Decadent Chocolate Flavor
These chocolate cake pops deliver an intense chocolate experience in every bite. The combination of moist chocolate cake mixed with chocolate frosting creates a fudgy, truffle-like center that melts in your mouth. The outer candy coating adds a satisfying crunch that gives way to the creamy interior, creating a perfect textural contrast.
Budget-Friendly Homemade Treats
Making chocolate cake pops at home costs a fraction of what you’d pay at bakeries or coffee shops. A single batch yields 24-30 cake pops for under $10, compared to $2-4 per pop at retail stores. Plus, you can use leftover cake or even boxed cake mix to make them even more economical.
Endless Customization Options
The beauty of chocolate cake pops lies in their decorating potential. From colorful sprinkles and drizzled chocolate to themed decorations for holidays and special occasions, these treats become edible canvases. Unlike our elaborate chocolate layer cake that requires advanced skills, cake pops allow creativity without complexity. Try making them today and discover your new favorite dessert project!
How to Make Chocolate Cake Pops
Quick Overview
These chocolate cake pops are surprisingly easy to make and incredibly satisfying to create. The process involves just four main steps: bake, crumble, shape, and dip. What makes them foolproof is their forgiving nature – even if your coating isn’t perfect, they’ll still taste amazing!
Key features:
- Rich, fudgy chocolate flavor
- Smooth candy shell exterior
- Moist, cake-like interior
- Perfect for gifts and parties
Timing:
- Prep Time: 2 hours (including chilling)
- Cook Time: 30 minutes
- Total Time: 2 hours 30 minutes
- Yield: 24-30 cake pops
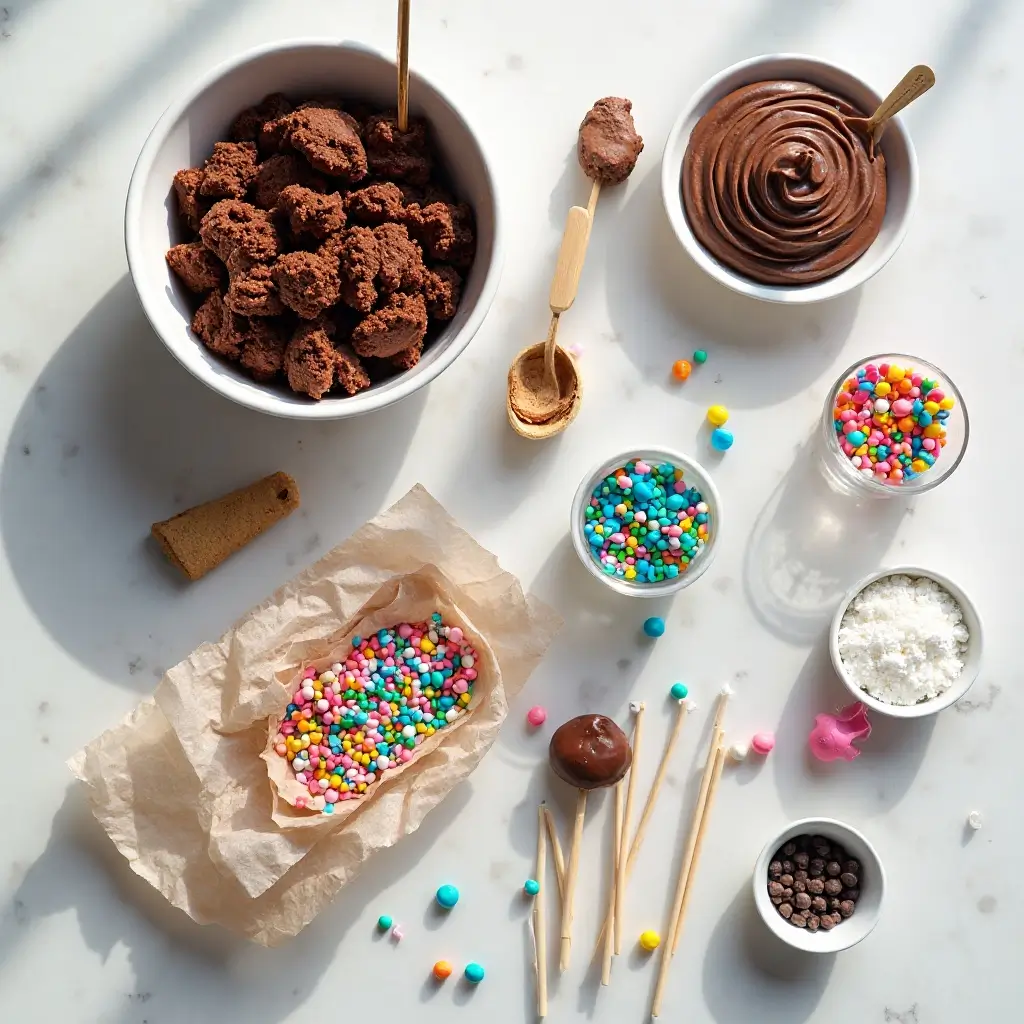
Key Ingredients for Chocolate Cake Pops
For the Cake:
- 1 box chocolate cake mix (or homemade chocolate cake)
- 3 large eggs
- 1/2 cup vegetable oil
- 1 cup water
For Assembly:
- 1/2 cup chocolate frosting (store-bought or homemade)
- 2 lbs white chocolate candy coating or chocolate chips
- 24-30 cake pop sticks
- 2 tablespoons coconut oil (for thinning coating)
For Decoration:
- Colorful sprinkles
- Chopped nuts
- Mini chocolate chips
- Colored candy melts (optional)
Pro tip: Use room temperature ingredients for the smoothest mixing and best texture.
Step-by-Step Instructions
Step 1: Bake the Chocolate Cake Preheat your oven to 350°F (175°C). Prepare the chocolate cake according to package directions using eggs, oil, and water. Pour batter into a greased 9×13 inch pan. Bake for 28-32 minutes until a toothpick inserted in center comes out clean. Cool completely in the pan for at least 1 hour.
Step 2: Crumble and Mix Once cooled, crumble the entire cake into fine crumbs using your hands or a food processor. Place crumbs in a large bowl. Add 1/2 cup chocolate frosting and mix thoroughly until the mixture holds together when squeezed. The consistency should be like cookie dough – not too wet or too dry.
Step 3: Shape the Cake Balls Using a small cookie scoop or your hands, portion the mixture into 1.5-inch balls (about 2 tablespoons each). Roll each portion between your palms to create smooth, round balls. Place on a parchment-lined baking sheet. Refrigerate for 2 hours or freeze for 30 minutes until firm.
Step 4: Prepare the Coating Melt the white chocolate coating in a microwave-safe bowl in 30-second intervals, stirring between each interval until smooth. If the coating is too thick, add coconut oil one teaspoon at a time until it reaches a dippable consistency.
Step 5: Dip the Cake Pops Remove a few cake balls from refrigerator at a time. Dip one end of a cake pop stick 1/2 inch into melted chocolate, then insert it into a cake ball (push in about halfway). Dip the entire cake pop into the melted chocolate, allowing excess to drip off. Gently tap the stick against the bowl’s edge to remove excess coating.
Step 6: Decorate and Set Immediately add sprinkles or decorations while the coating is wet. Insert the cake pop stick into a styrofoam block or cake pop stand to dry. Refrigerate for 15 minutes to set the coating completely.
What to Serve Chocolate Cake Pops With
Chocolate cake pops are perfect standalone treats, but they pair beautifully with various beverages and desserts:
Hot Beverages: Serve alongside coffee, hot chocolate, or chai tea for a cozy dessert experience.
Cold Drinks: Pair with cold milk, iced coffee, or even champagne for celebrations.
Dessert Platters: Include on dessert tables with chocolate chip cookies, brownies, and fresh berries.
Ice Cream: Crumble cake pops over vanilla ice cream for an indulgent sundae topping.
Top Tips for Perfecting Chocolate Cake Pops
Use the Right Cake-to-Frosting Ratio
Start with less frosting than you think you need. You can always add more, but too much frosting makes the mixture too soft to hold its shape. The mixture should hold together when squeezed but not be sticky or wet.
Chill Between Steps
Cold cake balls are essential for successful dipping. Warm cake balls will fall off the stick or create cracks in the coating. Always chill for at least 2 hours before dipping.
Perfect Your Dipping Technique
Dip the stick in chocolate before inserting into the cake ball – this acts as “glue.” When coating, use smooth up-and-down motions rather than swirling, which can create air bubbles.
Avoid Common Coating Mistakes
Don’t overheat the chocolate coating, as it can become thick and difficult to work with. If it seizes, add a small amount of coconut oil to restore smoothness. Work with small batches to prevent the coating from cooling and thickening.

Storing and Reheating Tips
Storage: Store finished chocolate cake pops in an airtight container in the refrigerator for up to one week. Layer them between parchment paper to prevent sticking. For longer storage, wrap individually in plastic wrap.
Freezing: Cake pops freeze beautifully for up to 3 months. Wrap each pop individually in plastic wrap, then place in a freezer bag. Thaw in the refrigerator for 2-3 hours before serving.
Room Temperature: Cake pops can sit at room temperature for up to 2 days in cool, dry conditions. Avoid warm or humid environments that can cause the coating to sweat or crack.
Gift Giving: For gifting, place cake pops in individual cellophane bags tied with ribbons, or arrange in a decorative box with tissue paper.
Nutrition Information
| Nutrient | Per Cake Pop |
|---|---|
| Calories | 185 |
| Total Fat | 8g |
| Saturated Fat | 5g |
| Cholesterol | 15mg |
| Sodium | 125mg |
| Total Carbs | 28g |
| Dietary Fiber | 1g |
| Sugars | 24g |
| Protein | 2g |
Nutritional values are approximate and may vary based on specific ingredients used.
Frequently Asked Questions
Why do my cake pops fall off the stick?
This usually happens when the cake balls aren’t cold enough or you didn’t dip the stick in chocolate before inserting. Always chill cake balls for at least 2 hours and use the chocolate “glue” method.
Can I use a different type of cake?
Absolutely! Vanilla, red velvet, or funfetti cake work wonderfully. Just match the frosting flavor to complement your cake choice.
How do I prevent cracks in the coating?
Cracks typically occur from temperature shock. Ensure cake balls are cold but not frozen solid, and don’t dip them in overly hot coating. Let frozen cake balls sit for 5 minutes before dipping.
Can I make cake pops without sticks?
Yes! You can make cake truffles instead by simply rolling the mixture into balls and dipping without sticks. They’re equally delicious and easier to store.
What’s the best coating to use?
Candy coating (also called almond bark) works best because it sets hard and has a smooth finish. You can also use chocolate chips with a little coconut oil, but the finish won’t be as smooth.
How far in advance can I make cake pops?
You can make cake pops up to one week in advance. Store them in the refrigerator in an airtight container. They actually taste better after a day as the flavors meld together.
Creative Variations and Additional Tips
Flavor Variations:
- Cookies & Cream: Use chocolate cake with vanilla frosting and crushed Oreos
- Peanut Butter: Add 2 tablespoons peanut butter to the cake mixture
- Mint Chocolate: Add peppermint extract and green food coloring
- Orange Chocolate: Add orange zest and orange extract
Decorating Ideas:
- Roll in chopped nuts before coating sets
- Drizzle with contrasting chocolate
- Create two-tone effects with different colored coatings
- Add edible glitter for special occasions
Troubleshooting Tips:
- If coating is too thick, thin with coconut oil or shortening
- For clean coating lines, tap the stick gently against the bowl
- Work in small batches to maintain optimal coating temperature
- Use a thermometer to keep coating between 90-95°F
Advanced Techniques:
- Create marbled effects by swirling different colored coatings
- Make themed cake pops for holidays using seasonal decorations
- Experiment with different cake pop shapes using molds
- Try dipping in tempered chocolate for a professional finish
Remember, the key to perfect chocolate cake pops is patience and practice. Don’t worry if your first batch isn’t Instagram-perfect – they’ll still taste incredible! Each batch will get better as you refine your technique.
These chocolate cake pops make wonderful gifts, party treats, or just a special dessert for your family. The combination of rich chocolate cake, creamy frosting, and smooth coating creates an irresistible treat that’s sure to become a household favorite. Happy baking!