No Bake Halloween Cakesicles Recipe
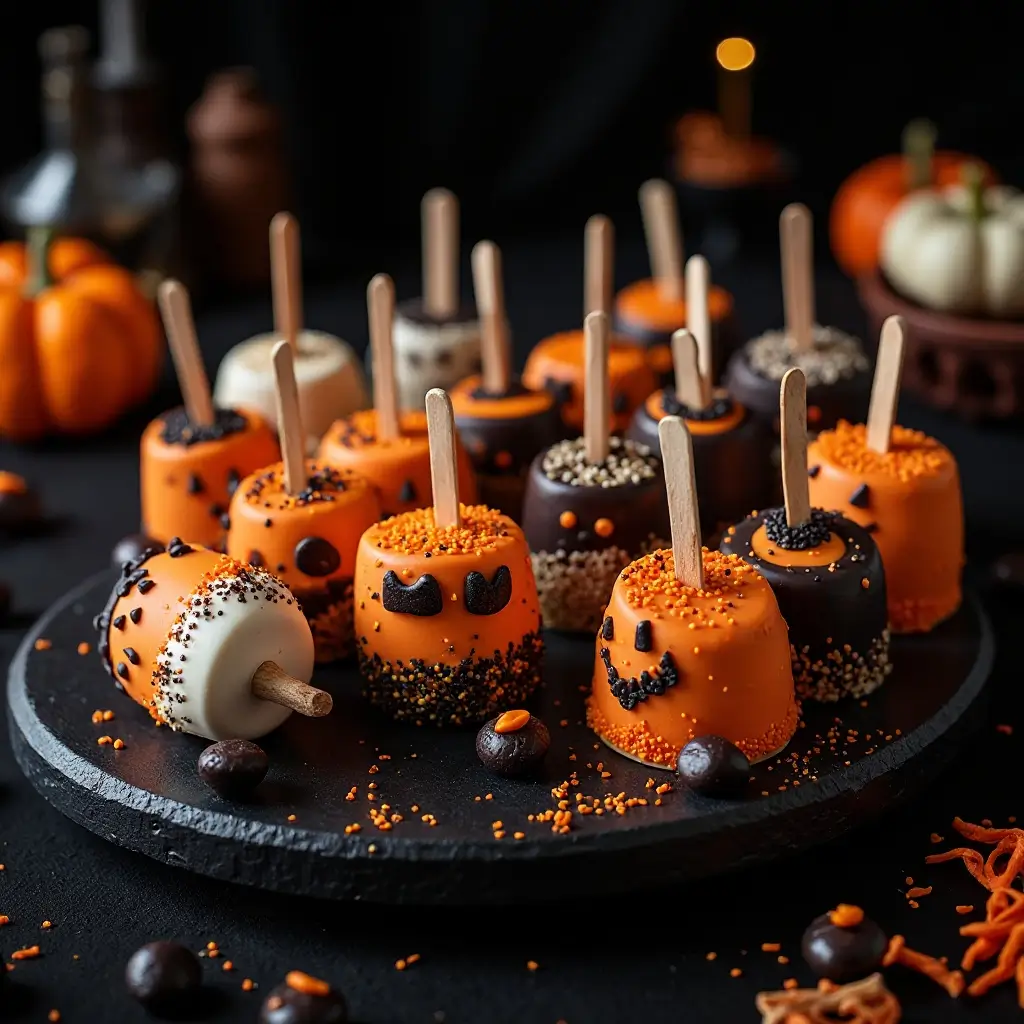
Spooky Treats! These Halloween Cakesicles combine moist cake & creamy frosting, dipped in colorful chocolate and decorated with creepy designs.
Get ready to enchant your taste buds with these absolutely magical Halloween Cakesicles! These bite-sized treats combine the rich, moist texture of cake with a glossy chocolate coating, all perfectly balanced on a stick for easy enjoyment.
Just like our popular Birthday Cake Pops, these festive delights are surprisingly simple to make and require no baking skills whatsoever. Perfect for Halloween parties, trick-or-treat gatherings, or simply satisfying your sweet tooth with something delightfully spooky.
Table of Contents
What are Halloween Cakesicles?
Ever wondered why we call them “cakesicles”? It’s simple – they’re cake meets popsicle in the most delicious way possible! These aren’t your ordinary frozen treats, but rather decadent cake bites dipped in chocolate and served on sticks.
Think of them as the sophisticated cousin of cake pops, but with a fun twist that makes them look like colorful popsicles. As they say, the way to a man’s heart is through his stomach, and these treats definitely pave that path with style! Ready to create some Halloween magic in your kitchen?
Why You’ll Love This Halloween Cakesicles Recipe:
Irresistibly Fun and Festive
These Halloween Cakesicles are the perfect blend of creativity and taste. The smooth, creamy chocolate coating gives way to moist, flavorful cake that melts in your mouth. Each bite delivers a satisfying sweetness that’s not overpowering, making them ideal for both kids and adults.
Budget-Friendly Homemade Treats
Making these at home costs a fraction of what you’d pay at specialty bakeries. With basic ingredients you likely already have in your pantry, you can create dozens of these impressive treats. Compare that to spending $3-4 per cakesicle at gourmet shops!
Endless Customization Options
The beauty lies in the decorating possibilities. From orange and black drizzles to spooky sprinkles and edible glitter, you can customize each cakesicle to match your Halloween theme. Much like our popular Chocolate Dipped Strawberries recipe, the decorating process is half the fun. Why not gather the family and make it a fun Halloween activity?
How to Make Halloween Cakesicles:
Quick Overview
These Halloween Cakesicles are surprisingly easy to make and incredibly satisfying to eat. The process involves creating cake crumbs, mixing them with frosting, shaping them into popsicle molds, and coating them with chocolate.
Total Time: 3 hours (including chilling time) Prep Time: 45 minutes Chill Time: 2 hours 15 minutes Difficulty: Easy Servings: Makes 12-15 cakesicles
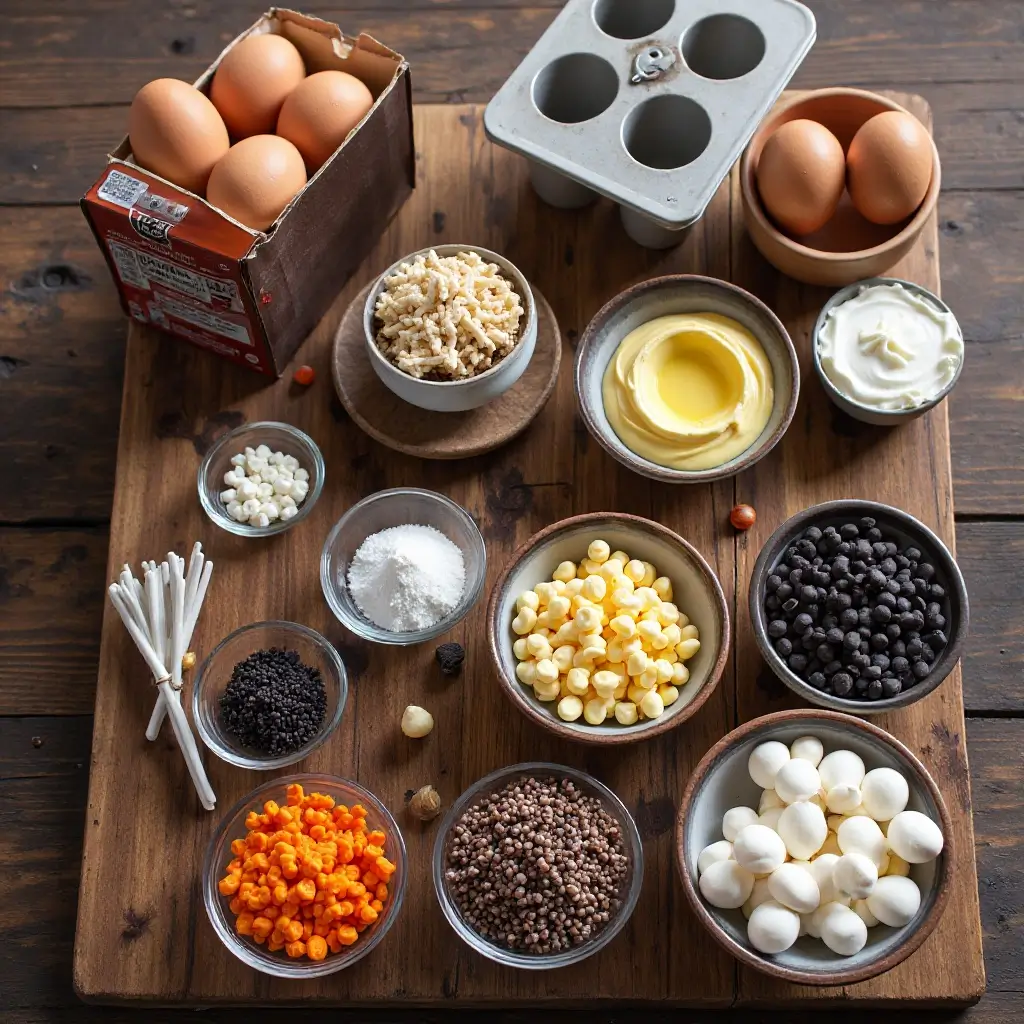
Key Ingredients for Halloween Cakesicles:
For the Cake Base:
- 1 box chocolate cake mix (15.25 oz)
- 3 large eggs
- 1/3 cup vegetable oil
- 1 cup water
- 1/2 cup vanilla frosting
For the Coating:
- 2 cups orange candy melts
- 1 cup black candy melts
- 1/2 cup white candy melts
- 2 tablespoons coconut oil (for smooth consistency)
For Decoration:
- Halloween sprinkles
- Edible glitter
- Mini chocolate chips
- Orange and black food coloring
- Popsicle sticks
Step-by-Step Instructions:
Prepare the Cake Base
Bake the chocolate cake according to package directions in a 9×13 inch pan. Allow it to cool completely, about 1 hour. Once cooled, crumble the entire cake into fine crumbs using your hands or a food processor. The finer the crumbs, the smoother your cakesicles will be.
Create the Cake Mixture
In a large bowl, combine the cake crumbs with vanilla frosting. Mix thoroughly until the mixture holds together when squeezed but isn’t overly wet. The consistency should be similar to wet sand that clumps together easily.
Shape the Cakesicles
Press the cake mixture firmly into popsicle molds, leaving about 1/4 inch from the top. Insert popsicle sticks about halfway into each mold. Place in the refrigerator for at least 2 hours or until completely firm.
Prepare the Coating
Melt the candy melts separately in microwave-safe bowls, heating in 30-second intervals and stirring between each interval. Add 1 teaspoon of coconut oil to each color for a smoother consistency. Allow to cool slightly before dipping.
Dip and Decorate
Remove cakesicles from molds carefully. Dip each one into your chosen colored coating, allowing excess to drip off. Place on parchment paper and immediately add sprinkles or decorations before the coating sets. Refrigerate for 15 minutes to set completely.
Final Touches
Use melted candy melts in squeeze bottles to create spooky designs, drizzles, or write Halloween messages. Allow each layer to set before adding the next decoration.
What to Serve Halloween Cakesicles With:
These delightful treats pair wonderfully with warm beverages like hot chocolate, spiced apple cider, or pumpkin spice lattes. For a complete Halloween spread, serve alongside caramel apples, pumpkin cookies, and candy corn. They also make excellent additions to Halloween party dessert tables, complementing other finger foods like mini cupcakes and chocolate-covered pretzels.
Consider serving them as the grand finale to a Halloween dinner, or pack them in treat bags for trick-or-treaters who visit your home.
Top Tips for Perfecting Halloween Cakesicles:
Temperature Control is Key
Always ensure your cake mixture is properly chilled before dipping. If it’s too warm, the coating won’t adhere properly and may crack. Conversely, if your melted chocolate is too hot, it will melt the cake underneath.
Achieve Smooth Coatings
Add a small amount of coconut oil or shortening to your melted candy melts for an ultra-smooth finish. This prevents the coating from being too thick and creates that professional bakery look.
Prevent Cracking
Tap the stick gently after dipping to remove air bubbles and excess coating. This prevents cracks from forming as the chocolate sets.
Make-Ahead Tips
You can prepare the cake mixture up to 2 days in advance and store it covered in the refrigerator. The finished cakesicles can be made up to a week ahead and stored properly.
Flavor Variations
Experiment with different cake flavors like vanilla, strawberry, or red velvet. You can also add extracts like almond, peppermint, or orange to the cake mixture for unique flavor profiles.
Storing and Reheating Tips:
Refrigerator Storage: Store finished Halloween Cakesicles in an airtight container in the refrigerator for up to 1 week. Place parchment paper between layers to prevent sticking.
Freezer Storage: These treats freeze beautifully for up to 3 months. Wrap individually in plastic wrap, then place in freezer bags. Thaw in the refrigerator for 2-3 hours before serving.
Room Temperature: If serving at a party, cakesicles can sit at room temperature for up to 4 hours without compromising quality. However, avoid leaving them in direct sunlight or warm areas.
No Reheating Needed: These treats are best enjoyed at room temperature or slightly chilled. No reheating is necessary or recommended.
Nutritional Information
| Nutrient | Per Cakesicle |
|---|---|
| Calories | 285 |
| Total Fat | 12g |
| Saturated Fat | 8g |
| Cholesterol | 25mg |
| Sodium | 180mg |
| Total Carbs | 45g |
| Sugars | 38g |
| Protein | 3g |
| Fiber | 2g |
Nutritional values are approximate and may vary based on specific ingredients used.
Frequently Asked Questions
Can I use homemade cake instead of box mix?
Absolutely! Any homemade cake recipe works perfectly. Just ensure it’s completely cooled before crumbling. Homemade cakes often create even more flavorful cakesicles.
What if I don’t have popsicle molds?
You can shape the mixture by hand into oval or round shapes, then insert sticks. Alternatively, use ice cube trays or small silicone molds for different shapes.
How do I prevent the coating from being too thick?
Thin your melted candy melts with a small amount of coconut oil or vegetable shortening. The coating should flow smoothly off a spoon when ready.
Can I make these dairy-free?
Yes! Use dairy-free cake mix, dairy-free frosting, and ensure your candy melts are dairy-free. Many brands offer dairy-free options that work just as well.
Why did my cakesicles fall off the sticks?
This usually happens when the cake mixture is too wet or the coating is too heavy. Ensure your mixture is the right consistency and allow proper chilling time.
How far in advance can I make these?
You can make them up to a week ahead and store them in the refrigerator, or up to 3 months in the freezer. They’re actually easier to work with after chilling overnight.
What’s the best way to transport these treats?
Use a styrofoam block or floral foam to hold the sticks upright during transport. Cover with plastic wrap to protect from air and moisture.
Creative Variations to Try
Spooky Faces: Use mini chocolate chips for eyes and orange candy melts to create jack-o’-lantern faces.
Ombre Effect: Dip halfway in orange, then partially in black for a stunning gradient effect.
Glittery Glamour: Roll in edible glitter immediately after coating for sparkly, magical treats.
Flavor Combinations: Try orange cake with chocolate coating, or vanilla cake with orange coating for different taste experiences.
These Halloween Cakesicles are guaranteed to be the hit of any Halloween gathering. They combine the nostalgic joy of cake pops with the fun presentation of popsicles, creating a treat that’s both familiar and exciting. Whether you’re making them for a party, as gifts, or just for family fun, these delightful treats will cast a delicious spell on everyone who tries them!