Perfect Lemon Cake Pops Recipe
Make delicious lemon cake pops! Get our easy recipe for bright, bite-sized treats perfect for parties or a sweet citrus craving.
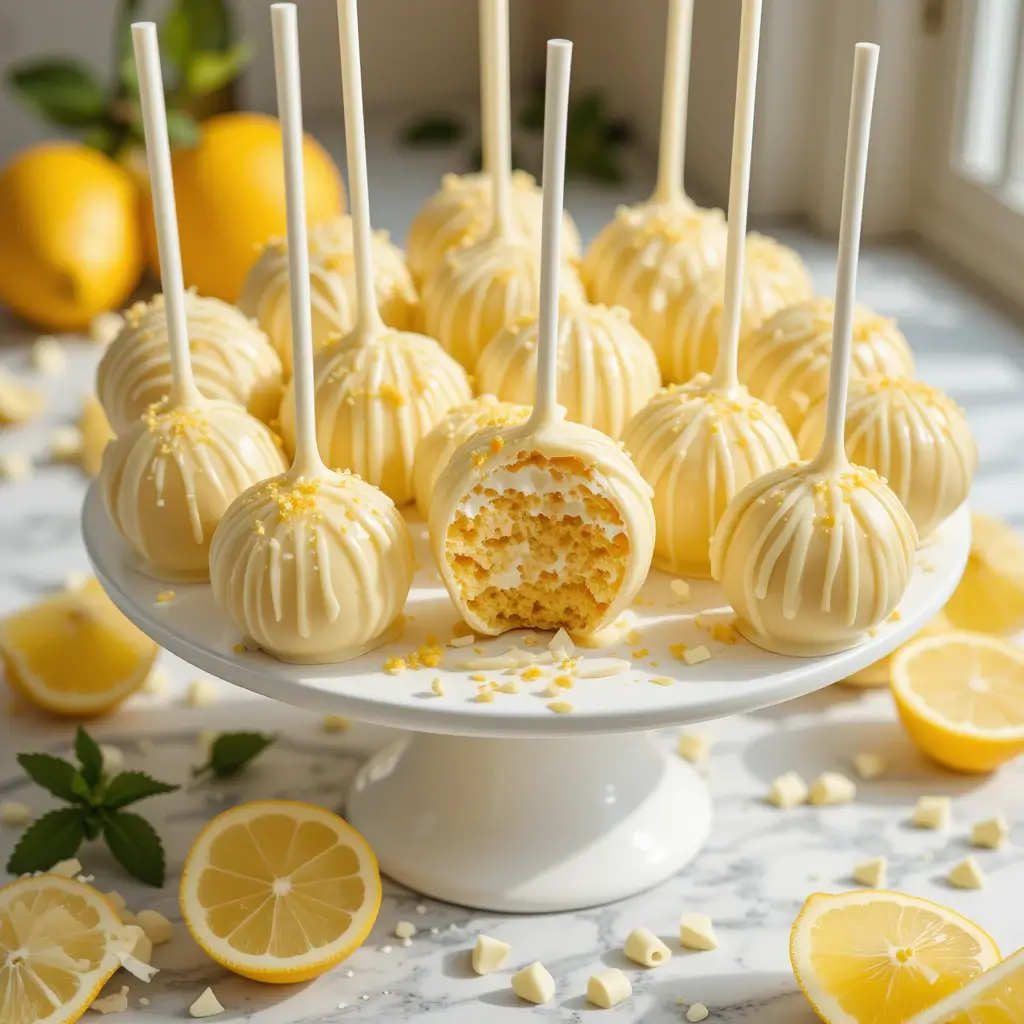
These delightfully zesty lemon cake pops burst with sunshine flavor in every bite! Did you know that cake pops were invented by accident when a baker’s cake crumbled? Now they’re party favorites worldwide! These bite-sized treats combine moist lemon cake with creamy frosting, all coated in smooth white chocolate.
They’re surprisingly simple to make and require no special baking skills. Perfect for birthdays, baby showers, or weekend treats with the family. Unlike our popular chocolate truffles, these cake pops offer a refreshing citrus twist that’s impossible to resist. Get ready to create magic in your kitchen!
Table of Contents
What Are Lemon Cake Pops?
Ever wondered why these little treats on sticks captured everyone’s hearts? Lemon cake pops are essentially deconstructed cake reimagined into perfect bite-sized spheres! Think of them as cake’s fun younger sibling who decided to get dressed up for a party.
The name says it all – cake that literally “pops” with flavor and pops right into your mouth. As they say, the way to a man’s heart is through his stomach, and these sunshine-bright treats definitely prove that point! Ready to make some edible sunshine?
Why You’ll Love This Lemon Cake Pops Recipe
Burst of Sunshine Flavor These lemon cake pops deliver an incredible citrus punch that awakens your taste buds. The combination of fresh lemon zest, tangy lemon juice, and sweet vanilla creates a perfect balance. Each bite offers that perfect “pop” of brightness that makes you smile instantly.
Budget-Friendly Homemade Delight Making cake pops at home costs a fraction of bakery prices. You’ll spend around $8-10 to make 24 cake pops versus $2-3 each at specialty shops. Plus, you control every ingredient, ensuring quality and freshness. No artificial preservatives or mystery ingredients here!
Customizable Coating Paradise The white chocolate coating serves as your creative canvas. Add food coloring, sprinkles, crushed cookies, or coconut flakes. Unlike our classic vanilla cake balls, these lemon versions pair beautifully with yellow and white decorations. The possibilities are endless for personalizing your treats.
Ready to transform simple ingredients into Instagram-worthy treats? Let’s dive into this foolproof recipe that’ll have everyone asking for your secret!
How to Make Lemon Cake Pops
Quick Overview
This recipe creates perfectly moist, tangy lemon cake pops that are surprisingly easy to master. The secret lies in achieving the right cake-to-frosting ratio for smooth rolling and dipping. Each pop delivers intense lemon flavor balanced with creamy sweetness.
Prep Time: 45 minutes
Chill Time: 2 hours
Dipping Time: 30 minutes
Total Time: 3 hours 15 minutes
Yield: 24 cake pops
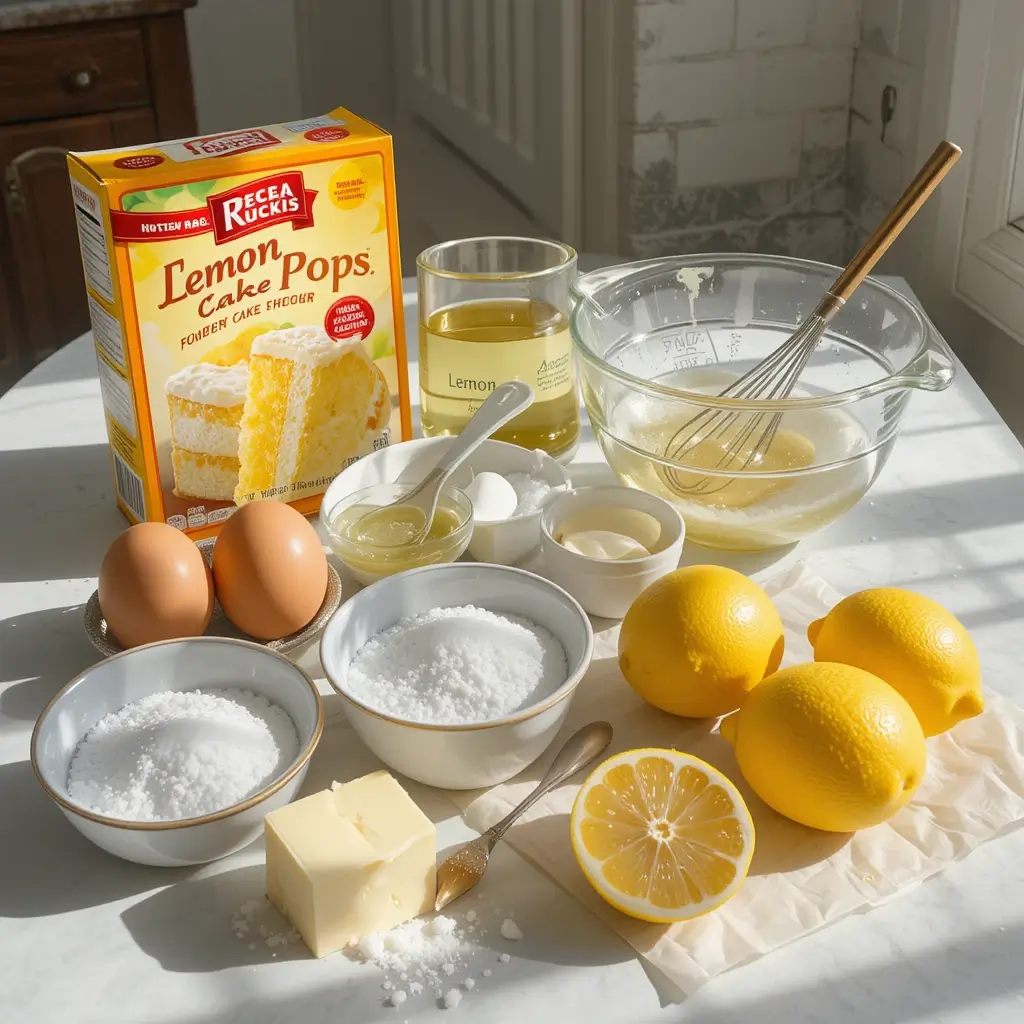
Key Ingredients for Lemon Cake Pops
For the Cake:
- 1 box (15.25 oz) lemon cake mix
- 3 large eggs
- 1/3 cup vegetable oil
- 1 cup water
- Zest of 2 fresh lemons
- 2 tablespoons fresh lemon juice
For the Frosting:
- 8 oz cream cheese, softened
- 1/4 cup butter, softened
- 2 cups powdered sugar
- 1 teaspoon vanilla extract
- 1 tablespoon fresh lemon juice
For the Coating:
- 2 lbs white melting chocolate or candy coating
- 24 cake pop sticks
- Yellow food coloring (optional)
- Sprinkles or decorations (optional)
Step-by-Step Instructions
Making the Cake Base
Preheat your oven to 350°F (175°C) and grease a 9×13 inch baking pan. In a large mixing bowl, combine the cake mix, eggs, oil, and water according to package directions. Add fresh lemon zest and lemon juice for that extra citrus punch. Mix until just combined – don’t overmix.
Pour the batter into your prepared pan and bake for 28-32 minutes, or until a toothpick inserted in the center comes out clean. The cake should spring back when lightly touched. Allow the cake to cool completely in the pan – this is crucial for the next steps.
Creating the Cake Pop Mixture
Once cooled, crumble the entire cake into fine crumbs using your hands or a fork. The finer the crumbs, the smoother your cake pops will be. In a separate bowl, prepare your frosting by beating together cream cheese, butter, powdered sugar, vanilla, and lemon juice until smooth and creamy.
Gradually add the frosting to the cake crumbs, mixing with your hands or a wooden spoon. Start with half the frosting and add more as needed. The mixture should hold together when squeezed but not be overly wet or sticky. You want the consistency of Play-Doh.
Shaping and Chilling
Roll the mixture into 1.5-inch balls using your palms. Place them on a parchment-lined baking sheet. Don’t worry if they’re not perfectly round – the dipping process will help smooth any imperfections. Refrigerate the shaped balls for at least 2 hours or freeze for 15 minutes. This chilling step prevents the cake pops from falling off the sticks.
Dipping and Decorating
Melt your white chocolate in a microwave-safe bowl in 30-second intervals, stirring between each interval until smooth. Add yellow food coloring if desired. Dip each cake pop stick about 1/2 inch into the melted chocolate, then insert it into a chilled cake ball, pushing it halfway through.
Dip each cake pop into the melted chocolate, letting excess drip off. Gently tap the stick against the bowl’s edge to remove excess coating. Add sprinkles or decorations immediately while the chocolate is wet. Place in a cake pop stand or styrofoam block to dry completely.
What to Serve Lemon Cake Pops With
Beverage Pairings These bright treats pair beautifully with hot tea, especially Earl Grey or chamomile. Coffee lovers will enjoy them with a light roast or cappuccino. For kids’ parties, serve with lemonade or milk. Sparkling water with lime creates a refreshing adult combination.
Dessert Table Companions Create a stunning dessert spread by pairing with vanilla cupcakes, sugar cookies, or fresh berries. The yellow color scheme works perfectly with white chocolate-covered strawberries. Consider adding lemon bars or key lime pie for a full citrus experience.
Party Presentation Ideas Display cake pops in mason jars filled with yellow and white candies. Create height variations using cake stands of different sizes. Add fresh lemon slices and mint sprigs as natural decorations around your display.
Top Tips for Perfecting Lemon Cake Pops
Achieving the Perfect Consistency
The cake-to-frosting ratio is critical for success. Start with less frosting and gradually add more until the mixture holds together without being sticky. If your mixture is too wet, add more cake crumbs. If too dry, add frosting one teaspoon at a time.
Temperature Control Secrets
Always work with chilled cake balls and properly tempered chocolate. If your chocolate is too hot, the cake balls will slide off the sticks. If too cool, it won’t coat smoothly. The ideal temperature is just warm to the touch.
Preventing Cracks and Breaks
Avoid temperature shock by bringing chilled cake pops to room temperature for 5 minutes before dipping. Insert sticks gently and don’t push too deep. If cracks appear, it usually means the chocolate was too hot or the cake balls weren’t chilled enough.
Professional Finishing Touches
Tap the stick gently against the bowl to remove excess chocolate – don’t shake vigorously. Rotate the cake pop while the chocolate sets to prevent flat spots. Use a small spoon to touch up any bare spots before the chocolate fully hardens.
Storing and Reheating Tips
Short-Term Storage Store finished cake pops in an airtight container at room temperature for up to 3 days. Layer them between parchment paper to prevent sticking. Keep them away from direct sunlight and heat sources to prevent the chocolate coating from melting.
Refrigeration Guidelines For longer storage, refrigerate cake pops for up to one week. Place them in a single layer in airtight containers. Bring to room temperature for 15 minutes before serving for the best taste and texture.
Freezing Instructions Freeze cake pops for up to 2 months in freezer-safe containers. Wrap individually in plastic wrap, then place in freezer bags. Thaw overnight in the refrigerator, then bring to room temperature before serving. The texture remains perfect after freezing.
Make-Ahead Tips Prepare cake balls up to 3 days in advance and store in the refrigerator. Dip and decorate on the day of serving for the freshest appearance. You can also freeze undipped cake balls for up to one month.
Nutrition Information
| Nutrient | Per Cake Pop |
|---|---|
| Calories | 185 |
| Total Fat | 8g |
| Saturated Fat | 5g |
| Cholesterol | 25mg |
| Sodium | 95mg |
| Total Carbs | 28g |
| Dietary Fiber | 0g |
| Sugars | 25g |
| Protein | 2g |
| Vitamin C | 2% DV |
Nutritional values are approximate and may vary based on specific ingredients used.
Frequently Asked Questions
Why are my cake pops falling off the sticks?
This usually happens when the cake balls aren’t chilled enough or the chocolate is too hot. Always refrigerate shaped cake balls for at least 2 hours before dipping. Make sure your melted chocolate is just warm to the touch, not hot.
Can I use a different cake flavor?
Absolutely! This recipe works with any boxed cake mix. Try vanilla, strawberry, or funfetti for variety. Just adjust the extract flavoring to match – use vanilla extract with vanilla cake, or strawberry extract with strawberry cake.
How do I prevent my chocolate coating from being too thick?
Add a small amount of coconut oil or shortening to thin the melted chocolate. Start with 1 teaspoon and add more as needed. The chocolate should flow smoothly off a spoon when properly thinned.
Can I make these without a cake pop stand?
Yes! Use a block of styrofoam, a colander turned upside down, or even a cardboard box with holes poked through. Just ensure the cake pops can stand upright while the chocolate sets.
What’s the best way to add food coloring?
Use gel or powder food coloring for best results. Liquid food coloring can make the chocolate seize up. Add coloring gradually until you achieve the desired shade.
How far in advance can I make these?
Cake pops taste best within 2-3 days of making. You can prepare the cake balls up to 3 days ahead and dip them the day of your event for optimal freshness and appearance.
Why did my chocolate coating crack?
Cracking occurs when there’s a temperature difference between the cake pop and chocolate. Let chilled cake pops sit at room temperature for 5 minutes before dipping, and ensure your chocolate isn’t too hot.
Can I use homemade cake instead of a mix?
Certainly! Use any lemon cake recipe that yields about 24 cupcakes worth of batter. Bake in a 9×13 pan and follow the same crumbling and mixing process.
Final Thoughts
These lemon cake pops bring joy to any occasion with their perfect balance of tart and sweet flavors. The bright yellow coating and fresh citrus taste make them ideal for spring celebrations, baby showers, or summer gatherings. With practice, you’ll master the technique and can experiment with different flavors and decorations.
Remember that cake pop making is both an art and a science. Don’t be discouraged if your first batch isn’t perfect – each attempt teaches you something new about texture, temperature, and timing. Soon you’ll be creating professional-looking treats that rival any bakery.
Share your creations on social media and tag us – we love seeing your colorful variations! Whether you stick to classic lemon or branch out with different coatings and decorations, these cake pops are sure to become a household favorite.
Ready to spread some sunshine? Gather your ingredients and let’s make some magic happen in the kitchen!