Easy Oreo Cake Roll Recipe
Discover our Oreo cake roll recipe! Our tips show you how to bake a fluffy chocolate cake with a creamy filling. Learn more.
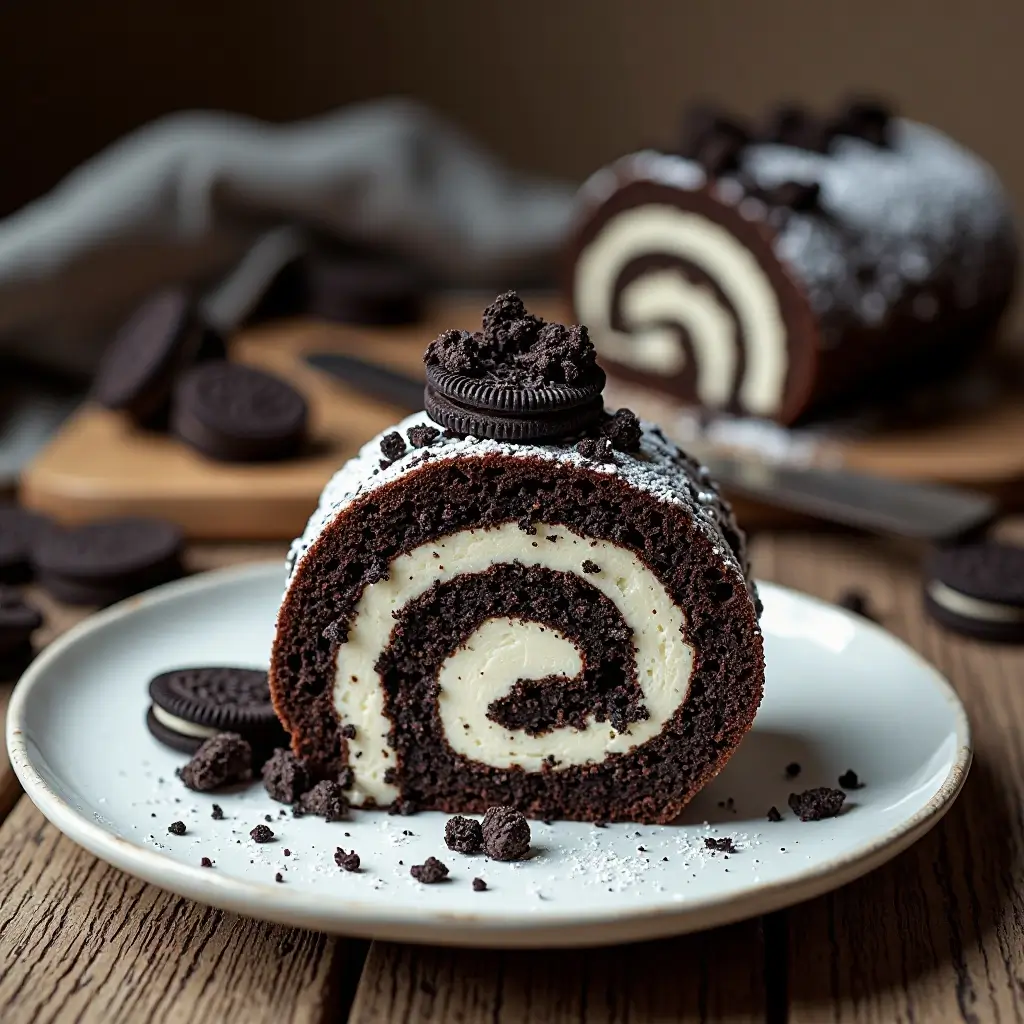
Imagine biting into a cloud of chocolatey perfection wrapped around creamy vanilla filling – that’s exactly what this incredible Oreo cake roll delivers! This show-stopping dessert combines the beloved flavors of everyone’s favorite cookie with a light, fluffy sponge cake that practically melts in your mouth.
What makes this recipe truly special is how deceptively simple it is to create such an impressive dessert that looks like it came straight from a fancy bakery.
What is Oreo Cake Roll?
Ever wondered why we call it a “cake roll” when it’s basically cake doing yoga? This delightful dessert gets its name from the rolling technique that creates beautiful spiral layers of cake and cream. The Oreo cake roll takes this classic concept and gives it a modern twist with crushed Oreo cookies both in the cake and filling.
As they say, the way to a man’s heart is through his stomach, and this dessert definitely takes the scenic route! Ready to roll up your sleeves and create some magic?
Why You’ll Love This Oreo Cake Roll
Rich Chocolate Flavor with Creamy Surprise
This Oreo cake roll delivers an intense chocolate experience that’s perfectly balanced with a luscious cream cheese filling. Every bite combines the deep cocoa flavor of the sponge cake with crunchy Oreo pieces and smooth, vanilla-scented cream that creates a texture symphony in your mouth.
Budget-Friendly Bakery-Style Dessert
Making this stunning dessert at home costs a fraction of what you’d pay at a high-end bakery. With simple pantry ingredients and a package of Oreos, you can create a dessert that looks professionally made and serves 8-10 people for under $10.
Impressive Presentation, Simple Technique
The beautiful spiral pattern created when you slice this cake roll makes it perfect for special occasions, holiday gatherings, or whenever you want to wow your guests. Unlike our popular chocolate lava cake recipe, this dessert can be made entirely ahead of time, making it ideal for entertaining. Give this recipe a try and watch as your family and friends are amazed by your baking skills!
How to Make Oreo Cake Roll
Quick Overview
This Oreo cake roll is surprisingly easy to master with just a few key techniques. The secret lies in creating a light, flexible sponge cake that won’t crack when rolled, then filling it with a rich cream cheese mixture loaded with crushed Oreos.
Preparation Details:
- Prep Time: 25 minutes
- Baking Time: 12-15 minutes
- Cooling Time: 30 minutes
- Assembly Time: 15 minutes
- Total Time: 1 hour 25 minutes
- Serves: 8-10 people
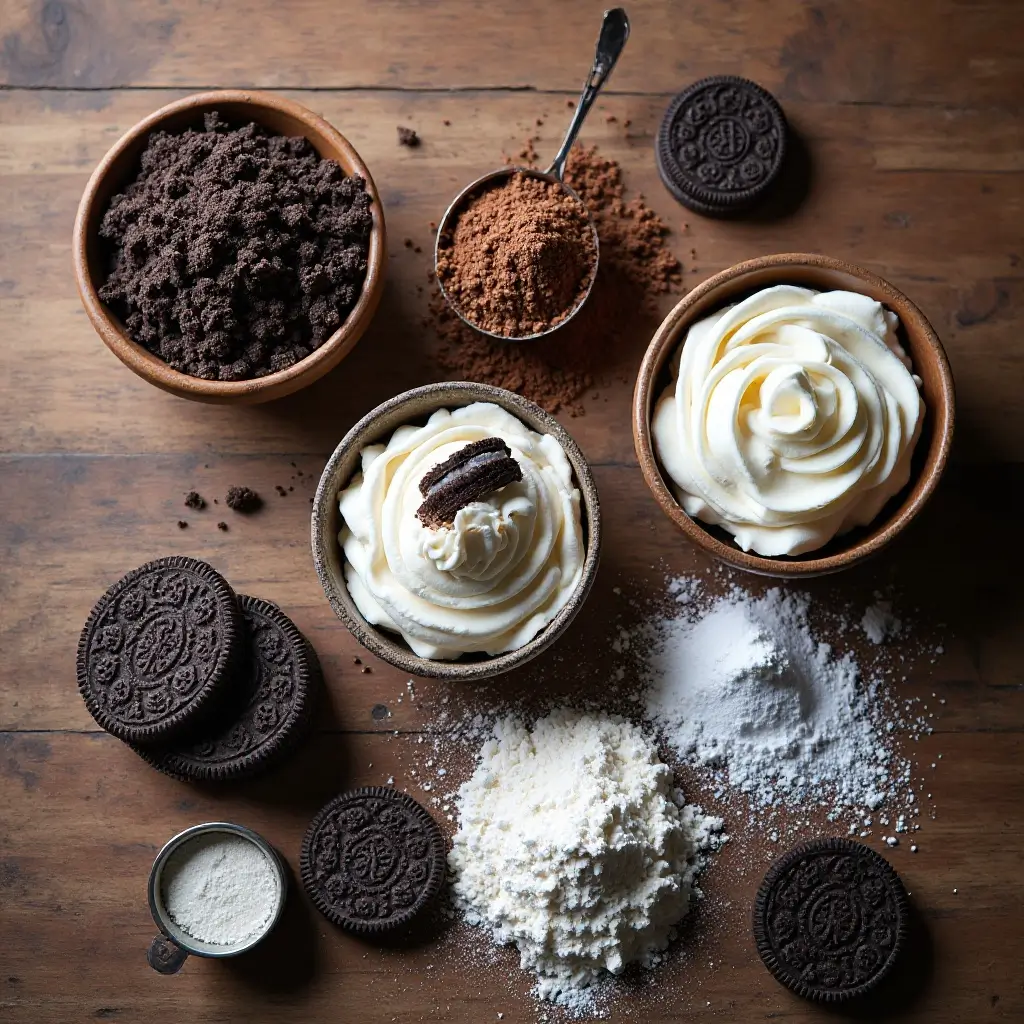
Key Ingredients for Oreo Cake Roll
For the Chocolate Sponge Cake:
- 3/4 cup all-purpose flour
- 1/4 cup unsweetened cocoa powder
- 1 teaspoon baking powder
- 1/4 teaspoon salt
- 4 large eggs, room temperature
- 3/4 cup granulated sugar
- 1/3 cup water
- 1 teaspoon vanilla extract
- Powdered sugar for dusting
For the Oreo Cream Filling:
- 8 oz cream cheese, softened
- 1/4 cup butter, softened
- 1 cup powdered sugar
- 1 teaspoon vanilla extract
- 1 cup heavy whipping cream
- 20 Oreo cookies, crushed (reserve some for garnish)
Step-by-Step Instructions
Preparing the Cake:
- Preheat and Prep: Preheat your oven to 375°F (190°C). Line a 15×10-inch jelly roll pan with parchment paper, leaving overhang on the sides. Lightly grease the parchment paper.
- Mix Dry Ingredients: In a medium bowl, whisk together flour, cocoa powder, baking powder, and salt. Set aside.
- Beat Eggs and Sugar: In a large bowl, beat eggs with an electric mixer on high speed for 5 minutes until thick and pale yellow. Gradually add granulated sugar, beating until well combined.
- Add Liquids: Beat in water and vanilla extract until just combined.
- Fold in Flour Mixture: Gently fold the flour mixture into the egg mixture using a spatula, being careful not to overmix and deflate the eggs.
- Bake the Cake: Spread batter evenly in the prepared pan. Bake for 12-15 minutes, or until the cake springs back when lightly touched.
Rolling the Cake:
- Prepare for Rolling: While the cake is baking, lay out a clean kitchen towel and dust it generously with powdered sugar.
- Turn Out Cake: As soon as the cake comes out of the oven, turn it out onto the prepared towel. Carefully peel off the parchment paper.
- Roll While Warm: Starting from the short end, roll the cake up in the towel. Let it cool completely on a wire rack, about 30 minutes.
Making the Filling:
- Cream Base: Beat cream cheese and butter until light and fluffy, about 3 minutes. Gradually add powdered sugar and vanilla, beating until smooth.
- Whip Cream: In a separate bowl, whip heavy cream to stiff peaks. Gently fold the whipped cream into the cream cheese mixture.
- Add Oreos: Fold in most of the crushed Oreos, reserving some for garnish.
Assembly:
- Unroll and Fill: Carefully unroll the cooled cake. Spread the Oreo cream filling evenly over the surface, leaving a 1/2-inch border on all sides.
- Final Roll: Roll the cake back up without the towel, starting from the same short end. Wrap in plastic wrap and refrigerate for at least 2 hours.
- Garnish and Serve: Before serving, dust with powdered sugar and sprinkle with reserved crushed Oreos.
What to Serve Oreo Cake Roll With
This rich dessert pairs beautifully with several complementary options:
Hot Beverages: Serve with freshly brewed coffee, hot chocolate, or chai tea to balance the sweetness.
Fresh Fruits: Add fresh berries like strawberries or raspberries for a tart contrast that cuts through the richness.
Ice Cream: A scoop of vanilla or mint chocolate chip ice cream alongside each slice creates an indulgent dessert experience.
Whipped Cream: A dollop of lightly sweetened whipped cream adds extra creaminess without overwhelming the Oreo flavors.
Top Tips for Perfecting Oreo Cake Roll
Preventing Cracks
The key to a crack-free cake roll is timing. Roll the cake while it’s still warm and pliable. If cracks do appear, don’t worry – they’ll be hidden when you dust with powdered sugar.
Ingredient Substitutions
Can’t find cream cheese? Substitute with mascarpone for an even richer filling. For a lighter version, replace half the heavy cream with Greek yogurt. Gluten-free flour works well as a 1:1 substitution for regular flour.
Texture Tips
For extra chocolate intensity, add 1 tablespoon of instant coffee to the cake batter. This enhances the chocolate flavor without adding coffee taste. Make sure all ingredients are at room temperature for the smoothest mixing.
Rolling Technique
Practice makes perfect with the rolling motion. Use gentle, even pressure and don’t worry if your first roll isn’t perfect – each attempt will get better.
Storing and Reheating Tips
Refrigerator Storage: Wrap the finished cake roll tightly in plastic wrap and store in the refrigerator for up to 5 days. The flavors actually improve after the first day as they meld together.
Freezing Instructions: This cake roll freezes beautifully for up to 3 months. Wrap it in plastic wrap, then aluminum foil. Thaw overnight in the refrigerator before serving.
Serving Temperature: For the best taste and texture, remove from the refrigerator 15-20 minutes before serving to take the chill off.
Make-Ahead Tips: You can bake the cake layer up to 2 days in advance and store it rolled in the towel. The filling can also be made a day ahead and stored separately in the refrigerator.
Nutrition Information
| Nutrient | Per Serving (1 slice) |
|---|---|
| Calories | 385 |
| Total Fat | 18g |
| Saturated Fat | 11g |
| Cholesterol | 95mg |
| Sodium | 285mg |
| Total Carbohydrates | 52g |
| Dietary Fiber | 2g |
| Sugars | 45g |
| Protein | 6g |
Nutritional values are approximate and based on 10 servings
Frequently Asked Questions
Can I make this cake roll ahead of time?
Yes! This cake roll is actually better when made a day ahead. The flavors have time to meld, and the texture becomes even more tender. Store covered in the refrigerator.
Why did my cake roll crack when I rolled it?
Cracking usually happens when the cake is either too cool or overbaked. Make sure to roll it while still warm and don’t overbake – it should spring back lightly when touched.
Can I use a different type of cookie instead of Oreos?
Absolutely! Try chocolate chip cookies, graham crackers, or even gingersnaps for different flavor profiles. Adjust the amount based on your taste preference.
How do I know when the sponge cake is done?
The cake is ready when it springs back lightly when touched in the center and starts to pull slightly away from the sides of the pan. Don’t overbake, as this makes rolling difficult.
Can I make this without eggs?
For an egg-free version, substitute each egg with 1/4 cup unsweetened applesauce or use commercial egg replacer following package directions.
What if I don’t have a jelly roll pan?
You can use a large rimmed baking sheet (about 18×13 inches), but you’ll have a thinner cake. Reduce baking time by 2-3 minutes and watch carefully.
Bonus Tips for Extra Success
Room Temperature Ingredients: This is crucial for smooth mixing. Take eggs and dairy out 1-2 hours before baking.
Proper Pan Preparation: Use parchment paper with overhang – this makes removing the cake foolproof.
Visual Cues: Learn to read your cake. It should look set but still slightly shiny on top when done.
Rolling Practice: If you’re nervous about rolling, practice with a cooled store-bought cake first to get the motion down.
Flavor Variations: Try adding orange zest to the filling for an Oreo creamsicle version, or mint extract for a cookies and cream mint roll.
This Oreo cake roll recipe proves that impressive desserts don’t have to be complicated. With a little practice and these detailed instructions, you’ll be creating bakery-worthy desserts that will have everyone asking for the recipe. The combination of rich chocolate cake, creamy filling, and crunchy Oreo pieces creates a dessert that’s both nostalgic and sophisticated – perfect for any celebration or whenever you want to treat yourself to something special.