Best Red Velvet Thanksgiving Cake – Easy Homemade Recipe
Impress your guests with a stunning Red Velvet Thanksgiving Cake, layered with smooth cream cheese frosting and classic holiday flavors.
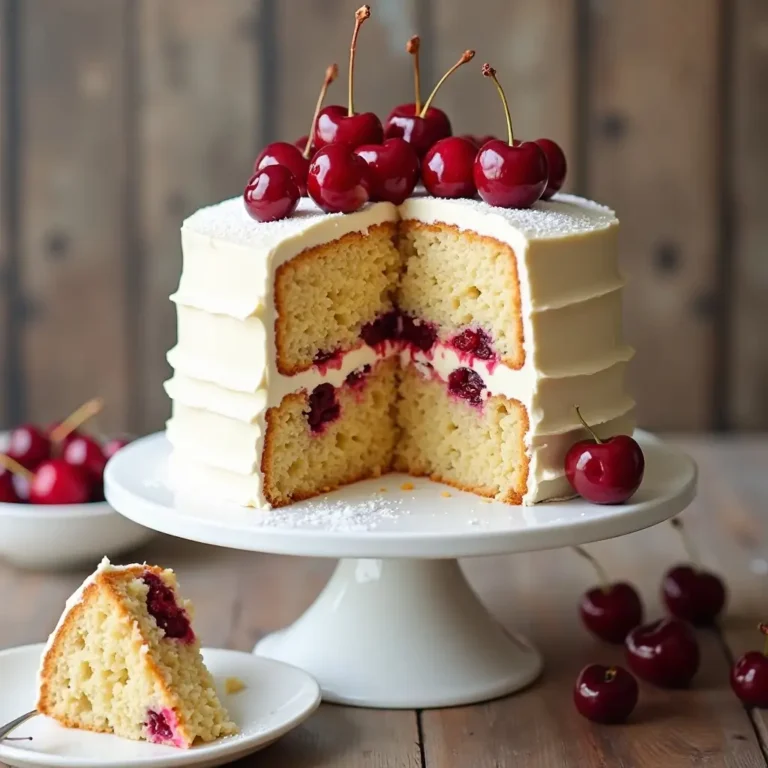
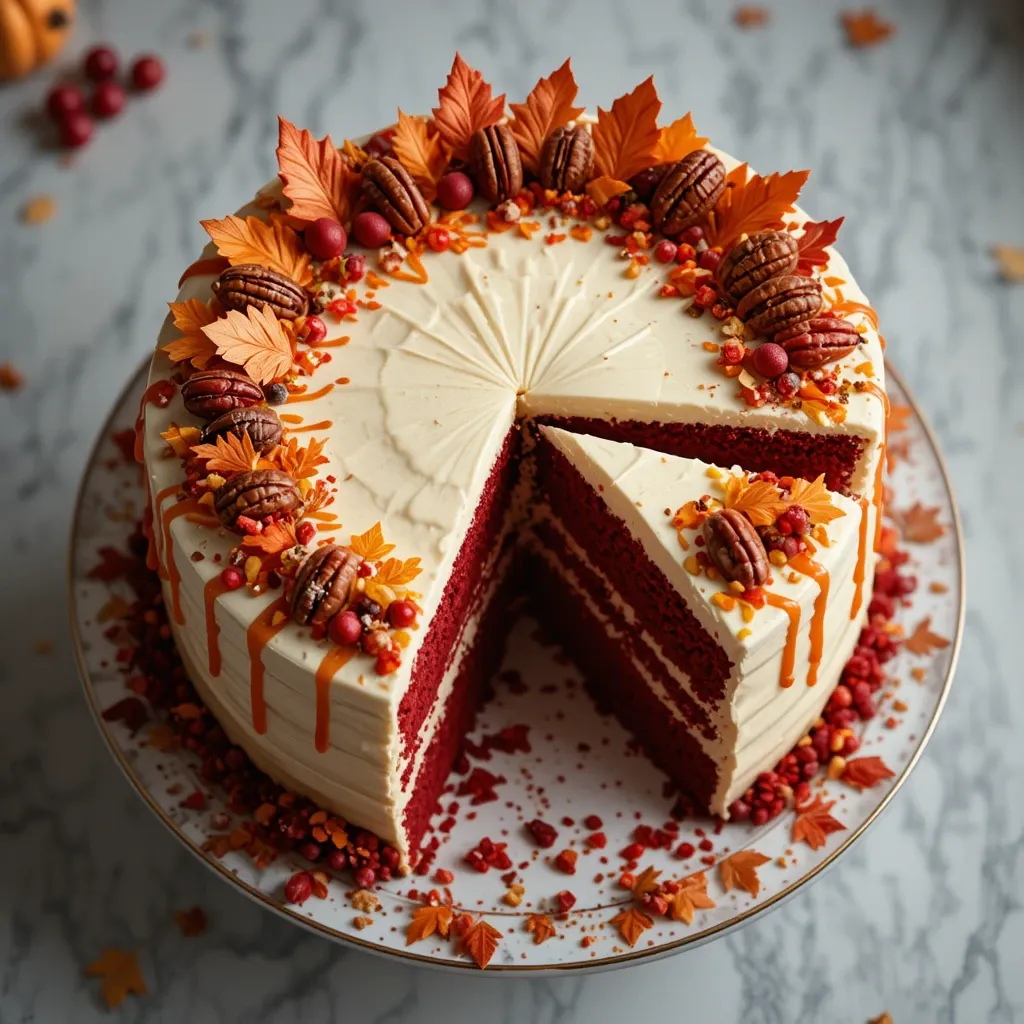
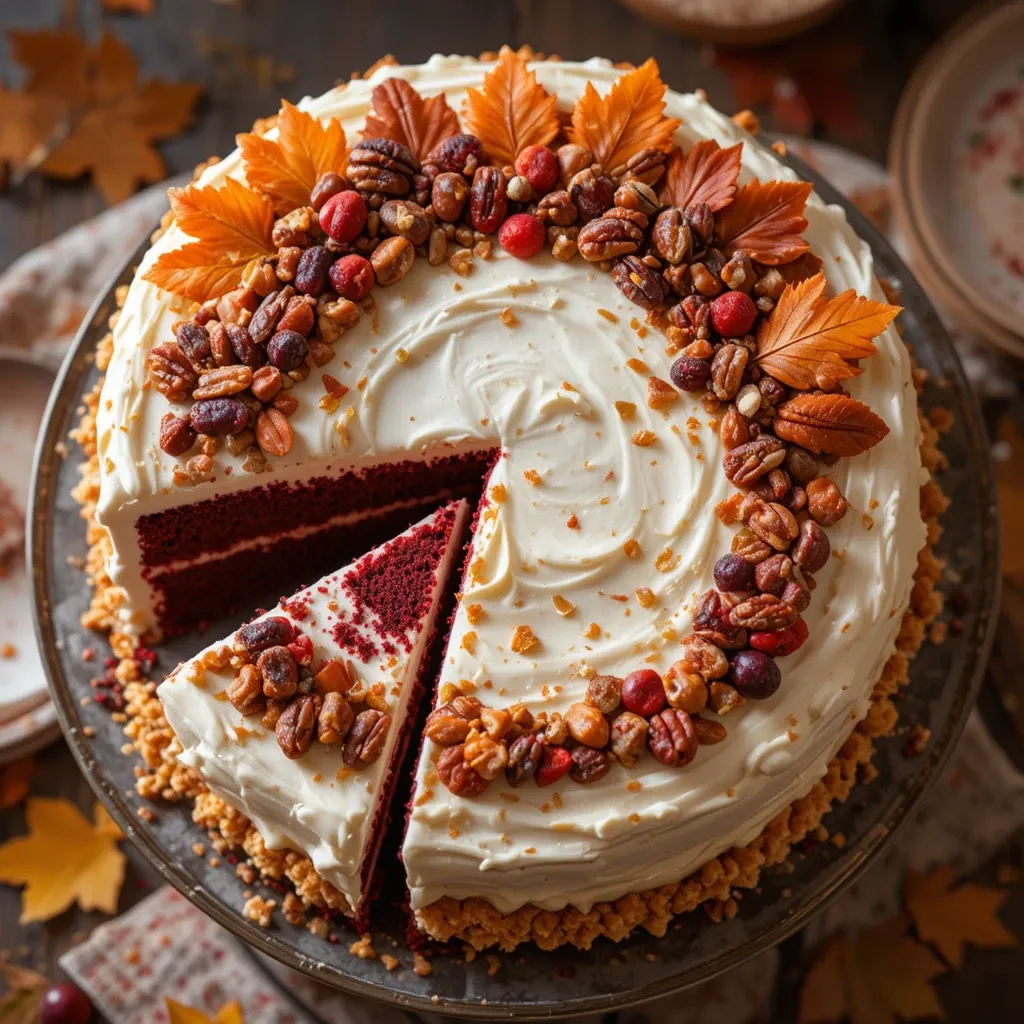
Velvety-smooth, deep crimson cake crowned with fluffy cream cheese frosting, sitting proudly at the center of your Thanksgiving table. This red velvet Thanksgiving cake isn’t just dessert—it’s a conversation starter, a family tradition in the making, and surprisingly simple to create.
With its striking color and irresistible tangy-sweet flavor, it transforms your holiday spread from ordinary to extraordinary. Unlike traditional pumpkin pie, this cake offers a modern twist that’ll have your guests asking for seconds (and the recipe!). Ready to become the dessert hero of Thanksgiving?
What is Red Velvet Thanksgiving Cake?
Ever wondered why red velvet cake got its dramatic name? Legend has it that the “velvet” comes from its incredibly soft, tender crumb—so delicate it practically melts on your tongue. The red? That’s where the fun begins! Originally from natural cocoa reactions, now it’s that gorgeous crimson hue we all adore.
A red velvet Thanksgiving cake takes this classic Southern beauty and gives it a holiday makeover with festive decorations, warm spices, or seasonal touches. As they say, “the way to a man’s heart is through his stomach,” and this cake is your golden ticket! Don’t just read about it—grab your apron and let’s bake some magic.
Why You’ll Love This Red Velvet Thanksgiving Cake
The Ultimate Crowd-Pleaser
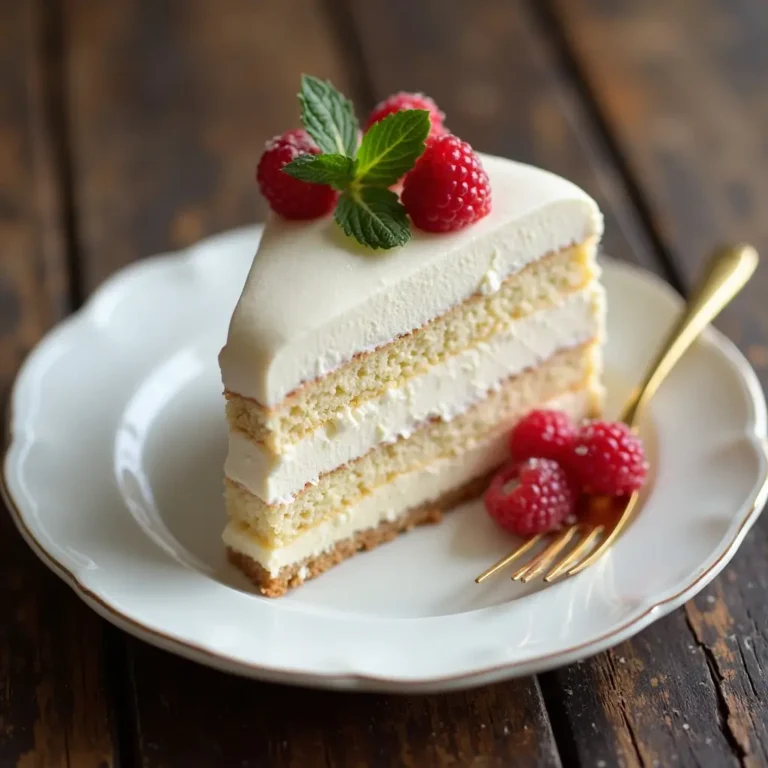
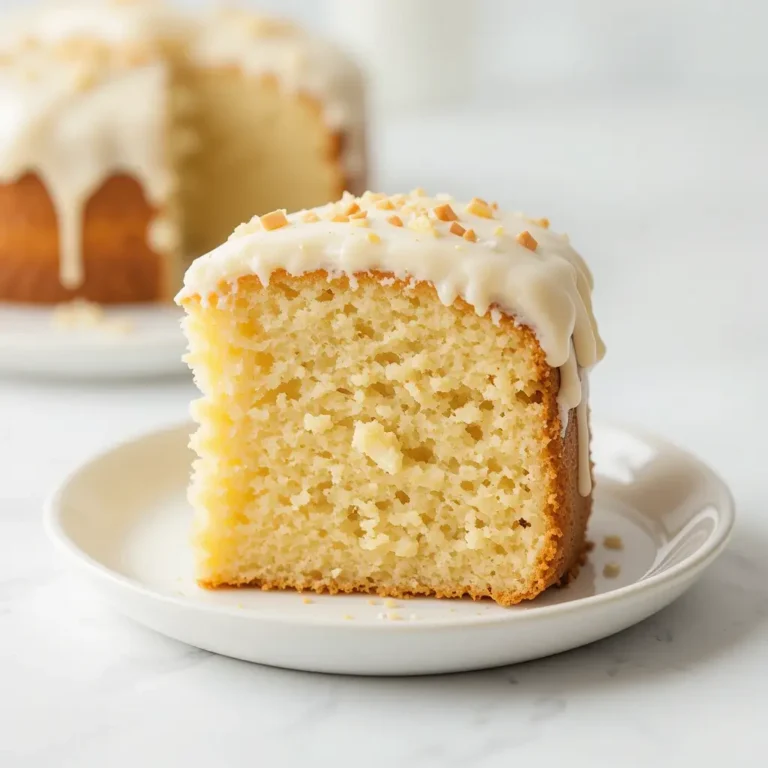
This red velvet Thanksgiving cake delivers everything you want in a holiday dessert. The cake itself boasts a tender, moist crumb with subtle chocolate notes balanced by a slight tanginess from buttermilk. The cream cheese frosting adds a luscious, creamy counterpoint that’s neither too sweet nor too heavy—pure perfection after a hearty Thanksgiving meal.
Budget-Friendly Holiday Baking
Forget spending $60+ at fancy bakeries! Making this red velvet Thanksgiving cake at home costs a fraction of store-bought versions while delivering bakery-quality results. You’ll use simple pantry staples like flour, cocoa powder, and butter, with the only splurge being good-quality food coloring. Plus, homemade always tastes better and shows your loved ones you care.
Customize Your Creation
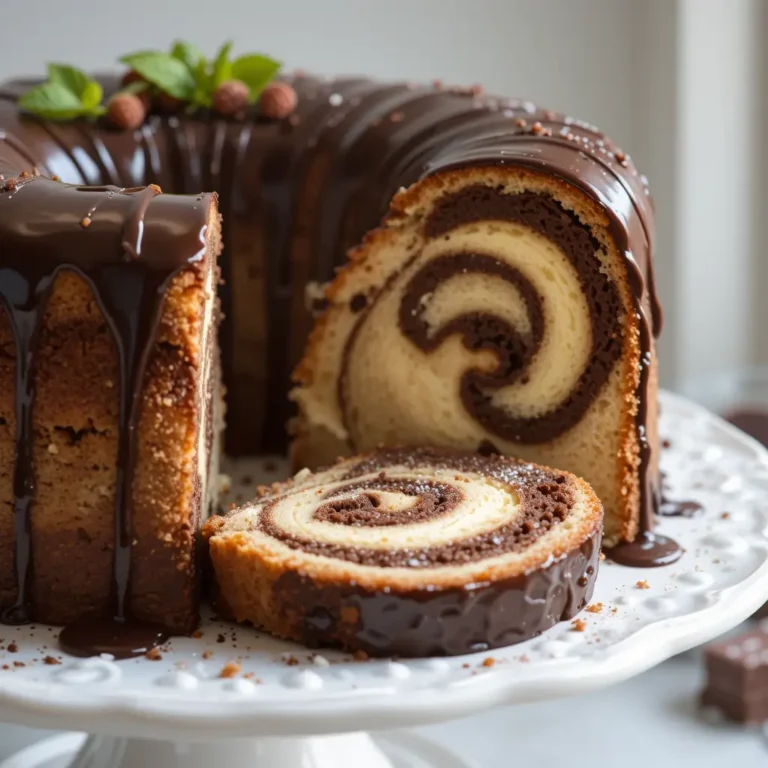
The beauty of this cake lies in its versatility. Top it with candied pecans for crunch, fresh cranberries for tartness, or autumn leaves crafted from fondant for visual wow-factor. Add a hint of cinnamon or pumpkin spice to the batter for extra Thanksgiving vibes. If you loved our Classic Chocolate Layer Cake, you’ll adore this red velvet version—it’s just as impressive but with a unique flavor profile that screams celebration.
Ready to roll up your sleeves? This red velvet Thanksgiving cake is calling your name, and trust me, your kitchen is about to smell absolutely divine!
How to Make Red Velvet Thanksgiving Cake
Quick Overview
This red velvet Thanksgiving cake is easier than you think! You’ll create two (or three) gorgeous red velvet layers with a soft, cocoa-kissed crumb, then sandwich and frost them with tangy cream cheese frosting. The result? A stunning dessert that looks like it came from a professional bakery but requires only basic baking skills.
Time Breakdown:
- Prep Time: 20 minutes
- Baking Time: 28-32 minutes
- Cooling Time: 1 hour
- Frosting & Assembly: 30 minutes
- Total Time: Approximately 2 hours 30 minutes
Key Ingredients for Red Velvet Thanksgiving Cake
For the Cake:
- 2½ cups all-purpose flour
- 2 tablespoons unsweetened cocoa powder (not Dutch-process)
- 1 teaspoon baking soda
- 1 teaspoon salt
- ½ cup unsalted butter, softened
- 1½ cups granulated sugar
- 2 large eggs, room temperature
- 1 cup buttermilk, room temperature
- 2 tablespoons red food coloring (liquid or gel)
- 1 teaspoon white vinegar
- 1 teaspoon vanilla extract
- ½ cup vegetable oil
For the Cream Cheese Frosting:
- 16 ounces cream cheese, softened (two 8-oz packages)
- 1 cup unsalted butter, softened
- 4 cups powdered sugar, sifted
- 2 teaspoons vanilla extract
- Pinch of salt
Optional Thanksgiving Decorations:
- Candied pecans
- Fresh cranberries
- Caramel drizzle
- Gold leaf flakes
- Fondant autumn leaves
- Cinnamon sticks

Step-by-Step Instructions
Prepare Your Workspace
Start by preheating your oven to 350°F (175°C). Grease two 9-inch round cake pans generously with butter or cooking spray, then line the bottoms with parchment paper circles. This ensures your cakes release perfectly every time. Set them aside while you prepare your batter.
Mix the Dry Ingredients
In a medium bowl, sift together the flour, cocoa powder, baking soda, and salt. Sifting is crucial for red velvet cake—it removes lumps and creates that signature velvety texture. Set this bowl aside; you’ll add it to the wet ingredients later.
Cream Butter and Sugar
In a large mixing bowl or stand mixer fitted with the paddle attachment, beat the softened butter and sugar together on medium-high speed for 3-4 minutes. You want the mixture light, fluffy, and pale in color. This step incorporates air into your cake, making it tender and soft.
Add Eggs One at a Time
Reduce mixer speed to medium and add eggs one at a time, beating well after each addition. Make sure each egg is fully incorporated before adding the next. Scrape down the sides of the bowl as needed to ensure everything mixes evenly.
Create the Red Velvet Color
In a small bowl or measuring cup, whisk together the buttermilk, red food coloring, vinegar, and vanilla extract. The vinegar reacts with the baking soda to help the cake rise and creates a subtle tang that’s characteristic of red velvet. Don’t skip it!
Combine Wet and Dry Ingredients
With your mixer on low speed, alternate adding the flour mixture and the buttermilk mixture to the butter-sugar-egg mixture. Start and end with the dry ingredients, mixing in three additions of flour and two of buttermilk. The pattern should be: 1/3 flour, 1/2 buttermilk, 1/3 flour, 1/2 buttermilk, 1/3 flour. Mix just until combined after each addition.
Add the Oil
Slowly stream in the vegetable oil while mixing on low speed. The oil keeps the cake incredibly moist—it’s the secret weapon! Mix just until the batter is smooth and uniform in color. Don’t overmix, or your cake will become tough.
Bake the Layers
Divide the batter evenly between your prepared pans. Use a kitchen scale for precision, or simply eyeball it. Smooth the tops with a spatula. Bake for 28-32 minutes, or until a toothpick inserted in the center comes out with just a few moist crumbs. The cakes should spring back when lightly pressed.
Cool Completely
This step requires patience! Let the cakes cool in their pans for 10 minutes, then turn them out onto wire cooling racks. Remove the parchment paper and let them cool completely—at least 45 minutes to 1 hour. If you frost warm cake, your beautiful frosting will melt into a puddle. Trust me on this!
Make the Cream Cheese Frosting
While your cakes cool, prepare the frosting. In a large bowl, beat the softened cream cheese and butter together until smooth and creamy, about 2-3 minutes. Make sure there are no lumps! Gradually add the powdered sugar, one cup at a time, beating on low speed to avoid a sugar cloud in your kitchen. Once all the sugar is incorporated, add vanilla and salt, then increase speed to medium-high and beat for 2-3 minutes until light and fluffy.
Level and Layer
Once cakes are completely cool, use a long serrated knife or cake leveler to trim any domed tops, creating flat, even layers. Place one layer on your serving plate or cake stand. Spread about 1 cup of frosting evenly over the top, going right to the edges. Gently place the second layer on top, pressing down lightly.
Apply Crumb Coat
Spread a thin layer of frosting all over the cake—top and sides. This is your crumb coat, which seals in loose crumbs. Don’t worry about it looking perfect; you won’t see it! Refrigerate the cake for 15-20 minutes to let this layer set firm.
Final Frosting
Remove the cake from the fridge and apply your final, generous layer of frosting. Use an offset spatula for smooth, professional-looking results. You can create swirls, textured patterns, or a perfectly smooth finish—whatever matches your style!
Add Thanksgiving Touches
Here’s where creativity shines! Decorate your red velvet Thanksgiving cake with candied pecans arranged around the top edge, fresh cranberries for pops of color, a delicate caramel drizzle, or fondant autumn leaves. You could even pipe elegant borders with any leftover frosting. Make it uniquely yours!
What to Serve Red Velvet Thanksgiving Cake With
This red velvet Thanksgiving cake is rich and satisfying, so pair it thoughtfully:
Hot Beverages: A strong cup of coffee cuts through the sweetness beautifully, while spiced chai tea complements the subtle cocoa notes. Hot chocolate is always a winner with kids!
Wine Pairings: Serve with a sweet dessert wine like Port, late-harvest Riesling, or Moscato d’Asti. The wine’s sweetness matches the cake while adding complexity.
Ice Cream: A scoop of vanilla bean ice cream provides cool, creamy contrast. Butter pecan or cinnamon ice cream adds extra Thanksgiving flair.
Fresh Fruit: Balance the richness with fresh raspberries, strawberries, or a tart cranberry compote on the side.
Whipped Cream: Some guests prefer lighter toppings—offer freshly whipped cream as an alternative to the cream cheese frosting.
Top Tips for Perfecting Red Velvet Thanksgiving Cake
Use Room Temperature Ingredients
This is the golden rule of cake baking! Room temperature eggs, buttermilk, butter, and cream cheese blend more smoothly, creating better texture. Take everything out of the fridge 1-2 hours before baking. In a pinch, place eggs in warm water for 5 minutes or microwave buttermilk for 10-15 seconds.
Don’t Overmix the Batter
Once you add flour, mix only until you can’t see dry streaks anymore. Overmixing develops gluten, resulting in a tough, dense cake instead of that tender velvet crumb. Mix on low speed and stop as soon as ingredients combine.
Choose the Right Food Coloring
Gel food coloring provides more vibrant color without adding excess liquid to your batter. You’ll need less gel than liquid coloring. If using liquid, stick to the recipe amount. Natural alternatives like beet juice create a more muted burgundy color—beautiful but different from classic red velvet.
Test for Doneness Properly
Start checking your cakes at 28 minutes. Insert a toothpick in the center—it should come out with a few moist crumbs, not wet batter. The cake will continue cooking slightly as it cools (carryover cooking). Overbaked red velvet becomes dry and crumbly.
Make Ahead Strategy
Bake cake layers up to 2 days ahead. Once completely cool, wrap tightly in plastic wrap and store at room temperature. Frosted cake keeps refrigerated for up to 5 days. Unfrosted layers can be frozen for up to 3 months—wrap in plastic, then aluminum foil.
Achieve Smooth Frosting
For bakery-smooth frosting, invest in an offset spatula. After your crumb coat sets, dip your spatula in hot water, dry it off, and use it to smooth the final frosting layer. The warmth helps the frosting glide beautifully. For perfectly smooth sides, hold a bench scraper or large knife perpendicular to the cake and rotate the cake stand slowly.
Substitute Buttermilk
No buttermilk? No problem! Make your own by adding 1 tablespoon of white vinegar or lemon juice to 1 cup of regular milk. Let it sit for 5 minutes until it curdles slightly. This creates the same tangy flavor and acidic reaction needed for proper rise.
Storing and Reheating Tips
Room Temperature Storage
If you’ll eat the cake within 2 days, you can store it at room temperature in a cake keeper or under a large inverted bowl. The cream cheese frosting is stable enough for short-term storage in cool room conditions (below 70°F). This keeps the cake extra moist and the frosting perfectly soft.
Refrigerator Storage
For longer storage, refrigerate your red velvet Thanksgiving cake. Cover it loosely with plastic wrap or store in an airtight container for up to 5 days. The frosting will firm up in the cold. Before serving, let the cake sit at room temperature for 30-45 minutes—this allows the frosting to soften and brings out the cake’s full flavor.
Freezing Instructions
Red velvet cake freezes beautifully! For unfrosted layers, wrap each tightly in plastic wrap, then aluminum foil, and freeze for up to 3 months. For frosted cake, freeze until the frosting is firm (about 1 hour), then wrap carefully. Thaw overnight in the refrigerator, then bring to room temperature before serving.
Individual Slice Storage
Have leftovers? Wrap individual slices in plastic wrap and store in an airtight container or freezer bag. This makes grab-and-go desserts easy! Frozen slices can be thawed in the microwave for 20-30 seconds or left at room temperature for 2 hours.
Reheating Tips
While cake is typically served at room temperature, if you want to warm a cold slice, microwave it for 10-15 seconds. This makes the cake ultra-soft and slightly melty—delicious! Just don’t overdo it, or the frosting will melt off completely.
Frequently Asked Questions
Can I make red velvet Thanksgiving cake without food coloring?
Yes! Your cake will be light brown instead of red, but the flavor remains delicious. Some bakers use natural alternatives like beet juice (2-3 tablespoons) or freeze-dried strawberry powder, though colors will be more subtle and earthy-toned.
Why is my red velvet cake dense and not fluffy?
Dense cake usually results from overmixing the batter, using cold ingredients, or incorrect measurements. Make sure to bring eggs and buttermilk to room temperature, measure flour by spooning it into your measuring cup (don’t pack it), and mix only until ingredients just combine.
Can I use regular cocoa powder instead of natural cocoa powder?
Dutch-process cocoa doesn’t react with the vinegar and baking soda the same way natural cocoa does, which affects both rise and flavor. If you only have Dutch-process, your cake will still taste good but might have a slightly different texture and deeper chocolate flavor.
How do I prevent my cake layers from doming in the middle?
Use baking strips around your pans—these insulate the edges so the entire cake bakes evenly. Alternatively, slightly lower your oven temperature to 325°F and bake a few minutes longer. You can also use a flower nail in the center of the pan to conduct heat.
What’s the difference between red velvet and chocolate cake?
Red velvet uses much less cocoa powder (only 1-2 tablespoons) compared to chocolate cake, giving it a subtle cocoa hint rather than rich chocolate flavor. Red velvet also contains buttermilk and vinegar, creating a tangier taste and more tender crumb. The signature cream cheese frosting is another key difference.
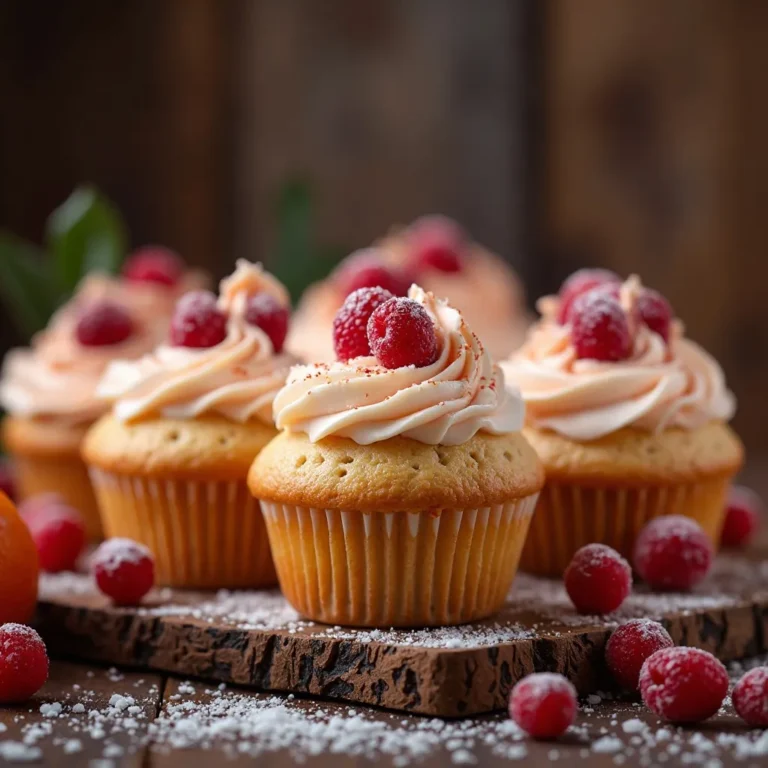
Can I make this as cupcakes instead?
Absolutely! This batter makes approximately 24 cupcakes. Line muffin tins with paper liners, fill each 2/3 full, and bake at 350°F for 18-22 minutes. They’re perfect for Thanksgiving gatherings where guests prefer individual portions.
Why do I need vinegar in red velvet cake?
Vinegar reacts with baking soda to create carbon dioxide bubbles, helping your cake rise and develop a fine, tender crumb. It also adds a subtle tang that balances the sweetness and is part of red velvet’s signature flavor profile. Don’t skip it!
How far in advance can I bake this cake?
Bake unfrosted layers up to 2 days ahead and store wrapped at room temperature, or freeze for up to 3 months. Assemble and frost the cake up to 1 day before serving—it actually tastes better after the flavors meld overnight! Store assembled cake in the refrigerator.
Can I reduce the sugar in this recipe?
You can reduce sugar by up to 1/4 cup in the cake itself, though it may affect moisture and texture. I don’t recommend reducing sugar in the frosting more than 1/2 cup, as it affects consistency. For less-sweet frosting, try Swiss meringue buttercream as an alternative.
What if I don’t have buttermilk?
Make a quick substitute by adding 1 tablespoon white vinegar or lemon juice to 1 cup of whole milk. Stir and let sit for 5 minutes until slightly curdled. You can also thin plain yogurt or sour cream with milk until it reaches buttermilk consistency.
Nutrition Information
| Nutrient | Per Slice (1/12 of cake) |
|---|---|
| Calories | 520 |
| Total Fat | 28g |
| Saturated Fat | 16g |
| Cholesterol | 95mg |
| Sodium | 380mg |
| Total Carbohydrates | 65g |
| Dietary Fiber | 1g |
| Sugars | 48g |
| Protein | 5g |
Nutrition values are approximate and may vary based on specific ingredients used and portion sizes
Final Thoughts
This red velvet Thanksgiving cake brings a refreshing twist to your holiday table while honoring the warmth and tradition of the season. The striking crimson layers, velvety texture, and tangy cream cheese frosting create a dessert that’s as memorable as it is delicious.
Whether you’re hosting a intimate family dinner or a large Thanksgiving feast, this cake adapts beautifully to any celebration. Decorate it simply with a dusting of powdered sugar, or go all out with elaborate autumn decorations—either way, you’ll have a showstopping centerpiece that tastes even better than it looks.
The best part? You don’t need professional baking skills to achieve bakery-quality results. Just follow these detailed instructions, use quality ingredients, and bake with love. Your guests will be talking about this red velvet Thanksgiving cake long after the holiday ends.
So grab your mixing bowls, preheat that oven, and get ready to create some delicious memories. This Thanksgiving, skip the ordinary and serve extraordinary. Your family deserves this red velvet masterpiece!
Happy Baking and Happy Thanksgiving! 🍰🍂
Have you made this red velvet Thanksgiving cake? Share your photos and tag us! We love seeing your beautiful creations. Don’t forget to save this recipe for next year—it’s a keeper!