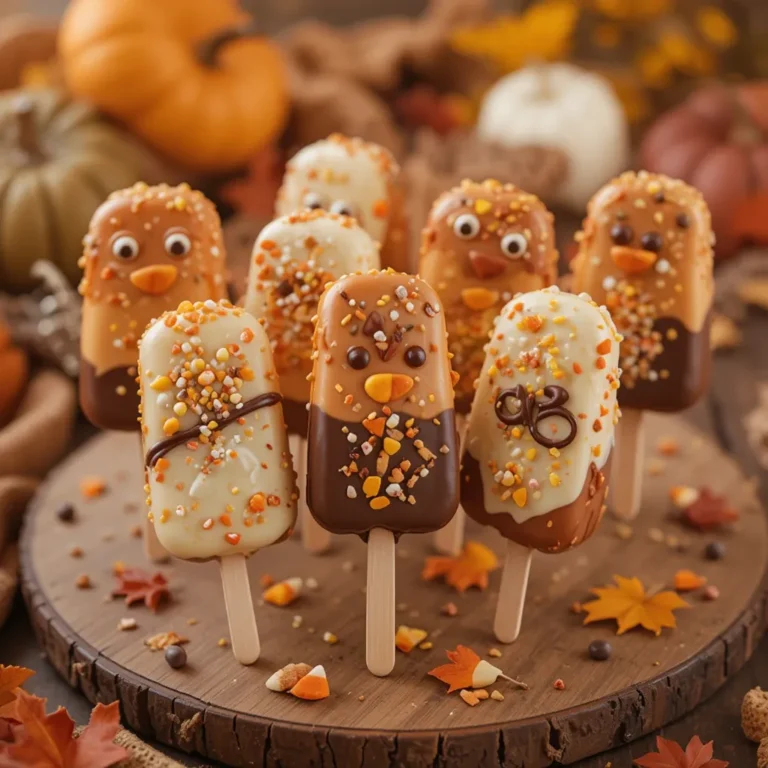
Easy Thanksgiving Cake Popsicles Recipe Made in 30 Minutes
Thanksgiving cake popsicles are the ultimate festive dessert that combines rich, moist cake with creamy frosting, all wrapped in a convenient handheld treat. These adorable popsicles bring the warmth of traditional Thanksgiving flavors into a fun, bite-sized format that both kids and adults absolutely adore. Making these thanksgiving cake popsicles at home is surprisingly simple,…
Thanksgiving cake popsicles are the ultimate festive dessert that combines rich, moist cake with creamy frosting, all wrapped in a convenient handheld treat. These adorable popsicles bring the warmth of traditional Thanksgiving flavors into a fun, bite-sized format that both kids and adults absolutely adore.
Making these thanksgiving cake popsicles at home is surprisingly simple, requiring just 30 minutes of prep time and basic ingredients you likely already have in your pantry.
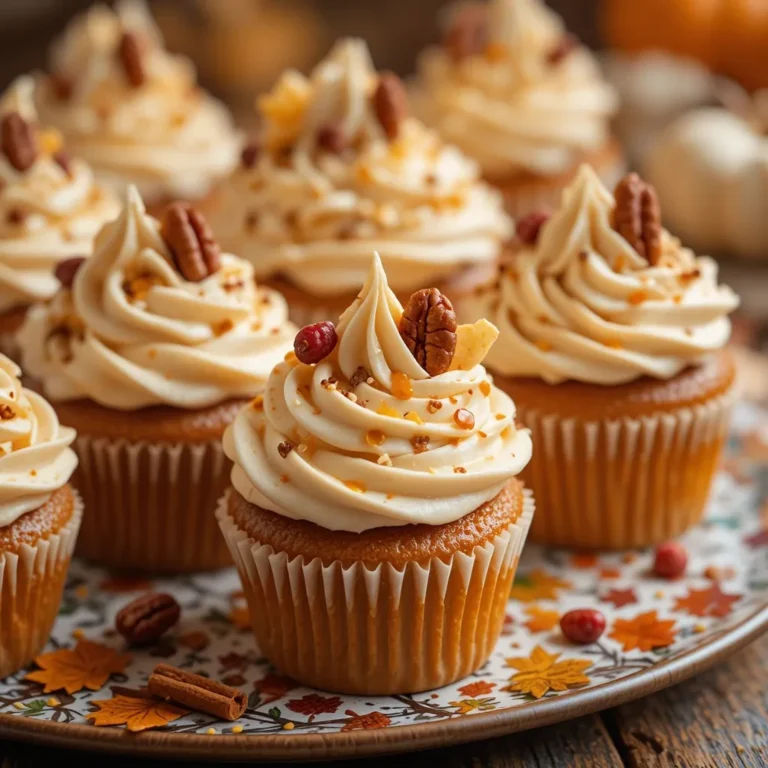
Much like our popular pumpkin spice cupcakes, these treats capture the essence of fall in every delicious bite. Get ready to impress your guests with these show-stopping desserts!
What Are Thanksgiving Cake Popsicles?
Ever wondered what happens when cake meets popsicle magic? Thanksgiving cake popsicles are crumbled cake mixed with frosting, shaped into bite-sized balls, and dipped in chocolate coating. They’re mounted on sticks for easy serving and decorated with festive fall colors.
Why are they called cake popsicles? Simply because they look like frozen popsicles but taste like rich, decadent cake! As the saying goes, “the way to a man’s heart is through his stomach,” and these treats certainly prove it true. Ready to create some thanksgiving cake popsicles magic in your own kitchen?
Why You’ll Love This Thanksgiving Cake Popsicles Recipe
They’re Incredibly Versatile and Customizable
These thanksgiving cake popsicles are a canvas for your creativity. You can use any cake flavor that speaks to your Thanksgiving spirit—spiced pumpkin, warm cinnamon, classic vanilla, or rich chocolate. The beauty lies in their adaptability to your family’s preferences.
Budget-Friendly Holiday Dessert
Making thanksgiving cake popsicles at home costs a fraction of what you’d pay at a bakery. Store-bought cake pops can run $3-5 each, but homemade versions cost less than $1 per pop. You’ll save money while creating something far more special and personalized for your holiday gathering.
Decorated to Perfection
The real magic happens with the toppings and decorations. Drizzle them with white chocolate, sprinkle with crushed graham crackers, add mini chocolate chips, or dust with edible gold glitter. Orange and brown sprinkles create that perfect autumn vibe. Similar to our chocolate-covered strawberries recipe, the decorating possibilities are endless. These thanksgiving cake popsicles let you express your artistic side while creating an impressive centerpiece dessert that’ll have everyone asking for your secret recipe!
How to Make Thanksgiving Cake Popsicles
Quick Overview
Making thanksgiving cake popsicles is easier than you think! These delightful treats feature a moist cake interior with a smooth, creamy texture that melts in your mouth. The chocolate coating adds a satisfying crunch, while the festive decorations make them Instagram-worthy.
Time Breakdown:
- Prep Time: 30 minutes
- Chilling Time: 2 hours
- Decorating Time: 30 minutes
- Total Time: 3 hours
Key Ingredients for Thanksgiving Cake Popsicles
For the Cake Base:
- 1 box (15.25 oz) cake mix (spice cake, pumpkin, or vanilla)
- Ingredients required on cake box (eggs, oil, water)
For the Binding:
- 1 cup (240g) cream cheese frosting (store-bought or homemade)
- 2 tablespoons heavy cream (if needed for moisture)
For the Coating:
- 24 oz candy melts (orange, brown, or white chocolate)
- 2 tablespoons coconut oil (for smooth coating)
For Decoration:
- Fall-colored sprinkles (orange, yellow, brown, red)
- Mini chocolate chips
- Crushed graham crackers
- White chocolate drizzle
- Candy corn pieces
- 24 lollipop sticks
Special Tools:
- Cookie scoop (1.5 tablespoon size)
- Styrofoam block (for drying)
- Microwave-safe bowls
- Parchment paper

Step-by-Step Instructions
Step 1: Bake Your Cake
Preheat your oven according to the cake mix instructions (usually 350°F). Prepare your cake batter following the package directions, mixing until smooth and well combined. Pour the batter into a greased 9×13 inch baking pan and bake for the time specified on the box (typically 25-30 minutes). Insert a toothpick into the center—if it comes out clean, your cake is done. Let the cake cool completely in the pan for at least 1 hour before proceeding.
Step 2: Crumble the Cake
Once your cake is completely cooled, break it into large chunks and place them in a large mixing bowl. Using your hands or a fork, crumble the cake into fine, uniform crumbs. The texture should resemble coarse breadcrumbs with no large chunks remaining. This step is crucial for achieving smooth, professional-looking thanksgiving cake popsicles.
Step 3: Mix with Frosting
Add the cream cheese frosting to your cake crumbs, starting with 3/4 cup. Using your hands or a sturdy spoon, mix the frosting into the crumbs thoroughly. The mixture should hold together when squeezed but not be overly sticky or wet. If it’s too dry and crumbly, add more frosting one tablespoon at a time. If too wet, add more cake crumbs. The perfect consistency is like cookie dough—moldable but not mushy.
Step 4: Shape the Popsicles
Line a baking sheet with parchment paper. Using a cookie scoop, portion out uniform balls of the cake mixture (about 1.5 tablespoons each). Roll each portion between your palms to create smooth, round balls. Make sure to apply gentle pressure to eliminate any cracks. Place the shaped balls on the prepared baking sheet, spacing them about 1 inch apart. You should get approximately 24 thanksgiving cake popsicles from this recipe.
Step 5: Chill the Balls
Place the baking sheet in the refrigerator and chill the cake balls for at least 1 hour, or up to overnight. This chilling step is essential—it firms up the balls so they won’t fall apart when you dip them in the coating. For faster results, you can freeze them for 20-30 minutes instead.
Step 6: Insert the Sticks
Melt about 1/4 cup of your candy melts in the microwave (heat in 30-second intervals, stirring between each). Dip the tip of each lollipop stick about 1/2 inch into the melted candy, then insert it straight into a chilled cake ball, pushing it halfway through. The melted candy acts as “glue” to secure the stick. Return the cake pops to the refrigerator for 15 minutes to set.
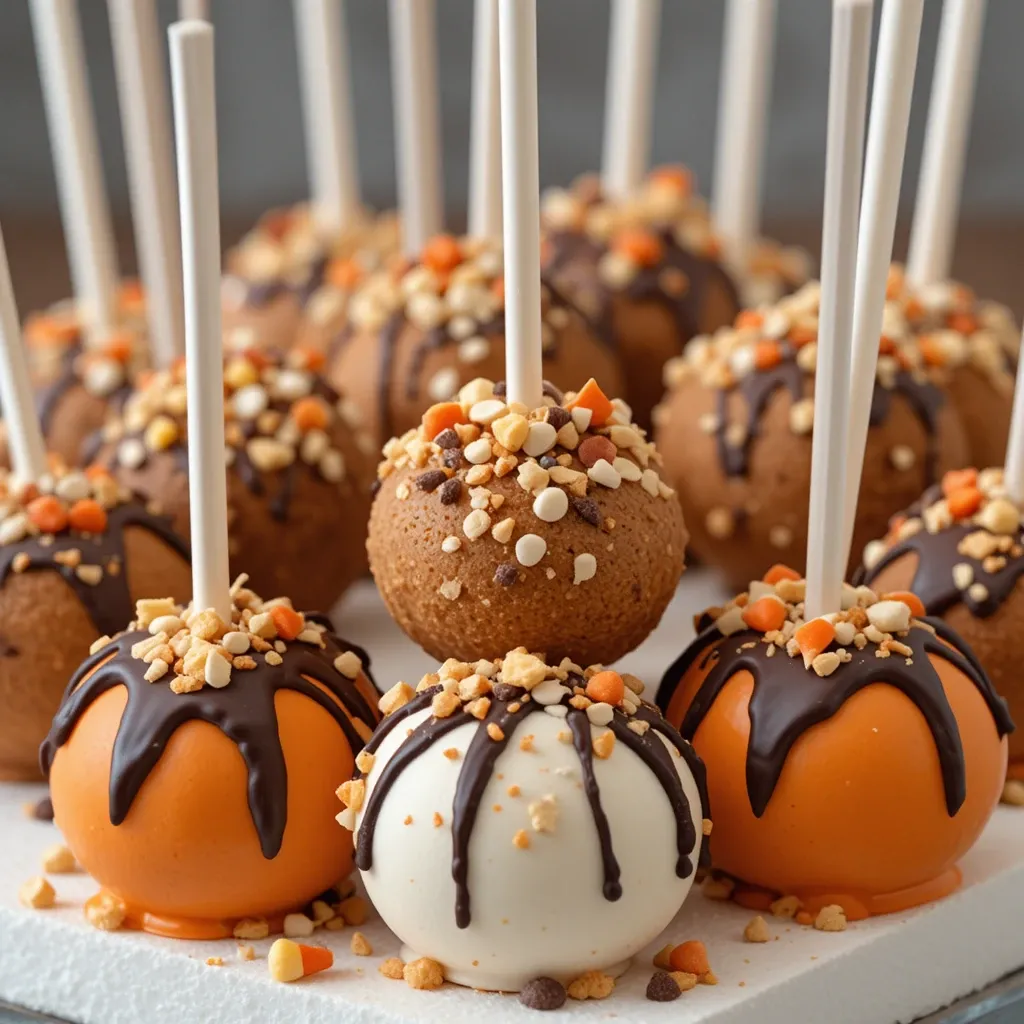
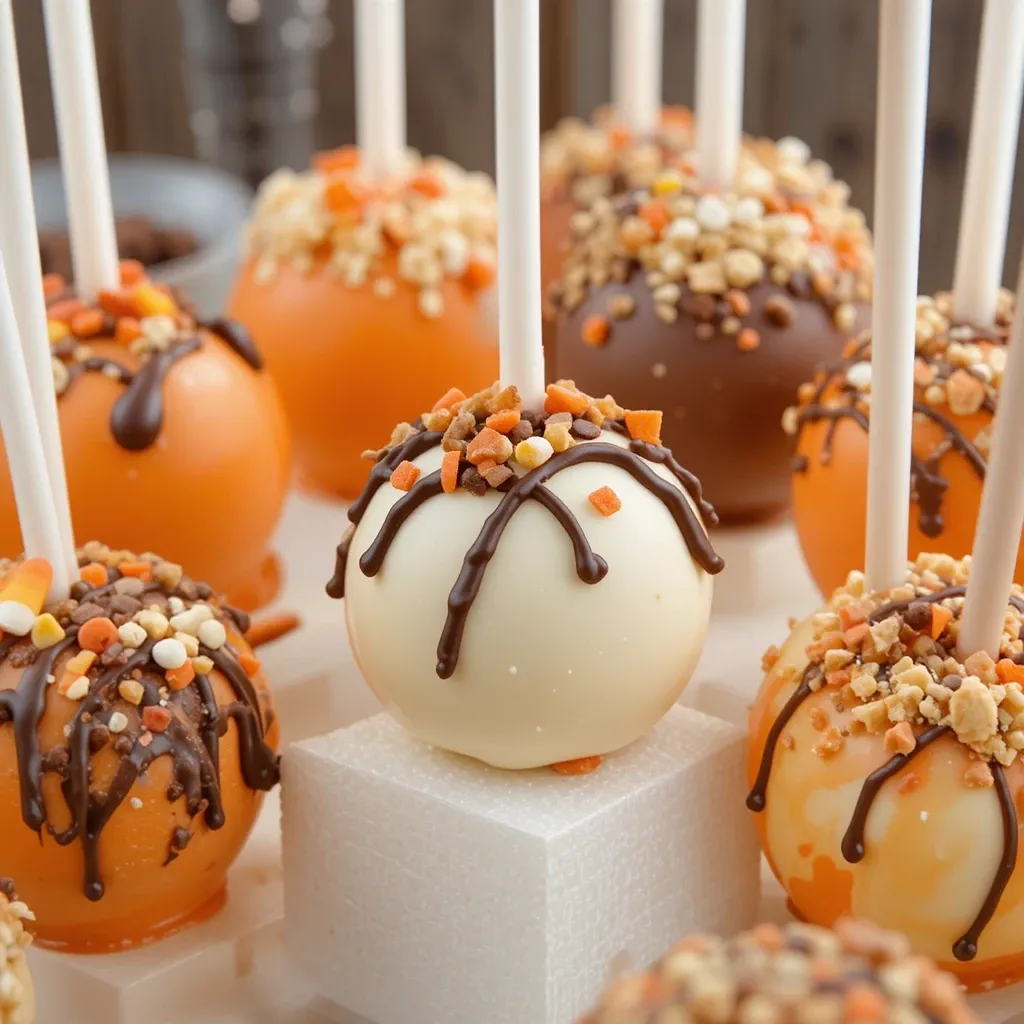
Step 7: Melt the Coating
Place your candy melts in a deep, narrow microwave-safe bowl (a tall cup works great). Add 1 tablespoon of coconut oil per 12 oz of candy melts. Microwave on 50% power for 1 minute, then stir. Continue heating in 30-second intervals, stirring after each, until completely smooth and melted. The coating should have a thin, pourable consistency. If it’s too thick, add a bit more coconut oil.
Step 8: Dip the Cake Pops
Remove your thanksgiving cake popsicles from the refrigerator. Hold a cake pop by the stick and dip it straight down into the melted coating, submerging it completely. Gently lift it out and let the excess coating drip off for about 10-15 seconds. You can tap the stick gently against the rim of the bowl to remove excess coating. Rotate the pop slowly to ensure even coverage.
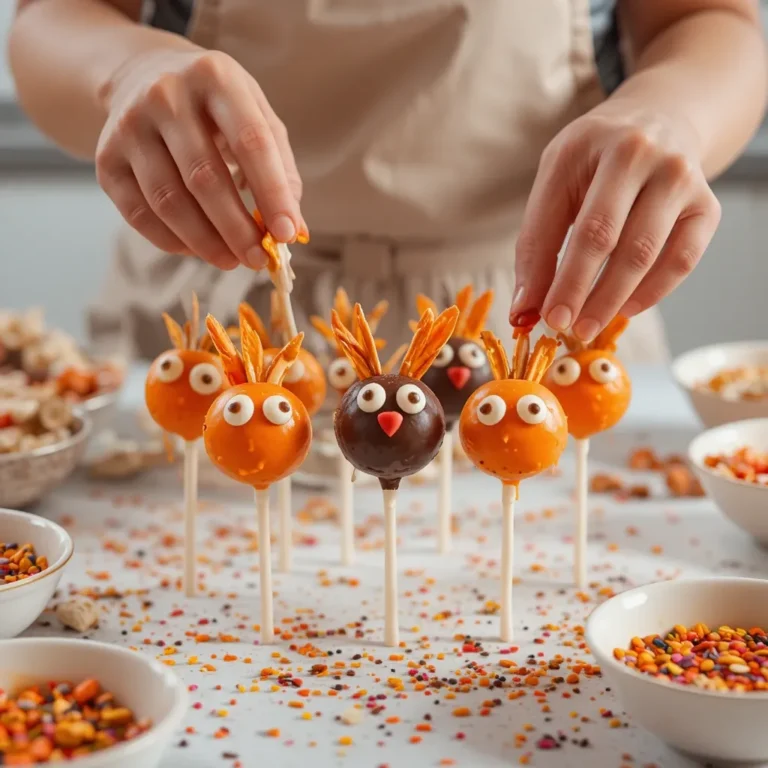
Step 9: Decorate Immediately
While the coating is still wet, add your decorations. Sprinkle with fall-colored sprinkles, add candy corn pieces, or press on mini chocolate chips. Work quickly as the coating sets fast. For drizzle designs, let the first coating set for 5 minutes, then use a fork or piping bag to drizzle contrasting chocolate over the top.
Step 10: Let Them Set
Stick your decorated thanksgiving cake popsicles into a styrofoam block to dry completely. Let them set at room temperature for 15-20 minutes until the coating is firm to the touch. Once set, they’re ready to serve or store!
What to Serve Thanksgiving Cake Popsicles With
Thanksgiving cake popsicles are versatile and can be served in many delightful ways:
Hot Beverages: Pair them with pumpkin spice lattes, hot apple cider, or spiced chai tea. The warm drinks complement the sweet, rich cake perfectly.
Coffee Station: Display them on a dessert table alongside your coffee bar. They’re perfect for dipping into coffee or enjoying as an after-dinner treat.
Dessert Platter: Arrange them with other miniature desserts like pecan tassies, pumpkin pie bites, and chocolate truffles for a stunning dessert spread.
Ice Cream: Serve alongside vanilla bean or cinnamon ice cream for an indulgent dessert pairing.
Wine Pairing: These thanksgiving cake popsicles pair beautifully with dessert wines like Moscato, Port, or a sweet Riesling.
Kid-Friendly Display: Create a “cake pop bouquet” by arranging them in a decorated vase or mason jar filled with candy corn or dried beans to hold them upright.
Top Tips for Perfecting Thanksgiving Cake Popsicles
Use Room Temperature Cake
Never try to crumble warm cake—it will become gummy and difficult to work with. Completely cooled cake crumbles perfectly and mixes with frosting more evenly.
Don’t Overmix with Frosting
Too much frosting makes your thanksgiving cake popsicles too soft and difficult to coat. Start with less frosting and add more gradually. The mixture should hold together but not feel wet.
Chill Between Steps
Patience is key! Proper chilling prevents your cake pops from falling off the sticks or cracking during coating. If they feel too soft at any point, pop them back in the fridge.
Use Deep Bowl for Coating
A tall, narrow container allows you to dip the cake pops straight down, creating a smooth, even coating without awkward angles.
Tap, Don’t Shake
When removing excess coating, gently tap the stick against the bowl rim. Aggressive shaking can cause the cake ball to fly off the stick.
Temperature Matters
If your coating is too hot, it will make the cake ball crack. If too cold, it won’t flow smoothly. Aim for a warm, honey-like consistency.
Flavor Variations
Try different cake flavors: chocolate cake with orange coating for autumn vibes, spice cake with cream cheese frosting for traditional Thanksgiving, or red velvet for a festive touch.
Make Ahead Successfully
Shape and coat your thanksgiving cake popsicles up to 3 days before serving. Store them properly and they’ll taste fresh for your holiday gathering.
Storing and Reheating Tips
Short-Term Storage: Store your finished thanksgiving cake popsicles in an airtight container at room temperature for up to 2 days. Place parchment paper between layers to prevent them from sticking together. Keep them away from direct sunlight and heat sources, which can melt the coating.
Refrigerator Storage: For longer storage, keep thanksgiving cake popsicles in the refrigerator for up to 1 week. Place them in a single layer in an airtight container or wrap each individually in plastic wrap. Let them sit at room temperature for 10-15 minutes before serving for the best texture and flavor.
Freezer Storage: These freeze beautifully for up to 3 months! Wrap each cake pop individually in plastic wrap, then place them in a freezer-safe bag or container. This prevents freezer burn and keeps them fresh. To thaw, transfer them to the refrigerator overnight or let them sit at room temperature for 30-45 minutes.
Uncoated Cake Balls: You can make the cake balls ahead and freeze them before coating. Freeze on a baking sheet until solid, then transfer to a freezer bag for up to 2 months. Thaw slightly, insert sticks, and coat as directed.
No Reheating Needed: Thanksgiving cake popsicles are served at room temperature and don’t require reheating. Simply remove from storage and let them come to room temperature for optimal flavor and texture.
Frequently Asked Questions
Why do my cake pops keep falling off the sticks?
This usually happens when the cake mixture is too moist or the balls aren’t chilled enough. Make sure to dip the stick in melted chocolate before inserting it, chill thoroughly, and ensure your cake-frosting ratio isn’t too wet.
Can I use homemade cake instead of boxed mix?
Absolutely! Any cake recipe works for thanksgiving cake popsicles. Just make sure it’s completely cooled before crumbling. Denser cakes like pound cake work especially well.
How do I prevent cracks in the coating?
Cracks occur when there’s a temperature difference between the cold cake ball and warm coating. Let your chilled cake pops sit at room temperature for 5 minutes before dipping, and ensure your coating isn’t too hot.
What’s the best chocolate for coating?
Candy melts work best because they’re formulated to set quickly and create a smooth shell. You can also use almond bark or tempered chocolate, but these require more technique.
Can I make these dairy-free or gluten-free?
Yes! Use dairy-free cake mix and frosting, and choose dairy-free chocolate coating. For gluten-free, simply use gluten-free cake mix. The process remains the same.
How far in advance can I make thanksgiving cake popsicles?
You can make them up to 3 days before your event when stored properly in the refrigerator. For longer storage, freeze them up to 3 months ahead.
Why is my coating too thick?
Candy melts thicken as they cool. Add a tablespoon of coconut oil or paramount crystals to thin the coating to a dippable consistency. Reheat gently if it starts to thicken while you’re working.
Can I decorate these with fresh fruit?
Fresh fruit contains moisture that can make your coating soggy. Stick to dried decorations like sprinkles, nuts, crushed cookies, or candy pieces for best results.
What if I don’t have lollipop sticks?
You can use pretzel sticks, candy sticks, or even leave them as cake balls without sticks. Just arrange them in mini cupcake liners for easy serving.
How do I transport cake pops without ruining them?
Use a styrofoam block or specially designed cake pop stand. Cover loosely with plastic wrap (not touching the pops) or place in a tall container that keeps them upright and protected.
Nutrition Information
| Nutrient | Per Serving (1 cake pop) |
|---|---|
| Calories | 180 |
| Total Fat | 9g |
| Saturated Fat | 5g |
| Cholesterol | 15mg |
| Sodium | 125mg |
| Total Carbohydrates | 24g |
| Dietary Fiber | 0g |
| Sugars | 18g |
| Protein | 2g |
Nutrition information is approximate and based on standard ingredients. Values may vary based on specific products used.
Additional Helpful Tips & Tricks
Color Coordination: Create an ombre effect by using multiple shades of fall colors. Start with dark brown candy melts at the bottom and transition to orange at the top for a stunning autumn gradient.
Flavor Boost: Add a teaspoon of cinnamon, nutmeg, or pumpkin pie spice to your frosting before mixing with cake crumbs. This amplifies the Thanksgiving flavor profile.
Professional Presentation: Display your thanksgiving cake popsicles in a decorative arrangement. Fill a vase with fall leaves, acorns, or candy corn, then insert the pops to create an edible centerpiece.
Party Favor Idea: Wrap individual cake pops in clear cellophane bags tied with ribbon in fall colors. Add a “Happy Thanksgiving” tag for charming party favors guests can take home.
Allergy-Friendly Options: For nut allergies, ensure all ingredients are processed in nut-free facilities. For egg allergies, use egg-free cake mixes available at most grocery stores.
Troubleshooting Thin Coating: If your first coat is too thin, let it set completely (about 10 minutes), then dip again for a thicker, more professional-looking coating.
Creative Shapes: Instead of balls, try shaping your thanksgiving cake popsicles into mini pumpkins, acorns, or turkey shapes using your hands and a toothpick for details.
Texture Enhancement: Roll your coated pops in finely crushed vanilla wafers, graham crackers, or Biscoff cookies for added crunch and flavor dimension.
These thanksgiving cake popsicles are guaranteed to become a beloved tradition at your holiday table. They combine nostalgia, creativity, and deliciousness in one perfect bite-sized package. Happy baking, and have a wonderful Thanksgiving celebration!