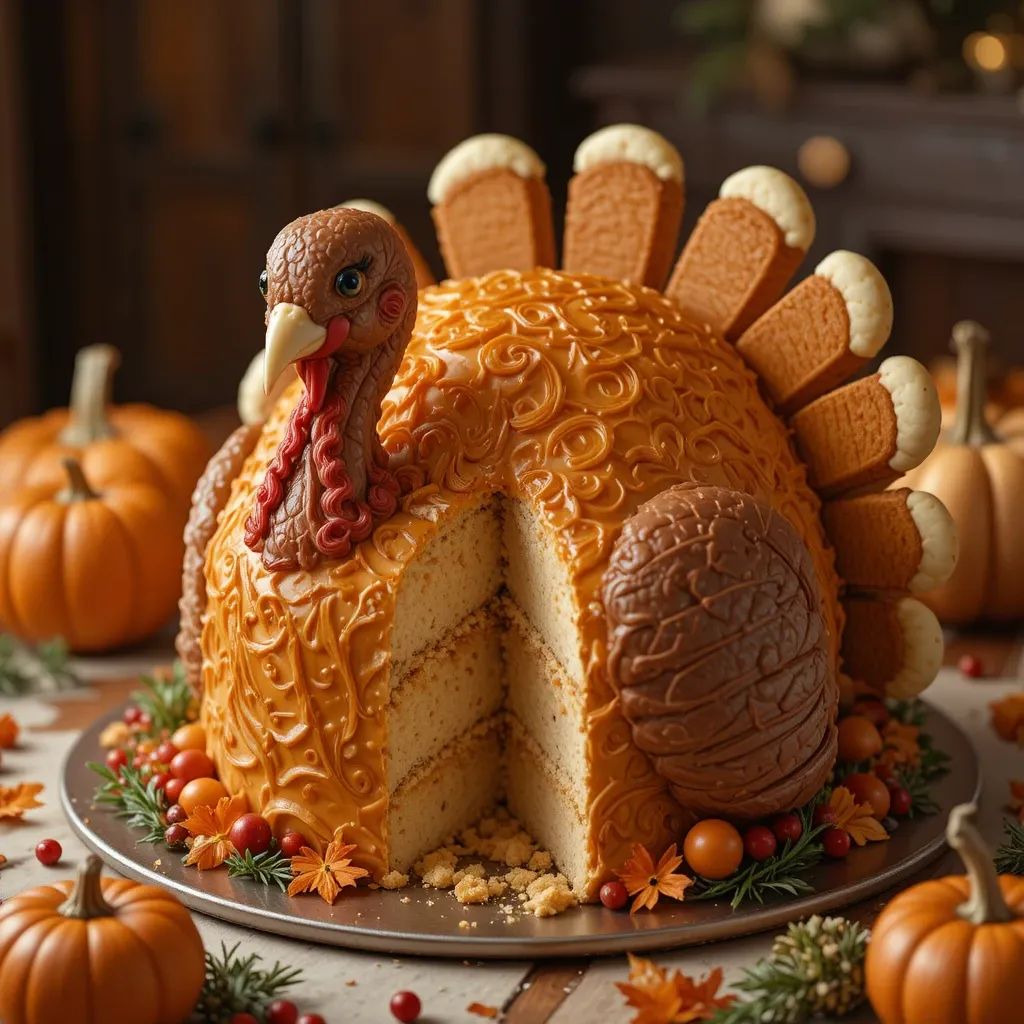
Thanksgiving Cake Turkey – Dessert Everyone Will Love
Picture this: a stunning centerpiece that looks like a roasted turkey but is actually a delicious cake! This Thanksgiving cake turkey is the ultimate conversation starter at any holiday gathering. It combines creativity with incredible taste, making it perfect for bakers who want to impress without spending all day in the kitchen. Whether you’re hosting…
Picture this: a stunning centerpiece that looks like a roasted turkey but is actually a delicious cake! This Thanksgiving cake turkey is the ultimate conversation starter at any holiday gathering. It combines creativity with incredible taste, making it perfect for bakers who want to impress without spending all day in the kitchen.
Whether you’re hosting your first Thanksgiving or your twentieth, this whimsical dessert brings joy and laughter to the table, proving that holiday baking can be both fun and delicious.
What is Thanksgiving Cake Turkey?
Ever wonder who came up with the idea of turning dessert into poultry? This Thanksgiving cake turkey is a cleverly decorated cake designed to look like a golden roasted turkey, complete with drumsticks made from ice cream cones! It’s the perfect blend of artistry and taste.
After all, they say the way to a man’s heart is through his stomach, and nothing says “I love you” quite like a turkey you can actually enjoy for dessert. Ready to create some holiday magic?
Why You’ll Love This Thanksgiving Cake Turkey
A Dessert That Steals the Show
This isn’t just another cake—it’s an edible work of art that’ll have your guests pulling out their phones for photos before anyone takes a slice. The moist, flavorful cake hidden beneath golden buttercream “skin” delivers on taste just as much as it does on presentation. Every bite offers that perfect balance of sweetness and texture that makes homemade cakes superior to store-bought alternatives.
Budget-Friendly Holiday Magic
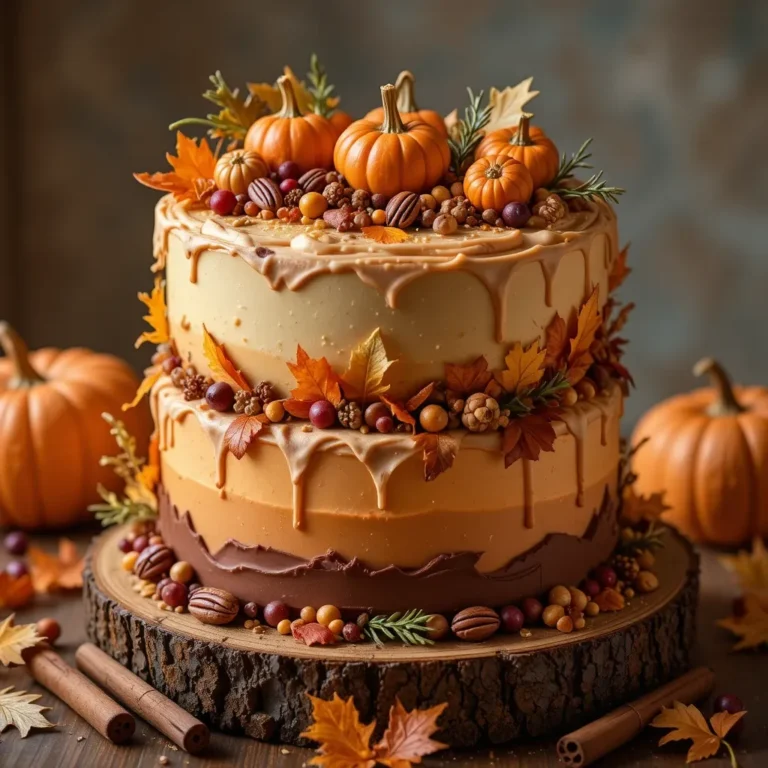
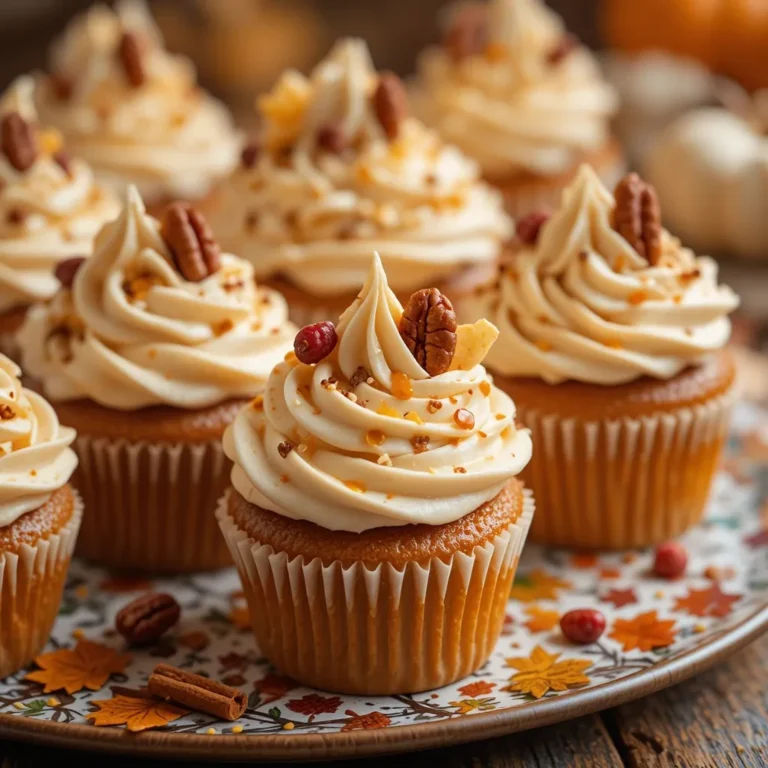
Forget spending a fortune on fancy desserts from the bakery. Making this Thanksgiving cake turkey at home costs a fraction of the price while delivering twice the wow factor. You’ll use simple, affordable ingredients you probably already have in your pantry—butter, sugar, eggs, flour, and cocoa powder for the drumsticks. Compare this to our popular Pumpkin Spice Bundt Cake, and you’ll find this turkey creation even more memorable for your holiday spread.
Customizable and Crowd-Pleasing
The beauty of this recipe lies in its versatility. Choose your favorite cake flavor as the base—vanilla, chocolate, or spice cake all work wonderfully. The buttercream coating acts as your canvas, and you can tint it to achieve that perfect golden-brown turkey color. Add some creative touches with pretzel sticks for bones and cookies for wings, and you’ve got a dessert that appeals to kids and adults alike.
Whether you’re looking to add humor to your holiday table or simply want a memorable dessert, this Thanksgiving cake turkey checks all the boxes. Why settle for ordinary when you can serve extraordinary? Roll up your sleeves and let’s create something your family will talk about for years to come!
How to Make Thanksgiving Cake Turkey
Quick Overview
This Thanksgiving cake turkey is surprisingly simple to create despite its impressive appearance. The process involves baking your favorite cake, carving it into a turkey body shape, and decorating it with buttercream frosting tinted to look like golden-brown turkey skin. The drumsticks are made from ice cream cones dipped in chocolate, adding a playful touch that everyone will love.
Time Breakdown:
- Prep Time: 45 minutes
- Baking Time: 30-35 minutes
- Decorating Time: 1 hour
- Total Time: 2 hours 20 minutes
- Serves: 12-16 people
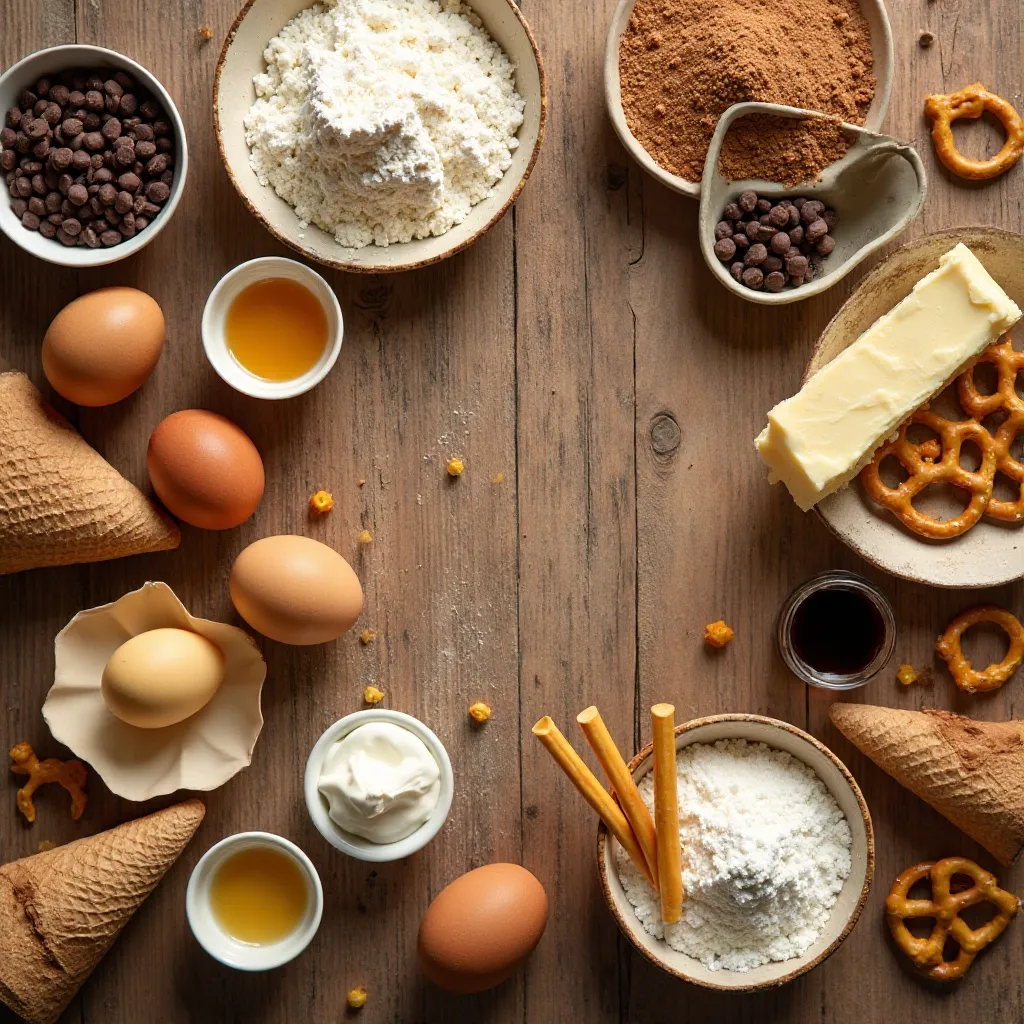
Key Ingredients for Thanksgiving Cake Turkey
For the Cake:
- 2 boxes of cake mix (your choice of flavor) or homemade cake batter
- Eggs, oil, and water (as required by cake mix)
- 1 batch of your favorite cake recipe (if making from scratch)
For the Buttercream Frosting:
- 2 cups (4 sticks) unsalted butter, softened
- 8 cups powdered sugar
- 6-8 tablespoons heavy cream or milk
- 2 teaspoons vanilla extract
- 1/4 teaspoon salt
- Brown gel food coloring (to create turkey skin color)
- Orange gel food coloring (optional, for depth)
For the Drumsticks:
- 2 sugar ice cream cones
- 1 cup semi-sweet chocolate chips
- 2 tablespoons coconut oil
- 1/4 cup white chocolate chips (for the bone effect)
For Decoration:
- 1 package of chocolate cookies (like Oreos) for wings
- Pretzel sticks (for bones)
- Candy eyes (optional)
- Red fruit leather or fondant (for the wattle)
Step-by-Step Instructions
Bake the Cake
Start by preheating your oven to 350°F (175°C). Prepare two 9-inch round cake pans by greasing them thoroughly and lining the bottoms with parchment paper. This ensures your cakes will release easily after baking.
Mix your cake batter according to package directions or use your favorite homemade recipe. Divide the batter evenly between the two prepared pans. Bake for 30-35 minutes, or until a toothpick inserted in the center comes out clean. The cakes should be golden on top and spring back when lightly pressed.
Remove the cakes from the oven and let them cool in the pans for 10 minutes. Then turn them out onto wire cooling racks and allow them to cool completely. This is crucial—decorating warm cake will melt your frosting and create a mess.
Shape the Turkey Body
Once your cakes are completely cool, it’s time to create the turkey shape. Place one cake layer on your serving platter or cake board. This will be your base. Use a serrated knife to carve the second cake layer into a dome shape to represent the turkey’s breast.
Stack the dome-shaped cake on top of the flat base layer. Use a small amount of buttercream between the layers to help them stick together. Now, gently carve and shape the stacked cakes to create a more rounded, turkey-like body. Don’t worry about being perfect—the frosting will smooth out any rough edges.
Trim a small portion from the front to create a neck area where you’ll later add the turkey’s head details. Set aside any cake scraps in a bowl—you can crumble these and use them as “stuffing” for a fun presentation later.
Prepare the Buttercream Frosting
In a large mixing bowl, beat the softened butter with an electric mixer on medium speed for 3-4 minutes until it’s light and fluffy. This step is essential for achieving a smooth, creamy frosting.
Gradually add the powdered sugar, one cup at a time, mixing on low speed after each addition. Once all the sugar is incorporated, add the vanilla extract and salt. Then add the heavy cream one tablespoon at a time until you reach your desired consistency. The frosting should be spreadable but firm enough to hold its shape.
Divide the frosting into portions. Leave about 1/2 cup white for details. Tint the remaining frosting with brown gel food coloring to create a golden turkey skin color. Start with a small amount of coloring—you can always add more. For a more realistic look, add a tiny drop of orange coloring to warm up the brown tone.
Frost and Decorate the Turkey Body
Start with a crumb coat—a thin layer of frosting applied all over the carved cake. This seals in the crumbs and creates a smooth base for your final coat. Refrigerate the cake for 15-20 minutes to let this layer set.
Once the crumb coat is firm, apply your final layer of buttercream in the golden-brown color. Use an offset spatula to spread the frosting smoothly over the entire turkey body. For added texture that mimics turkey skin, use the back of a spoon or a small spatula to create gentle swirls and patterns in the frosting.
Work in sections, smoothing as you go. Don’t rush this step—taking your time here makes all the difference in the final appearance. If the frosting starts to get too soft, pop the cake in the refrigerator for a few minutes to firm it up before continuing.
Create the Chocolate Drumsticks
Melt the semi-sweet chocolate chips with coconut oil in a microwave-safe bowl. Heat in 30-second intervals, stirring between each, until the chocolate is completely smooth. The coconut oil helps thin the chocolate for easier dipping.
Hold each sugar cone upside down and dip the pointed end into the melted chocolate, coating about three-quarters of the cone. Let the excess chocolate drip off, then place the cones on a parchment-lined baking sheet with the pointed (chocolate-coated) end facing up. Refrigerate for 10 minutes until the chocolate sets.
For the bone effect, melt the white chocolate chips. Dip the very tip of each cone (the uncoated end) into the white chocolate to create the appearance of a bone sticking out of the drumstick. Let this set in the refrigerator for another 5 minutes.
Add the Finishing Touches
Insert the chocolate-dipped ice cream cones into the sides of the cake to serve as turkey legs. Position them at slight angles for a more natural, relaxed turkey pose. They should stick into the cake securely, but you can add a small dollop of frosting inside each cone for extra stability.
For the wings, take chocolate sandwich cookies and carefully separate them. Insert the cookie halves into the sides of the turkey body, pressing them gently into the frosting. Angle them slightly upward for a realistic wing position.
Use pretzel sticks to create bones protruding from the drumsticks if desired. Push a white chocolate-dipped pretzel into the top of each ice cream cone for an extra detailed look.
Create a face at the front of the turkey by adding candy eyes and fashioning a wattle from red fruit leather or fondant. Get creative here—some bakers add candy corn for a beak or use additional frosting details for personality.
Final Presentation
Step back and assess your creation. Add any final decorative touches—perhaps some fresh herbs like rosemary around the base to mimic a garnished turkey platter, or place the turkey on a bed of crushed graham crackers to represent stuffing.
Your Thanksgiving cake turkey is now ready to be the star of your dessert table! Keep it refrigerated until about 30 minutes before serving to allow the frosting to soften slightly for easier slicing.
What to Serve Thanksgiving Cake Turkey With
This show-stopping dessert pairs beautifully with classic Thanksgiving beverages and sides. Serve it alongside hot apple cider, spiced coffee, or a dessert wine like late-harvest Riesling. The sweetness of the cake complements these drinks perfectly.
For a complete dessert spread, consider adding our Classic Pumpkin Pie or Pecan Pie Bars to give guests variety. The Thanksgiving cake turkey can also be served with vanilla ice cream or fresh whipped cream on the side for those who love an extra indulgent treat.
If you’re creating a dessert buffet, include some lighter options like fresh fruit salad or cranberry sorbet to balance the richness of the cake. The turkey cake becomes the centerpiece while other desserts play supporting roles.
Top Tips for Perfecting Thanksgiving Cake Turkey
Choose the Right Cake Flavor
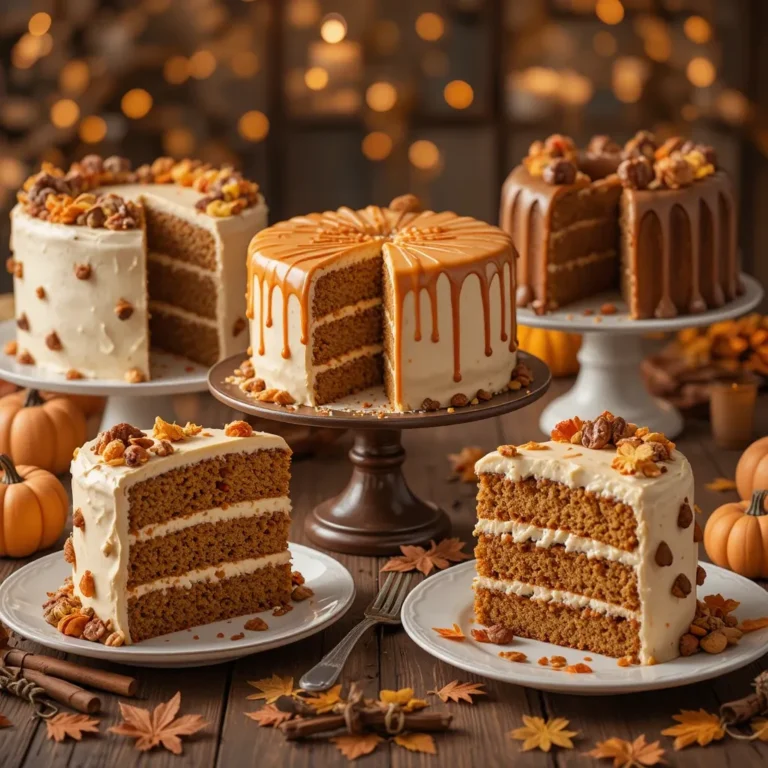
While vanilla and chocolate are classics, don’t be afraid to experiment with fall-inspired flavors. Spice cake, carrot cake, or even pumpkin cake work wonderfully as the base. The buttercream coating will hide the cake’s color, so you have complete freedom with your flavor choice. Just ensure your cake is sturdy enough to hold its shape when carved.
Master the Frosting Consistency
The buttercream consistency makes or breaks this project. If it’s too soft, it will slide off the curved cake surface. If it’s too stiff, it will tear the cake as you spread it. Test your frosting by spreading a small amount on a plate—it should glide smoothly without being runny. If needed, add more powdered sugar to thicken or more cream to thin.
Keep Everything Cool
Work in a cool kitchen when possible. If your space is warm, the buttercream will soften too quickly, making decorating difficult. Keep the cake refrigerated between decorating steps, and don’t hesitate to chill your frosting for 10 minutes if it starts to get too soft while you’re working.
Create Texture for Realism
Real turkey skin isn’t perfectly smooth, and neither should your cake be. Use a small offset spatula or the back of a spoon to create subtle texture in the frosting. You can also use a fork to gently create small indentations that mimic the texture of cooked poultry. These small details elevate the realistic appearance.
Prep Components in Advance
Make your life easier by preparing elements ahead of time. Bake the cake layers a day in advance, wrap them tightly in plastic wrap, and refrigerate. You can also make the buttercream frosting up to three days ahead and store it in an airtight container in the refrigerator. Make the chocolate drumsticks the day before and store them in a cool, dry place.
Use Quality Food Coloring
Gel food coloring is essential for achieving the right turkey color without making your frosting too thin. Liquid food coloring adds too much moisture and won’t give you the rich, golden-brown hue you need. Invest in good quality gel colors—a little goes a long way, and they’re worth the cost.
Support the Structure
If you’re worried about the cake layers shifting, insert a few wooden dowels or thick straws through the center of the stacked cake before frosting. This provides internal support and ensures your turkey keeps its shape throughout the celebration. Cut the supports flush with the top of the cake so they’re hidden beneath the frosting.
Storing and Reheating Tips
Proper Storage Methods
Store your Thanksgiving cake turkey in the refrigerator due to the buttercream frosting. Cover it loosely with plastic wrap or place it under a large cake dome to protect it from absorbing refrigerator odors. The cake will stay fresh for up to 4-5 days when properly refrigerated.
If you need to transport this cake, place it on a sturdy cake board and keep it in a cool vehicle. Avoid leaving it in a hot car, as the frosting will begin to melt within minutes. If possible, transport it in a flat box or container that provides protection without touching the decorated surface.
Freezing Instructions
You can freeze this cake for up to one month if you want to prepare it well in advance. First, freeze the decorated cake uncovered for about 2 hours until the frosting is firm. Then wrap it carefully in several layers of plastic wrap, followed by aluminum foil. This double wrapping prevents freezer burn and protects the decoration.
To thaw, remove the cake from the freezer and place it in the refrigerator overnight, still wrapped. This slow thawing process prevents condensation from forming on the frosting. Remove the wrapping only after the cake has fully thawed to maintain the best appearance.
Serving Tips
Remove the cake from the refrigerator 30 minutes before serving. This allows the buttercream to soften slightly, making it easier to slice and more enjoyable to eat. The cake tastes best at room temperature when the flavors are fully developed and the texture is at its softest.
When cutting, use a long, sharp knife and wipe it clean between slices for neat presentation. The cake layers may be different heights due to the shaping, so adjust your slicing accordingly to ensure everyone gets a good portion.
Frequently Asked Questions
How far in advance can I make a Thanksgiving cake turkey?
You can bake the cake layers up to 2 days in advance and store them wrapped tightly in plastic wrap at room temperature or refrigerated. The decorated cake can be completed 1-2 days before serving and stored in the refrigerator. Make the chocolate drumsticks up to 3 days ahead and store them in an airtight container in a cool place.
What’s the best cake flavor to use for this recipe?
Classic vanilla or chocolate cake works perfectly, but spice cake, carrot cake, pumpkin cake, or butter cake are all excellent fall-inspired options. Choose a cake that’s sturdy enough to hold its shape when carved. Avoid extremely delicate cakes like angel food cake, which may crumble too easily during shaping.
Can I use store-bought frosting instead of homemade?
While homemade buttercream gives the best flavor and texture, you can use store-bought frosting in a pinch. You’ll need approximately 3-4 containers of frosting. However, store-bought frosting is often softer and may be harder to work with when creating the turkey skin texture. Consider mixing in additional powdered sugar to achieve a more stable consistency.
How do I get the perfect turkey skin color?
Start with a base of brown gel food coloring, then add a tiny amount of orange to warm it up. The color should resemble golden-brown roasted turkey. Mix the coloring into your frosting gradually—it’s easier to add more than to lighten an over-colored batch. Test the color on a small plate before applying it to the entire cake.
What if my cake crumbles when I’m carving it?
Ensure your cake is completely cooled before carving, as warm cake crumbles more easily. Work with a sharp serrated knife and use gentle sawing motions rather than pressing down hard. If some crumbling occurs, don’t worry—the crumb coat will seal everything in. Save the crumbs to use as “stuffing” for presentation.
Can I make this cake dairy-free or gluten-free?
Yes! Use your favorite dairy-free cake recipe and substitute the buttercream with dairy-free butter alternatives. For gluten-free versions, use a gluten-free cake mix or recipe. The decoration techniques remain exactly the same regardless of dietary modifications.
How do I transport this cake without ruining the decoration?
Place the finished cake on a sturdy cake board or thick cardboard base. If possible, keep it in a large flat box or cake carrier. Transport in a cool vehicle and avoid sudden stops or sharp turns. You can also insert long wooden skewers through the drumsticks into the cake body for extra security during transport, then remove them before serving.
What should I do if the buttercream gets too soft while decorating?
Place the frosting in the refrigerator for 10-15 minutes to firm it up. If you’re in the middle of decorating and the frosting on the cake starts to slide, refrigerate the entire cake for 15-20 minutes before continuing. Working in a cool kitchen helps prevent this issue.
Can I use fondant instead of buttercream?
Absolutely! Fondant gives an even smoother appearance and can be easier to color to achieve that perfect turkey skin tone. Color your fondant to the desired shade, roll it out, and drape it over your carved cake. Fondant also holds up better in warm environments and doesn’t require refrigeration.
How many people does this cake serve?
This Thanksgiving cake turkey serves approximately 12-16 people, depending on slice size. If you need to feed a larger crowd, you can make two cakes or increase the size by using larger cake pans and adjusting the recipe accordingly.
Nutrition Information
| Nutrient | Per Serving (1/14 of cake) |
|---|---|
| Calories | 520 |
| Total Fat | 24g |
| Saturated Fat | 15g |
| Cholesterol | 85mg |
| Sodium | 280mg |
| Total Carbohydrates | 73g |
| Dietary Fiber | 1g |
| Sugars | 58g |
| Protein | 4g |
Note: Nutrition information is approximate and will vary based on specific ingredients and cake flavor used.
Final Thoughts: Make Your Thanksgiving Unforgettable
This Thanksgiving cake turkey is more than just a dessert—it’s a memory maker. The laughter and surprise when you reveal that the “turkey” is actually cake will become part of your family’s holiday traditions.
The beauty of this recipe lies in its combination of creativity and simplicity. Yes, it looks incredibly impressive, but the techniques are straightforward enough for any home baker to master. You don’t need professional pastry skills or fancy equipment—just patience, enthusiasm, and a willingness to have fun with your food.
As you gather around the table this Thanksgiving, this whimsical dessert reminds us that holidays are about joy, creativity, and bringing people together. It’s about creating moments that make everyone smile, take photos, and say, “Remember that year when…”
So grab your mixing bowls, preheat that oven, and get ready to create something truly special. Your Thanksgiving cake turkey awaits, ready to become the talk of the holiday season. Happy baking, and may your Thanksgiving be filled with laughter, love, and plenty of delicious cake!
Don’t forget to share your Thanksgiving cake turkey creations on social media and tag us—we’d love to see your edible masterpieces! And if you loved this recipe, be sure to check out our other holiday dessert ideas for more inspiration.