Easy Thanksgiving Cake with Fondant – Perfect Holiday Recipe
Bake a Thanksgiving Cake with Fondant that’s both delicious and eye-catching — perfect for family gatherings or holiday dinner parties.
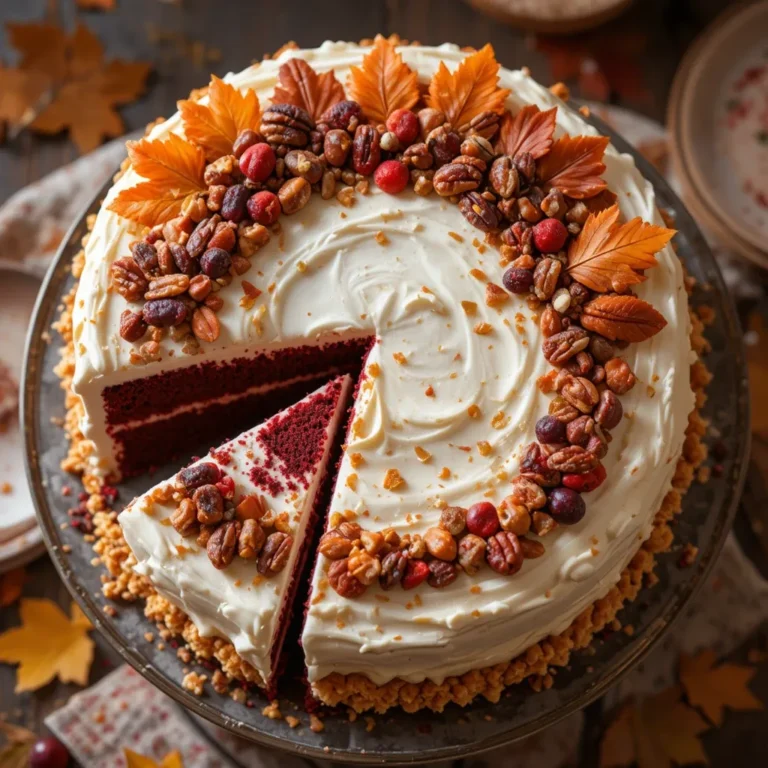
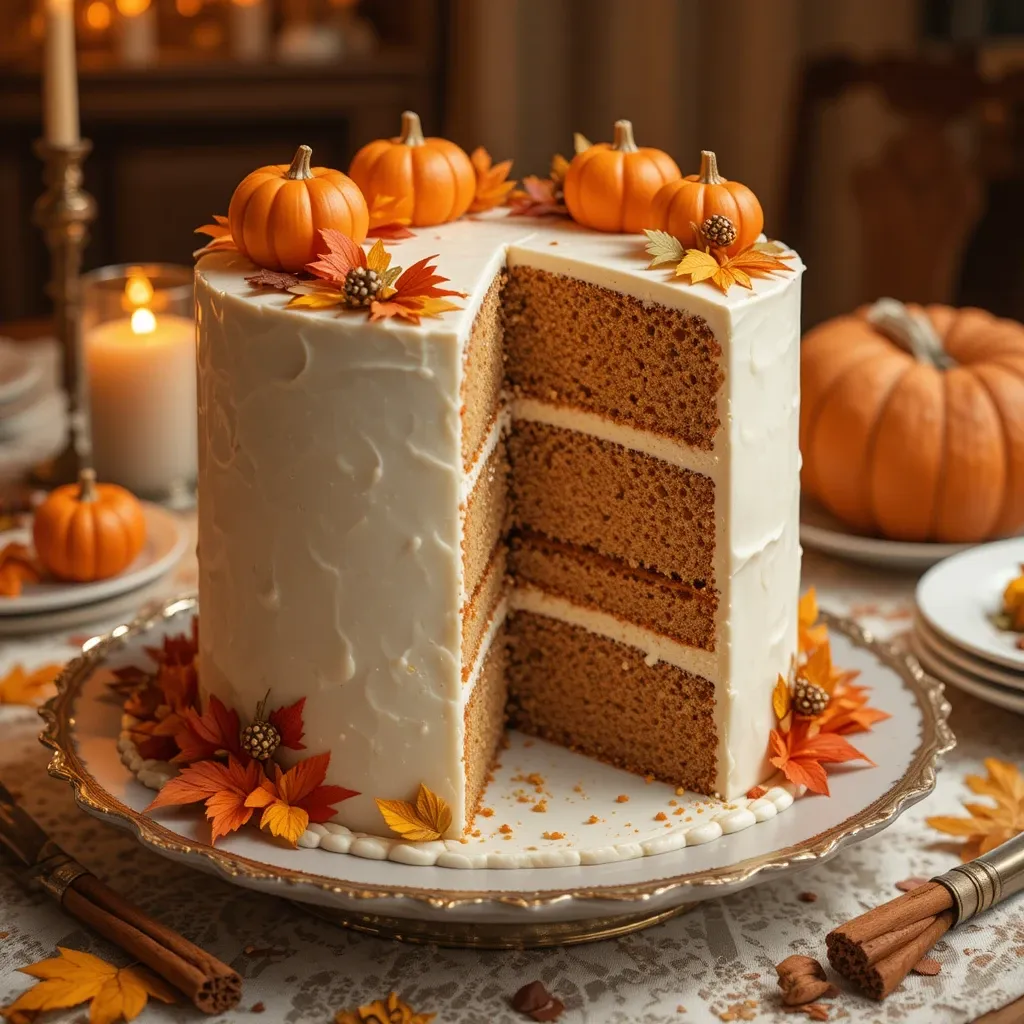
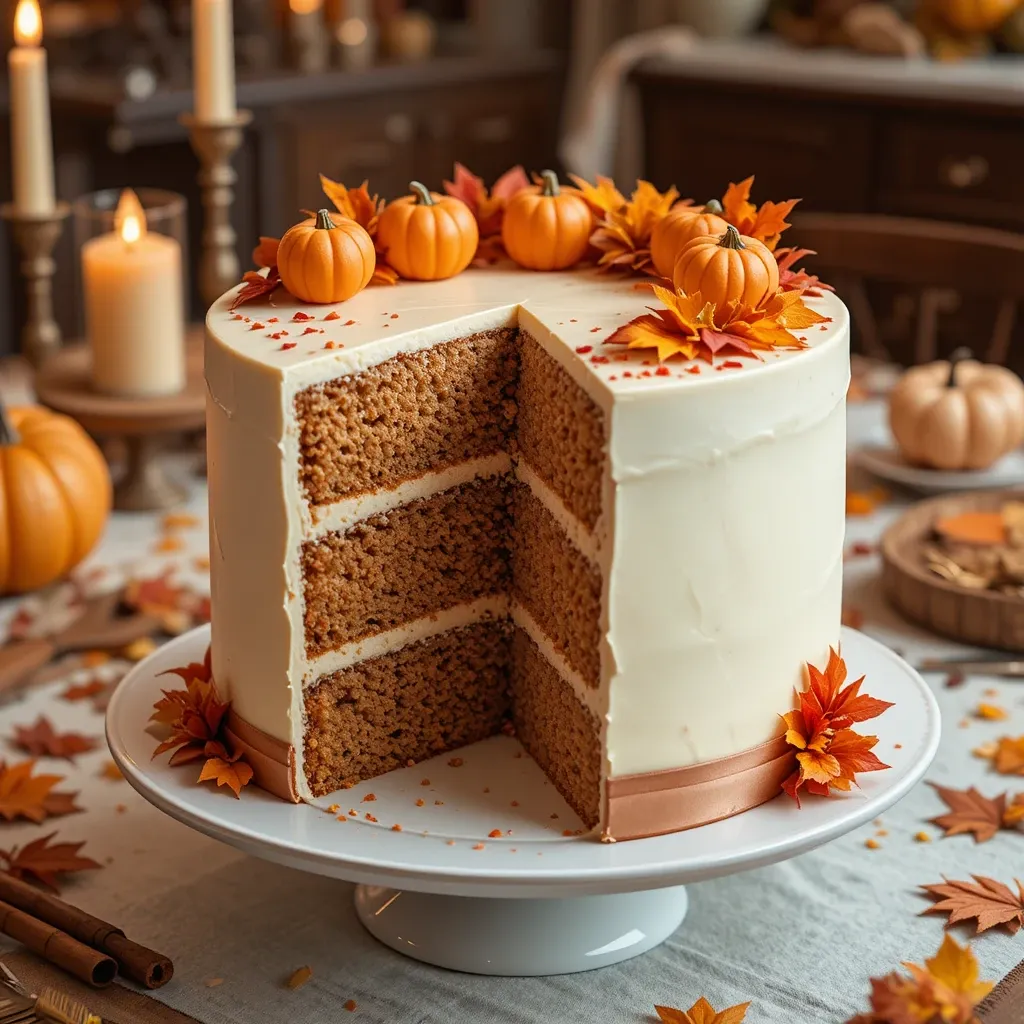
Picture this: your family gathered around the dinner table, and you unveil a breathtaking thanksgiving cake with fondant that looks like it came straight from a professional bakery. This gorgeous dessert combines moist spiced cake layers with smooth, elegant fondant decorations that capture the essence of autumn.
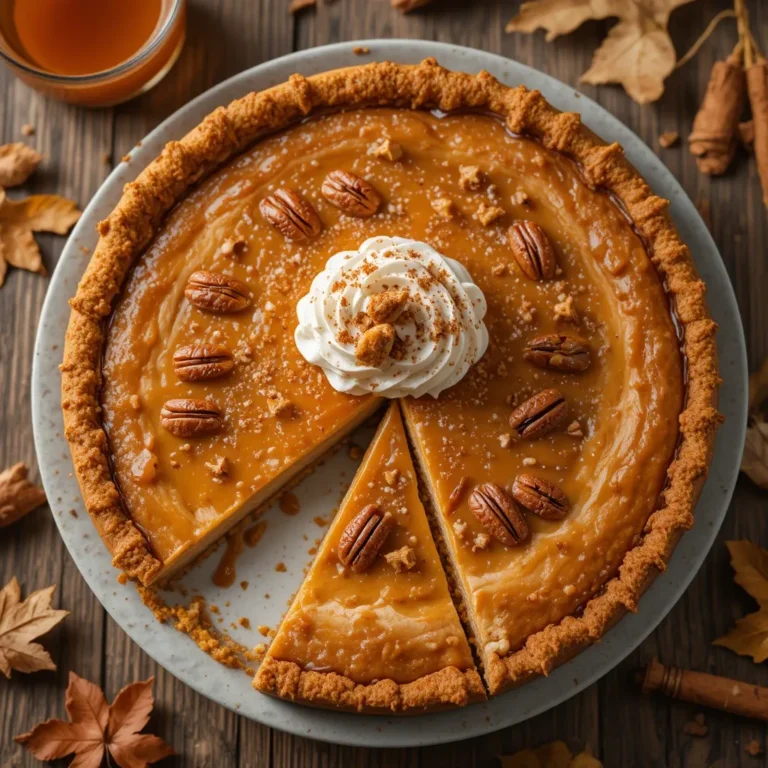
Whether you’re hosting Thanksgiving dinner or attending a potluck, this cake will steal the show. It’s easier to make than you think, requiring just basic baking skills and a little creativity. If you loved our Classic Pumpkin Pie recipe, you’ll absolutely adore this festive showstopper that takes your holiday dessert game to the next level!
What is Thanksgiving Cake with Fondant?
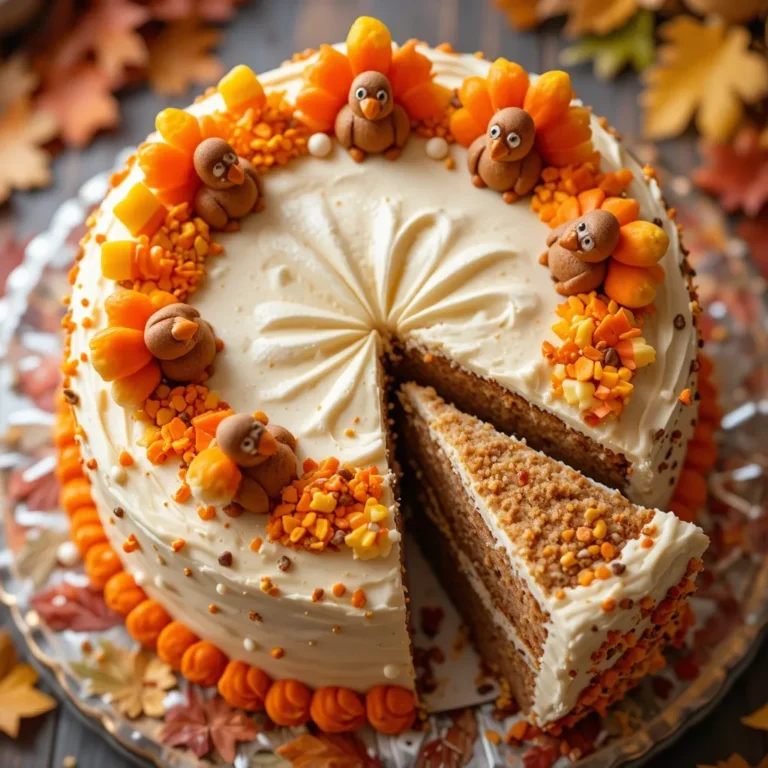
Ever wondered why we go all out decorating cakes for Thanksgiving? A thanksgiving cake with fondant is simply a delicious spiced cake covered in smooth, pliable sugar paste that’s sculpted into beautiful autumn decorations. Think tiny fondant pumpkins, leaves in rich oranges and golds, and maybe even a cute turkey topper!
It’s the edible art project that proves the saying “the way to a man’s heart is through his stomach” – or in this case, through his eyes first! This cake transforms a simple dessert into a conversation starter. Ready to impress your guests and create a memorable centerpiece? Let’s dive in!
Why You’ll Love This Thanksgiving Cake with Fondant
A Stunning Centerpiece That Tastes Amazing
This thanksgiving cake with fondant isn’t just beautiful – it’s delicious! The moist, spiced cake features warm cinnamon, nutmeg, and ginger that create those cozy autumn flavors everyone craves. The smooth fondant provides a perfect canvas for creative decorations while adding a sweet, vanilla note that complements the spiced cake perfectly.
Budget-Friendly Bakery-Style Results
Why spend $75-150 on a custom bakery cake when you can create your own masterpiece for a fraction of the cost? Making this thanksgiving cake with fondant at home costs around $20-30 in ingredients, and you’ll have complete control over flavors, colors, and decorations. Plus, homemade always tastes better!
Customizable to Your Style
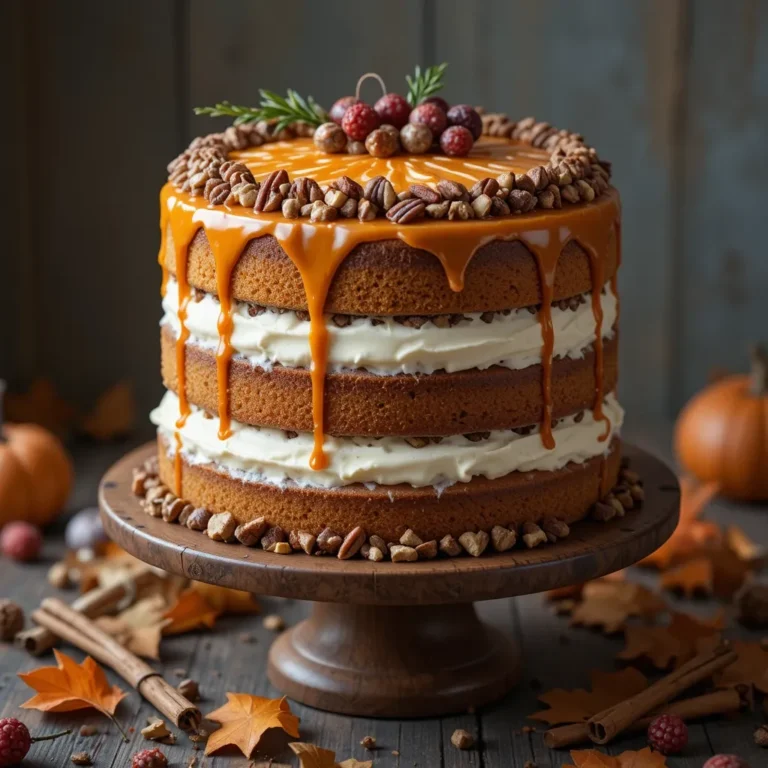
The beauty of working with fondant is endless creativity. Go traditional with autumn leaves and pumpkins, or get playful with turkeys and cornucopias. You can match your table decor, incorporate family traditions, or even add personalized messages. Much like our Autumn Sheet Cake recipe, this dessert lets your personality shine through while delivering incredible flavor.
Make-Ahead Friendly
Life gets hectic during the holidays. This cake can be baked and decorated 2-3 days in advance, giving you more time to focus on other dishes. The fondant actually helps seal in moisture, keeping your cake fresh and flavorful.
Ready to create your own edible centerpiece? Let’s get baking and decorating!
How to Make Thanksgiving Cake with Fondant
Quick Overview
This thanksgiving cake with fondant combines three moist spiced cake layers with smooth buttercream filling and a professional fondant covering. The recipe delivers a stunning dessert that looks complicated but follows straightforward steps.
Time Breakdown:
- Prep Time: 45 minutes
- Baking Time: 30-35 minutes
- Cooling Time: 2 hours
- Decorating Time: 1-2 hours
- Total Time: 4-5 hours (includes cooling)
The result? A gorgeous, Instagram-worthy cake that tastes as good as it looks!
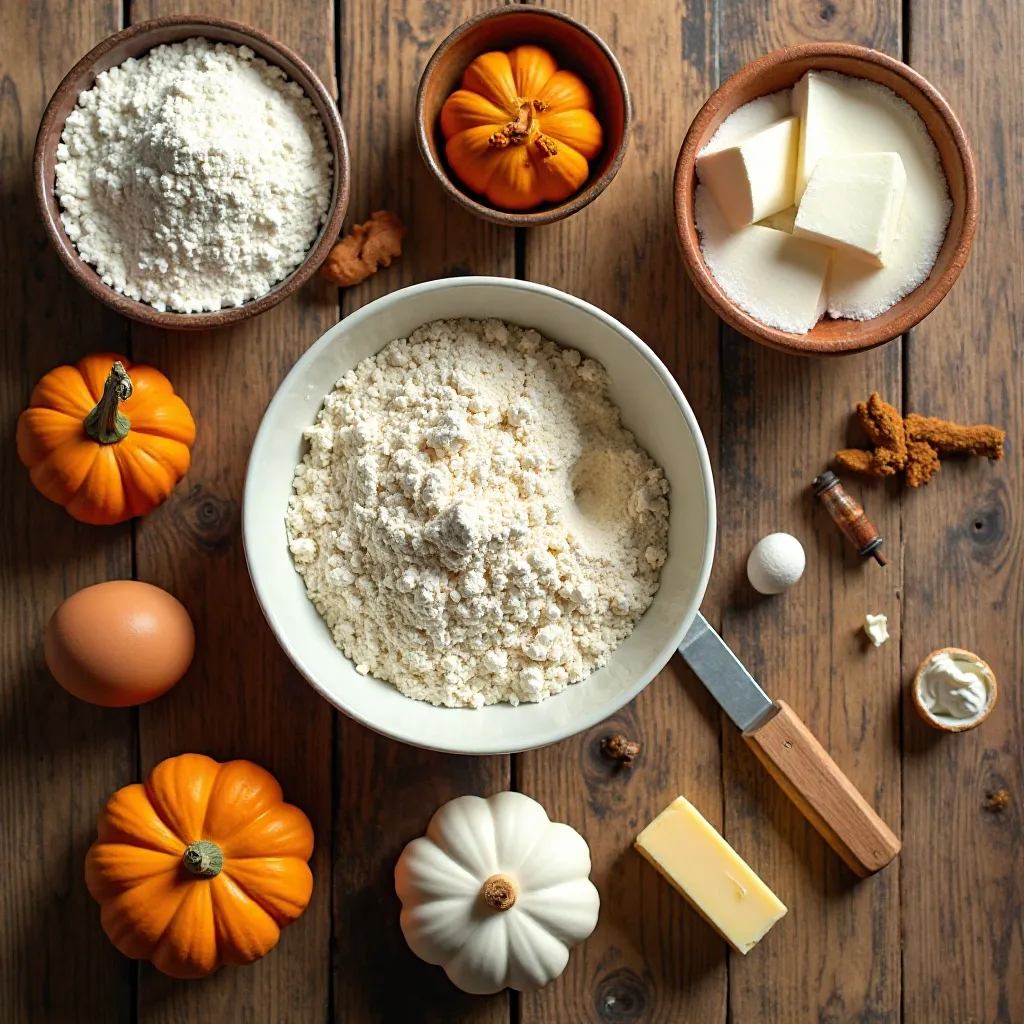
Key Ingredients for Thanksgiving Cake with Fondant
For the Spiced Cake:
- 3 cups all-purpose flour
- 2 cups granulated sugar
- 1 cup vegetable oil
- 4 large eggs (room temperature)
- 1 cup buttermilk (room temperature)
- 1 cup pumpkin puree (not pumpkin pie filling)
- 2 teaspoons baking powder
- 1 teaspoon baking soda
- 1 teaspoon salt
- 2 teaspoons ground cinnamon
- 1 teaspoon ground ginger
- 1/2 teaspoon ground nutmeg
- 1/4 teaspoon ground cloves
- 2 teaspoons vanilla extract
For the Buttercream:
- 2 cups unsalted butter (softened)
- 8 cups powdered sugar
- 1/4 cup heavy cream
- 2 teaspoons vanilla extract
- Pinch of salt
For Fondant Covering and Decorations:
- 3-4 pounds white fondant (store-bought or homemade)
- Gel food coloring (orange, brown, red, yellow, green)
- Powdered sugar (for dusting)
- Cornstarch (for rolling)
- Shortening (for smoothing)
Additional Supplies:
- Three 8-inch round cake pans
- Rolling pin
- Fondant smoother
- Small sculpting tools
- Leaf and pumpkin cutters (optional)
- Cake turntable
- Cake board
Step-by-Step Instructions
Preparing the Cake Layers
Preheat your oven to 350°F (175°C). Grease three 8-inch round cake pans with butter or cooking spray, then line the bottoms with parchment paper. This ensures your cakes release perfectly every time.
In a large mixing bowl, whisk together flour, baking powder, baking soda, salt, cinnamon, ginger, nutmeg, and cloves. Set this dry mixture aside. The spices will fill your kitchen with the most amazing autumn aroma!
In another large bowl, beat together the sugar and oil using an electric mixer on medium speed for about 2 minutes. Add eggs one at a time, beating well after each addition. The mixture should become light and fluffy.
Mix in the pumpkin puree and vanilla extract until fully combined. Don’t worry if it looks a bit separated – that’s normal!
Combining Wet and Dry Ingredients
Alternate adding the dry ingredients and buttermilk to the wet mixture, starting and ending with the dry ingredients. Add in three portions of dry and two portions of buttermilk. Mix on low speed just until combined after each addition. Be careful not to overmix, as this can make the cake tough.
Divide the batter evenly among your three prepared pans. Each pan should be about two-thirds full. Gently tap the pans on the counter a few times to release any air bubbles.
Baking the Cakes
Bake for 30-35 minutes, or until a toothpick inserted in the center comes out clean and the tops spring back when lightly touched. The cakes should pull slightly away from the sides of the pans.
Let the cakes cool in their pans for 15 minutes. This prevents them from breaking when you turn them out. Run a knife around the edges, then invert onto cooling racks. Remove the parchment paper and let the cakes cool completely – this is crucial! Warm cakes will melt your buttercream and make fondant work impossible.
Making the Buttercream
While the cakes cool, prepare your buttercream. Beat the softened butter with an electric mixer on medium-high speed for 3-4 minutes until light and fluffy. It should look almost white and have doubled in volume.
Reduce speed to low and gradually add the powdered sugar, one cup at a time. Once all the sugar is incorporated, add the vanilla, salt, and heavy cream. Increase speed to medium-high and beat for another 3-4 minutes. The buttercream should be smooth, fluffy, and spreadable. If it’s too thick, add more cream one tablespoon at a time.
Assembling the Cake
Level your cake layers using a serrated knife or cake leveler if they domed during baking. Flat layers create a more professional look and make fondant application easier.
Place your first cake layer on a cake board or serving plate. Spread about 3/4 cup of buttercream evenly over the top, leaving a small border around the edge. Add the second layer and repeat. Place the third layer on top.
Apply a thin “crumb coat” of buttercream over the entire cake – top and sides. This seals in crumbs so they don’t show through your fondant. Use an offset spatula and work in smooth, even strokes. Don’t worry about perfection here; you just want a thin, even layer.
Refrigerate the cake for 30-60 minutes until the crumb coat is firm to the touch. This is a critical step that makes fondant application much easier!
Applying the Final Buttercream Layer
Once the crumb coat is set, apply a thicker layer of buttercream over the entire cake. Use about 2 cups total. Smooth it as much as possible with your offset spatula or a bench scraper. The smoother your buttercream, the better your fondant will look.
Refrigerate again for 15-20 minutes. The buttercream should be firm but not rock-hard – cold enough that your finger leaves only a light impression when you touch it gently.
Preparing and Rolling the Fondant
Knead your fondant until it’s soft and pliable. If you’re coloring it, add gel food coloring a little at a time and knead until the color is even. For a base coat, many people prefer ivory, cream, or light tan colors that complement autumn decorations.
Dust your work surface lightly with powdered sugar or cornstarch. Using a rolling pin, roll the fondant out into a circle about 1/4 inch thick. Keep turning the fondant as you roll to maintain a circular shape and prevent sticking. You’ll need a circle about 16-18 inches in diameter to cover an 8-inch cake.
Covering the Cake with Fondant
Carefully lift the fondant using your rolling pin as support – drape it over the pin, then lift and center it over your cake. Gently unroll it so it covers the top and drapes down the sides evenly.
Starting at the top center, use your hands to smooth the fondant outward and down the sides. Work slowly and gently, smoothing out any air bubbles as you go. For stubborn air bubbles, use a clean pin to prick a tiny hole and gently press the air out.
Use a fondant smoother to create a professional finish. Smooth in circular motions on top and vertical strokes on the sides. Trim excess fondant at the base using a pizza cutter or sharp knife, leaving about 1/4 inch below the cake board edge.
Creating Fondant Decorations
Now comes the fun part! Color portions of fondant in autumn shades – orange, brown, red, yellow, and various greens. Keep unused fondant wrapped in plastic to prevent drying.
For Pumpkins: Roll orange fondant into small balls. Use a toothpick or small tool to create vertical lines from top to bottom. Make tiny stems from brown fondant and attach with a dab of water.
For Leaves: Roll out colored fondant thin and cut leaf shapes using cutters or a knife. Use a veining tool or toothpick to draw leaf details. Slightly curve the leaves for dimension.
For Acorns: Create oval shapes with brown fondant for the base. Make caps from textured brown fondant and attach on top.
For Turkeys (if desired): This is more advanced, but so cute! Create a teardrop-shaped brown body, add a small head with a beak and wattle using orange and red fondant. Create tail feathers in various autumn colors and fan them out behind the body.
Let decorations dry for a few hours or overnight before attaching to the cake. This helps them hold their shape better.
Final Assembly and Decoration
Arrange your fondant decorations on the cake using tiny dabs of water or buttercream as “glue.” Start with a plan – sketch it out if needed! You might create a cascade of leaves down one side, cluster pumpkins at the base, or create a seasonal scene on top.
Add finishing touches like gold or bronze luster dust for shimmer, or paint details with diluted food coloring. Get creative and have fun with it!
What to Serve Thanksgiving Cake with Fondant With
This stunning cake pairs beautifully with several accompaniments:
Classic Vanilla Ice Cream: The cold, creamy vanilla contrasts perfectly with the warm spices in the cake. Let it melt slightly into the cake for pure bliss.
Whipped Cream with Cinnamon: Make fresh whipped cream and add a dash of cinnamon. The light, airy texture complements the dense, moist cake.
Hot Apple Cider or Spiced Tea: Serve warm beverages alongside for the ultimate autumn experience. The warm drinks echo the cake’s cozy spice notes.
Salted Caramel Sauce: Drizzle this over individual slices for an extra decadent touch. The salty-sweet combination is irresistible.
Coffee or Espresso: A strong coffee cuts through the sweetness and enhances the warm spices. Perfect for an afternoon dessert service.
Candied Pecans: Sprinkle some around the plate for added crunch and a complementary nutty flavor.
Top Tips for Perfecting Thanksgiving Cake with Fondant
Room Temperature Ingredients Are Essential
Always bring eggs, buttermilk, and butter to room temperature before baking. Cold ingredients don’t mix as well and can result in a dense, uneven cake. Set them out 1-2 hours before you start.
Don’t Skip the Crumb Coat
This thin first layer of buttercream is your secret weapon for a flawless fondant finish. It seals in crumbs and creates a smooth surface. Rushing this step will show in your final result.
Work in a Cool, Dry Environment
Fondant hates humidity! If possible, work in an air-conditioned room, especially during summer. Humid conditions make fondant sticky and difficult to work with. If humidity is unavoidable, use more cornstarch when rolling.
Knead, Knead, Knead
Properly kneaded fondant is pliable and smooth, without cracks. If your fondant cracks when rolling, it’s too dry – knead in a tiny bit of shortening. If it’s sticky, dust with more powdered sugar.
Color Fondant in Advance
Gel food coloring takes time to develop full color intensity. Mix your colors the day before if possible. This also gives the fondant time to rest after the kneading required for coloring.
Substitution Ideas
Can’t find buttermilk? Make your own by adding 1 tablespoon white vinegar or lemon juice to 1 cup milk. Let it sit for 5 minutes.
Don’t have pumpkin puree? Use an equal amount of mashed sweet potato or butternut squash.
Prefer homemade fondant? Make marshmallow fondant using melted marshmallows, powdered sugar, and shortening. It tastes better than store-bought!
Avoid Common Mistakes
Don’t apply fondant to a warm cake – this causes melting and sagging. Your cake and buttercream must be completely chilled.
Don’t roll fondant too thin or too thick. Too thin tears easily; too thick tastes unpleasant and looks clunky. Aim for 1/4 inch consistently.
Don’t use flour for rolling fondant – it can dry out and create a crusty surface. Stick with powdered sugar or cornstarch.
Advanced Decoration Techniques
Use silicone molds to create intricate fondant details quickly. You can find autumn-themed molds for leaves, pumpkins, and more.
Airbrush food coloring creates beautiful gradients and shading on fondant. This gives depth and dimension to your decorations.
Add edible gold leaf or gold luster dust for an elegant, upscale look perfect for formal Thanksgiving dinners.
Create texture using everyday items – press burlap, lace, or textured rolling pins into fondant for interesting patterns.
Storing and Reheating Tips
Storing Your Thanksgiving Cake
Store your completed thanksgiving cake with fondant in a cool, dry place away from direct sunlight. A cake dome or large container works perfectly. The fondant acts as a seal, keeping the cake moist.
At room temperature, the cake stays fresh for 2-3 days. This is ideal since fondant can sweat when refrigerated.
If you must refrigerate (in hot weather or if your filling is perishable), bring the cake to room temperature 2-3 hours before serving. Remove it from the refrigerator while still covered to prevent condensation from forming on the fondant. Once it reaches room temperature, uncover it.
Freezing for Long-Term Storage
You can freeze the cake layers (unfrosted) for up to 3 months. Wrap each layer tightly in plastic wrap, then aluminum foil. Thaw in the refrigerator overnight before decorating.
Completed cakes with fondant can be frozen, but this isn’t recommended. Freezing can cause the fondant to become sticky and lose its smooth finish when thawed.
Make-Ahead Strategy
Bake the cake layers up to 2 days ahead. Wrap them well and keep at room temperature.
Make the buttercream up to 1 week ahead and refrigerate in an airtight container. Bring to room temperature and re-whip before using.
Apply fondant and create decorations 1-2 days before your event. This actually allows the cake to settle and flavors to meld beautifully.
Serving Leftovers
Leftover cake can be stored in an airtight container at room temperature for 3-4 days. The fondant may become slightly softer over time, but the cake remains delicious.
Individual slices can be wrapped in plastic wrap and frozen for up to 1 month. Thaw at room temperature for 2-3 hours.
If the cake becomes slightly dry, warm individual slices for 10-15 seconds in the microwave. This revives moisture and enhances the spices.
Frequently Asked Questions
Can I use store-bought fondant or should I make my own?
Store-bought fondant from brands like Satin Ice or Wilton works perfectly for this cake and saves significant time. However, homemade marshmallow fondant tastes much better – it’s less sweet and has a pleasant vanilla flavor. If taste is your priority and you have extra time, make your own. For appearance and ease, store-bought is excellent.
How do I prevent my fondant from cracking?
Fondant cracks when it’s too dry or rolled too thin. Knead it thoroughly before rolling to warm it up and make it pliable. If it’s very firm, microwave it for 5-10 seconds. Add a small amount of shortening while kneading if it remains dry. Roll to a consistent 1/4-inch thickness. Work quickly and keep unused fondant covered with plastic wrap.
Do I have to use buttercream under the fondant?
Yes! Buttercream acts as “glue” that helps fondant adhere to the cake. It also creates a smooth surface and adds flavor. Some bakers use ganache instead, which is also excellent. Never apply fondant directly to naked cake – it won’t stick properly and the cake will dry out.
Can I make this cake ahead of time?
Absolutely! This cake is actually better when made 1-2 days in advance. The flavors develop and deepen, and the fondant has time to settle. Just store it properly in a cool, dry place. Many professional bakers prefer making fondant cakes ahead because it reduces stress on the day of the event.
What if I don’t have all the spices listed?
You can simplify the spice blend if needed. At minimum, use cinnamon and nutmeg – these provide the essential “warm” autumn flavor. Pumpkin pie spice is an excellent substitute for the entire spice blend. Use 1 tablespoon of pumpkin pie spice in place of all the individual spices listed.
How do I fix air bubbles under the fondant?
If you spot air bubbles while applying fondant, gently lift the fondant near the bubble and smooth the air out toward the nearest edge. For bubbles you notice after the fondant is set, use a clean straight pin to prick a tiny hole, then gently press the air out and smooth with your fondant smoother. The hole will be nearly invisible.
Can I color fondant any color I want?
Yes! Use gel food coloring for best results – liquid coloring can make fondant sticky. Start with a tiny amount of gel color and knead thoroughly. You can always add more, but you can’t remove color. Mix colors to create custom shades. For autumn cakes, focus on oranges, reds, yellows, browns, and various greens.
What’s the best way to transport a fondant-covered cake?
Transport the cake in its box or on its cake board in a cool vehicle. Keep it level and secure it so it won’t slide. Avoid putting it in the trunk where it’s hottest. If traveling more than 30 minutes, consider transporting the cake in a cooler without ice (just for insulation from heat). Never transport in direct sunlight or heat.
How long does fondant take to dry?
Thin decorations like leaves dry in 2-4 hours. Thicker pieces like pumpkins need 4-8 hours or overnight. The fondant covering on your cake never fully “dries” – it remains pliable with a smooth surface. This is normal and correct. Only separate decorations need to dry hard before application.
Can I use this recipe to make cupcakes instead?
Yes! This batter makes about 30-36 cupcakes. Fill cupcake liners two-thirds full and bake at 350°F for 18-22 minutes. Top with buttercream frosting and smaller fondant decorations. Mini fondant pumpkins and leaves look adorable on cupcakes!
Nutrition Information
| Nutrient | Per Slice (1/12 of cake) |
|---|---|
| Calories | 580 |
| Total Fat | 28g |
| Saturated Fat | 13g |
| Cholesterol | 110mg |
| Sodium | 320mg |
| Total Carbohydrates | 78g |
| Dietary Fiber | 1g |
| Sugars | 62g |
| Protein | 5g |
Note: Nutrition information is approximate and includes cake, buttercream, and fondant.
Additional Tips for Success
Planning Your Design
Before you start decorating, sketch your design on paper. This helps you visualize placement and decide how much fondant of each color you’ll need. Take inspiration from autumn scenes, your table decorations, or Pinterest boards. Planning prevents waste and ensures a cohesive look.
Tools That Make a Difference
Invest in a few basic tools for better results: a ball tool for shaping, a veining tool for leaf details, letter and number cutters for personalization, and a good fondant smoother. These inexpensive tools dramatically improve your finished product.
Food Safety Considerations
Fondant-covered cakes contain buttercream, which is perishable. If your dining room is very warm (above 75°F), don’t leave the cake out for more than 2-3 hours. In cooler environments, it’s safe at room temperature for 4-6 hours. When in doubt, serve sooner rather than later.
Making It Kid-Friendly
Get children involved in creating fondant decorations! They can roll balls for pumpkins, press patterns into leaves, or create simple shapes. This turns cake decorating into a fun family activity and creates wonderful memories.
Dietary Modifications
For a lighter version, substitute half the oil with unsweetened applesauce. The cake will be slightly less moist but still delicious and lower in fat.
For egg-free, use commercial egg replacer or flax eggs (1 tablespoon ground flaxseed mixed with 3 tablespoons water per egg).
Gluten-free flour blends work well in this recipe. Use a 1:1 baking blend and add 1/2 teaspoon xanthan gum if your blend doesn’t contain it.
Troubleshooting Common Issues
Fondant is tearing: It’s rolled too thin or too dry. Knead in a small amount of shortening and roll slightly thicker.
Cake is doming excessively: Your oven temperature may be too high. Use an oven thermometer to verify accuracy. Also, try using cake strips around your pans.
Buttercream is too soft: It needs more powdered sugar or the butter was too soft. Refrigerate for 15 minutes, then re-whip.
Colors are bleeding: You used too much gel color or the fondant is too fresh. Let colored fondant rest overnight before using it near white fondant.
Professional Finishing Touches
Edge the cake board with a coordinating ribbon secured with double-sided tape. This creates a polished, bakery-style presentation.
Dust finished decorations with luster dust in coordinating colors for subtle shimmer.
Add fresh herbs like rosemary or sage around the cake base for a natural, elegant look.
Create a simple name plaque or “Give Thanks” message using letter cutters and fondant.
This thanksgiving cake with fondant truly is the ultimate holiday showstopper! With patience, practice, and these detailed instructions, you’ll create a dessert that looks professionally made while tasting infinitely better than anything store-bought. The combination of moist, spiced cake with smooth fondant and adorable autumn decorations makes this recipe perfect for Thanksgiving celebrations.
Remember, fondant work improves with practice. Your first attempt might not be perfect, and that’s completely okay! Each time you work with fondant, you’ll develop better techniques and more confidence. The most important thing is that you’re creating something made with love for the people you care about.
Don’t forget to take lots of photos before serving – this cake is definitely Instagram-worthy! Share your creations with the hashtag #ThanksgivingFondantCake so we can admire your beautiful work.
Ready to start creating? Gather your ingredients, clear your workspace, and prepare to make edible art that will have everyone asking, “Where did you buy that gorgeous cake?” When you tell them you made it yourself, get ready for lots of impressed reactions!