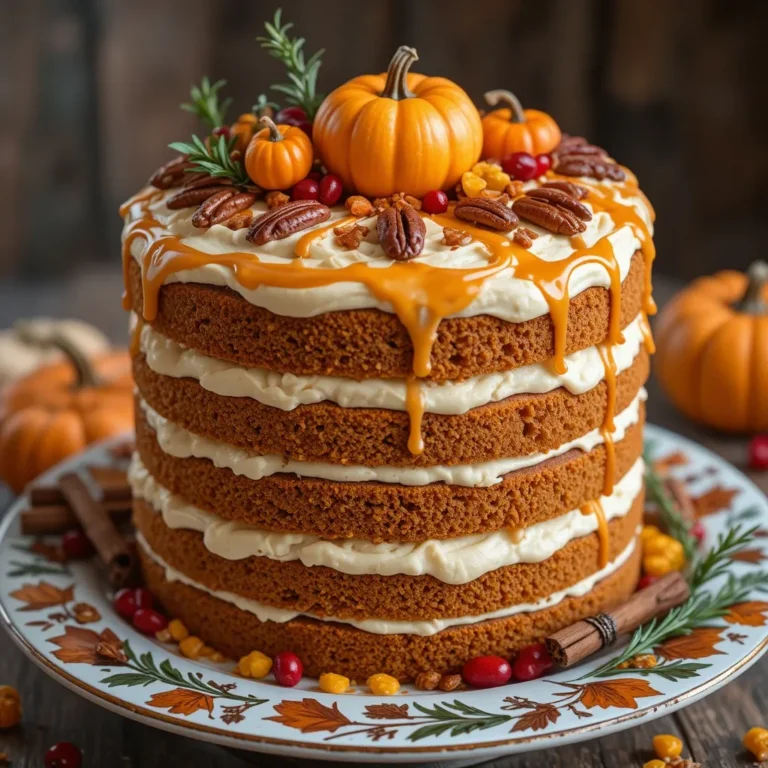
The BEST Thanksgiving Cheesecake Recipe Easier Than You Think
Imagine slicing into a velvety, cream-filled thanksgiving cheesecake that perfectly captures autumn’s warmth in every bite. This showstopping dessert combines the rich, tangy sweetness of classic cheesecake with cozy fall flavors like pumpkin, cinnamon, and nutmeg. Here’s a fun fact: cheesecake dates back to ancient Greece, where it was served to athletes during the first…
Imagine slicing into a velvety, cream-filled thanksgiving cheesecake that perfectly captures autumn’s warmth in every bite. This showstopping dessert combines the rich, tangy sweetness of classic cheesecake with cozy fall flavors like pumpkin, cinnamon, and nutmeg. Here’s a fun fact: cheesecake dates back to ancient Greece, where it was served to athletes during the first Olympic games!
This thanksgiving cheesecake is special because it’s surprisingly simple to make, requiring just 20 minutes of prep time and basic ingredients you likely have in your pantry.
It’s the perfect family-friendly dessert that looks professionally made but doesn’t require pastry chef skills. If you loved our pumpkin pie bars, you’ll absolutely adore this creamy alternative that brings the same autumn flavors in a more elegant presentation.
What is Thanksgiving Cheesecake?
Ever wonder why we call it thanksgiving cheesecake instead of just “fall cheesecake”? Well, this dreamy dessert captures everything we love about the holiday season in one decadent slice! It’s basically taking your favorite creamy cheesecake and giving it a cozy autumn makeover with pumpkin, warm spices, and sometimes a gingersnap crust.
They say the way to a man’s heart is through his stomach, and this thanksgiving cheesecake proves that saying true every single time! It’s the dessert that makes everyone at the table pause mid-conversation for another bite. Ready to become the dessert hero at your next gathering? Let’s get baking!
Why You’ll Love This Thanksgiving Cheesecake
The Perfect Holiday Centerpiece
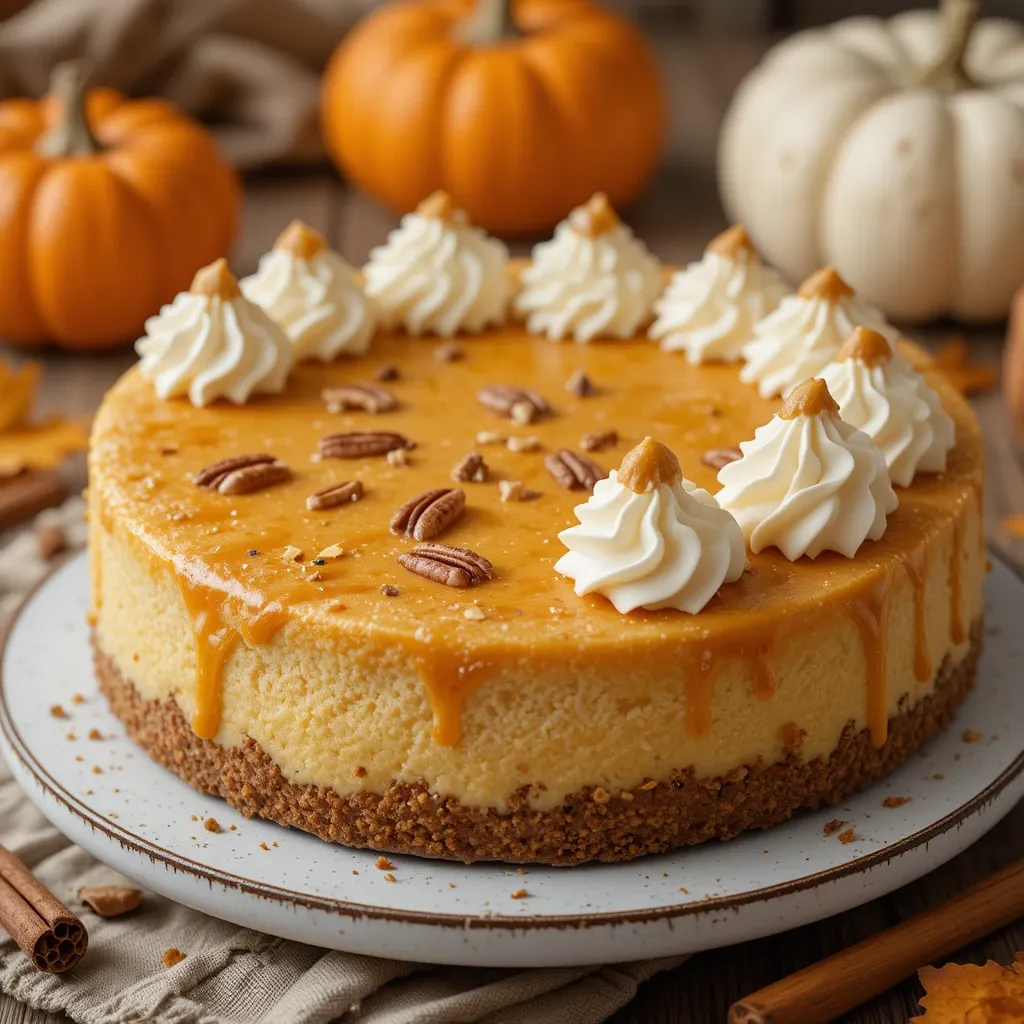
This thanksgiving cheesecake isn’t just dessert—it’s a conversation starter. The moment you place this beauty on your holiday table, with its golden swirled top and perfectly smooth texture, guests will be reaching for their cameras before their forks. The combination of tangy cream cheese and sweet pumpkin creates a flavor profile that’s both familiar and exciting, hitting all those nostalgic fall notes without being overwhelming.
Save Money Without Sacrificing Quality
Ordering a gourmet cheesecake from a bakery can easily cost $40-60, but making this thanksgiving cheesecake at home costs less than $15! You’ll get that same bakery-quality taste and presentation while keeping your holiday budget in check. Plus, you control every ingredient, ensuring the highest quality and freshest flavors. It’s a win-win that lets you splurge on other holiday essentials.
Flavor Combinations That Wow
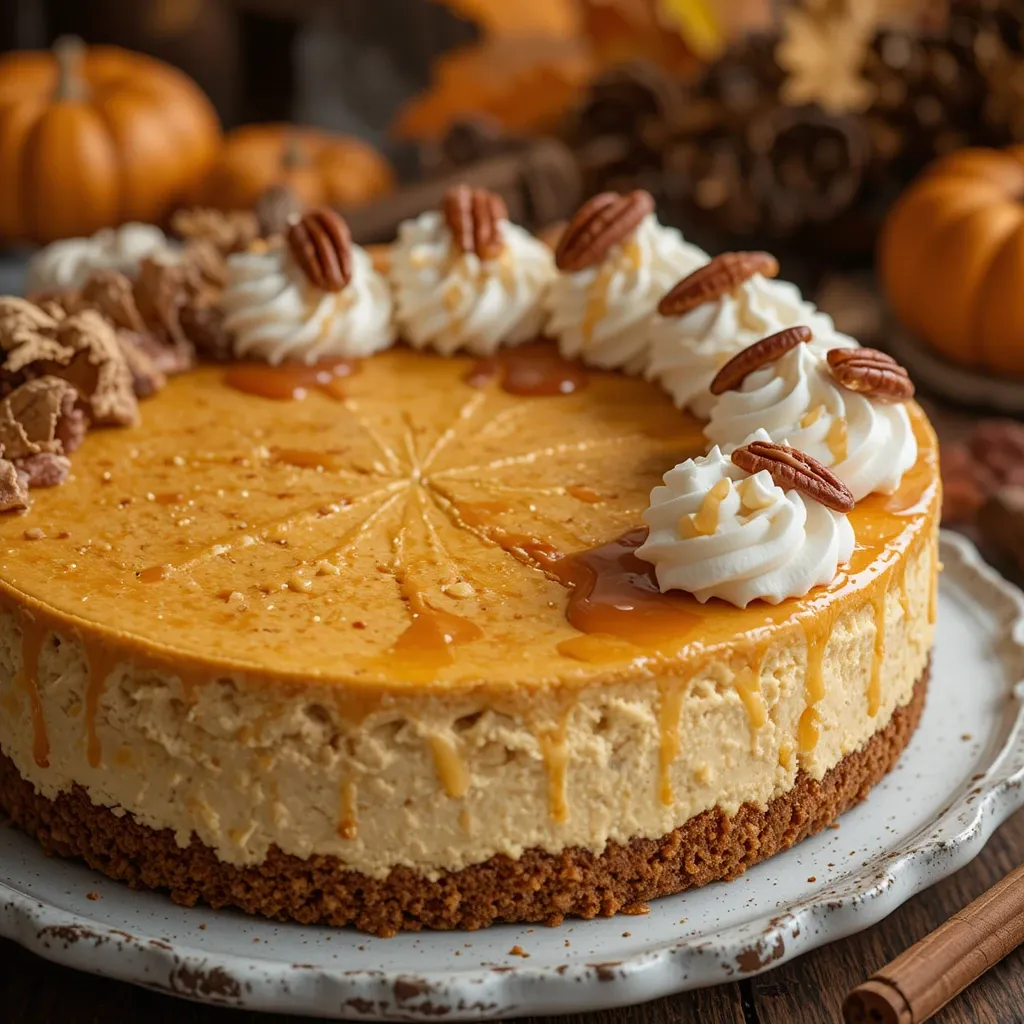
The gingersnap crust adds a spicy-sweet crunch that pairs perfectly with the smooth, creamy filling. Top it with cinnamon whipped cream, candied pecans, or a drizzle of salted caramel sauce for extra indulgence. The subtle pumpkin flavor isn’t overpowering—it’s just enough to remind you of autumn without tasting like you’re eating pumpkin pie.
If you enjoyed our apple crisp cheesecake bars, this full-sized thanksgiving cheesecake takes those flavors to the next level with an even creamier texture and more impressive presentation. Trust me, once you make this at home, you’ll never buy store-bought again!
How to Make Thanksgiving Cheesecake
Quick Overview
This thanksgiving cheesecake is easier than you think! The secret to success is bringing your ingredients to room temperature and not overmixing the batter.
Time Breakdown:
- Prep Time: 20 minutes
- Baking Time: 55-65 minutes
- Cooling Time: 4-6 hours (or overnight)
- Total Time: 5-7 hours
You’ll create a crispy gingersnap crust, whip up a silky pumpkin-cream cheese filling, and bake it low and slow for that perfect crack-free top. The result? A restaurant-quality thanksgiving cheesecake with a texture so smooth it practically melts on your tongue.
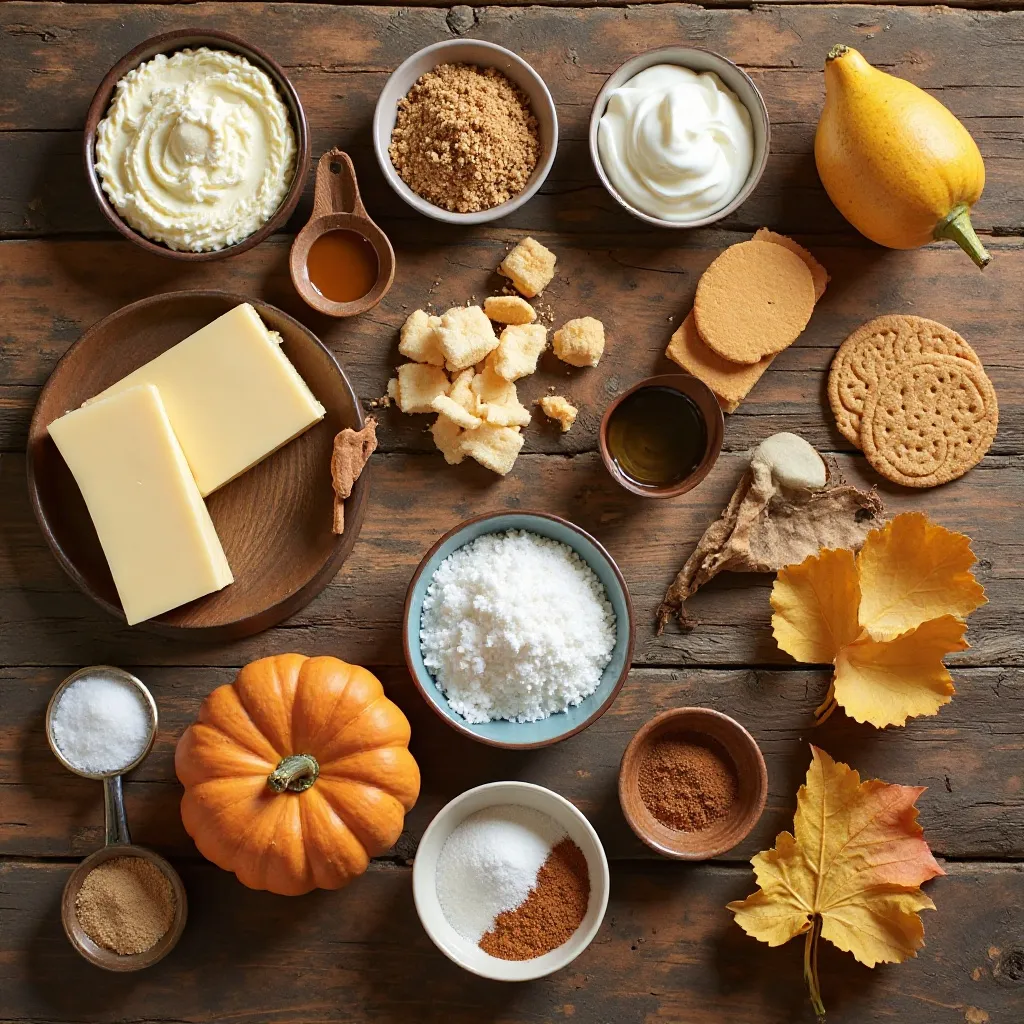
Key Ingredients for Thanksgiving Cheesecake
For the Crust:
- 2 cups gingersnap cookie crumbs (about 30 cookies)
- 1/4 cup granulated sugar
- 6 tablespoons unsalted butter, melted
- 1/4 teaspoon salt
For the Filling:
- 32 ounces (4 packages) cream cheese, softened to room temperature
- 1 cup granulated sugar
- 1/4 cup light brown sugar, packed
- 1 cup pumpkin puree (not pumpkin pie filling)
- 3 large eggs, room temperature
- 1/2 cup sour cream, room temperature
- 1/4 cup heavy cream
- 2 teaspoons vanilla extract
- 1 1/2 teaspoons ground cinnamon
- 1/2 teaspoon ground ginger
- 1/4 teaspoon ground nutmeg
- 1/4 teaspoon ground allspice
- 1/4 teaspoon salt
Optional Toppings:
- Whipped cream
- Candied pecans
- Caramel sauce
- Cinnamon stick garnish
Step-by-Step Instructions
Prepare Your Pan and Preheat
Start by preheating your oven to 325°F (163°C). Wrap the outside of a 9-inch springform pan with two layers of heavy-duty aluminum foil, ensuring it goes up the sides. This prevents water from seeping in during the water bath. Grease the inside of the pan with butter or non-stick spray for easy release later.
Make the Gingersnap Crust
In a medium bowl, combine the gingersnap crumbs, sugar, and salt. Pour in the melted butter and stir with a fork until the mixture resembles wet sand and holds together when pressed. Press the mixture firmly into the bottom of your prepared springform pan, using the bottom of a measuring cup to create an even, compact layer. Bake for 10 minutes, then remove and let cool while you prepare the filling.
Mix the Cream Cheese Base
In a large mixing bowl, beat the softened cream cheese with an electric mixer on medium speed for 2-3 minutes until completely smooth and fluffy with no lumps. Scrape down the sides of the bowl frequently. Add both sugars and beat for another 2 minutes until well combined and creamy. This step is crucial for a smooth, lump-free cheesecake.
Add Pumpkin and Dairy
Mix in the pumpkin puree until fully incorporated, about 1 minute. Add the sour cream, heavy cream, and vanilla extract, beating on low speed just until combined. Don’t overmix at this stage, as too much air can cause cracks. The mixture should be smooth and evenly colored.
Incorporate Spices and Eggs
Add all the spices (cinnamon, ginger, nutmeg, allspice) and salt to the mixture, stirring gently until evenly distributed. Now add the eggs one at a time, beating on low speed after each addition just until the yellow disappears. Overmixing eggs creates too much air, which leads to cracks and a puffy texture. Mix each egg for about 15-20 seconds only.
Pour and Smooth
Pour the filling over the cooled crust, using a spatula to smooth the top in even, circular motions. Tap the pan gently on the counter 3-4 times to release any air bubbles trapped in the batter. This creates a smooth, professional finish.
Create the Water Bath
Place your foil-wrapped springform pan inside a larger roasting pan. Carefully pour hot water into the roasting pan until it reaches about halfway up the sides of the springform pan. The water bath ensures even, gentle heat that prevents cracking and creates that signature creamy texture.
Bake to Perfection
Bake for 55-65 minutes. The cheesecake is done when the edges are set but the center still has a slight wobble (about a 2-3 inch diameter circle in the middle). It should jiggle like jello, not liquid. The internal temperature should read 150°F on an instant-read thermometer. Remember, it will continue cooking as it cools.
Cool Gradually
Turn off the oven and crack the door open about 4 inches. Let the cheesecake sit in the oven for 1 hour as it gradually cools. This prevents sudden temperature changes that cause cracks. After an hour, remove from the oven and water bath, remove the foil, and let cool completely on a wire rack for another 2 hours.
Chill and Serve
Once at room temperature, cover the cheesecake with plastic wrap and refrigerate for at least 4 hours, preferably overnight. This allows the flavors to develop and the texture to set properly. When ready to serve, run a thin knife around the edges before releasing the springform, then slice with a hot, clean knife for perfect slices.
What to Serve Thanksgiving Cheesecake With
This thanksgiving cheesecake is a showstopper on its own, but pairing it with complementary flavors takes it to the next level!
Coffee and Warm Beverages: Serve alongside freshly brewed coffee, spiced chai lattes, or hot apple cider. The warm beverages cut through the richness and enhance the autumn spices.
Fresh Whipped Cream: A dollop of homemade cinnamon whipped cream adds lightness and complements the dense, creamy texture. Simply whip heavy cream with powdered sugar and a pinch of cinnamon until stiff peaks form.
Caramel Drizzle: Warm salted caramel sauce drizzled over each slice adds a sweet-salty dimension that’s absolutely irresistible. You can make your own or use quality store-bought caramel.
Candied Nuts: Toasted candied pecans or walnuts add a delightful crunch that contrasts beautifully with the smooth cheesecake. The buttery, sweet nuts echo the fall theme perfectly.
Vanilla Ice Cream: For an extra indulgent treat, serve a slice with a small scoop of vanilla bean ice cream. The cold-hot contrast creates an amazing textural experience.
Fresh Fruit: Sliced pears, apple compote, or cranberry sauce add a tart, fresh element that balances the richness of the cheesecake.
Top Tips for Perfecting Thanksgiving Cheesecake
Always Use Room Temperature Ingredients
This is the golden rule of cheesecake making! Cold cream cheese creates lumps that no amount of mixing can fix. Leave your cream cheese, eggs, and sour cream on the counter for 1-2 hours before starting. If you’re short on time, microwave the cream cheese in 10-second bursts, checking frequently.
Don’t Overmix the Batter
Once you add the eggs, mix on low speed and only until just combined. Overmixing incorporates too much air, which creates cracks and an uneven texture. Think “gentle folding” rather than “vigorous beating” at this stage.
Master the Water Bath Technique
The water bath (bain-marie) is non-negotiable for a creamy, crack-free thanksgiving cheesecake. Make sure your foil wrapping is secure—double wrapping prevents any water leaks. If you’re nervous about leaks, place the springform pan in an oven-safe bag before adding to the water bath.
Know When It’s Done
The center should still wobble when you gently shake the pan. A perfectly baked cheesecake looks slightly underdone in the middle—it will firm up as it cools. If the entire surface is firm, you’ve likely overbaked it, which can lead to a dry texture.
Prevent Cracks with Gradual Cooling
Sudden temperature changes are the enemy of smooth cheesecake tops. Always let your thanksgiving cheesecake cool gradually in the turned-off oven with the door cracked. This one hour of patience prevents most cracks.
Use Pure Pumpkin Puree
Make sure you’re buying pure pumpkin puree, not pumpkin pie filling which contains added sugars and spices. The plain puree gives you control over the sweetness and spice levels.
Grease Your Pan Well
Even though you’ll be removing the springform sides, a well-greased pan ensures the cheesecake releases cleanly. Pay special attention to the area where the bottom meets the sides.
Slice Like a Pro
For clean, beautiful slices, use a large, thin knife dipped in hot water and wiped dry between each cut. This prevents the filling from sticking to the blade and dragging.
Storing and Reheating Tips
Refrigerator Storage
Cover your thanksgiving cheesecake tightly with plastic wrap or aluminum foil, ensuring no air gaps. Store in the refrigerator for up to 5-7 days. For best results, keep it on the springform base or transfer to a cake plate with a dome cover. The cheesecake actually tastes better after a day or two as the flavors meld together beautifully.
Freezing for Later
This thanksgiving cheesecake freezes wonderfully! For whole cheesecake freezing, wrap tightly in plastic wrap, then aluminum foil, then place in a freezer-safe bag. It will keep for up to 2-3 months. For individual slices, wrap each slice separately and freeze on a baking sheet before transferring to a freezer bag. This prevents them from sticking together.
Thawing Instructions
Transfer frozen cheesecake to the refrigerator 24 hours before serving to thaw slowly. Never thaw at room temperature, as this can affect the texture and create condensation. Individual slices thaw in 4-6 hours in the fridge. Once thawed, don’t refreeze.
Serving Temperature
While thanksgiving cheesecake can be eaten straight from the fridge, letting it sit at room temperature for 20-30 minutes before serving enhances the flavors and creates an even creamier texture. The filling softens slightly, making each bite melt in your mouth.
Reheating (Not Recommended)
Cheesecake is best served cold or at room temperature. Reheating isn’t necessary or recommended, as it can make the texture grainy and cause the filling to separate. If you prefer a slightly softer texture, simply let it come to room temperature naturally.
Frequently Asked Questions
Can I make thanksgiving cheesecake ahead of time?
Absolutely! In fact, cheesecake is one of the best make-ahead desserts. You can prepare it up to 3 days in advance. The flavors actually improve as it sits, making it perfect for holiday meal planning. Just keep it covered and refrigerated until ready to serve.
Why did my thanksgiving cheesecake crack?
Cracks typically occur from overmixing, overbaking, or cooling too quickly. Make sure you mix gently after adding eggs, remove the cheesecake when the center still wobbles, and cool gradually in the turned-off oven. Following the water bath method also significantly reduces cracking. Don’t worry if you do get cracks—top with whipped cream or sauce to cover them!
Can I use a graham cracker crust instead of gingersnap?
Yes! While gingersnap cookies add wonderful spice notes that complement the pumpkin, you can substitute with graham crackers or even vanilla wafer cookies. Use the same measurements: 2 cups of crumbs mixed with 1/4 cup sugar and 6 tablespoons melted butter.
Do I have to use a water bath?
While you can bake cheesecake without a water bath, it significantly increases the risk of cracks and can result in a drier, less creamy texture. The water bath provides gentle, even heat and humidity. If you absolutely can’t use one, place a pan of water on the rack below your cheesecake to add moisture to the oven.
Can I reduce the sugar in this recipe?
You can reduce the sugar by 1/4 cup, but I don’t recommend going lower as it affects both sweetness and texture. The sugar helps create that smooth, creamy consistency. If you want less sweetness, reduce the granulated sugar rather than the brown sugar, which adds moisture and depth.
What’s the difference between pumpkin puree and pumpkin pie filling?
Pumpkin puree is just cooked, mashed pumpkin with nothing added. Pumpkin pie filling contains added sugars, spices, and sometimes thickeners. Always use pure pumpkin puree for this thanksgiving cheesecake so you control the flavor and sweetness levels.
How do I know when my cheesecake is done?
The edges should be set and slightly puffed, while the center (about 2-3 inches in diameter) should still wobble like jello when you gently shake the pan. An instant-read thermometer should read 150°F in the center. Remember, it continues cooking as it cools!
Can I make this thanksgiving cheesecake gluten-free?
Yes! Simply use gluten-free gingersnap cookies or gluten-free graham crackers for the crust. The filling is naturally gluten-free. Make sure to check that your vanilla extract and other ingredients don’t contain gluten additives.
Nutrition Information
| Nutrient | Per Slice (1/12 of cheesecake) |
|---|---|
| Calories | 420 |
| Total Fat | 28g |
| Saturated Fat | 16g |
| Cholesterol | 125mg |
| Sodium | 320mg |
| Total Carbohydrates | 38g |
| Dietary Fiber | 1g |
| Sugars | 28g |
| Protein | 7g |
| Vitamin A | 85% DV |
| Calcium | 10% DV |
| Iron | 8% DV |
Nutritional values are approximate and may vary based on specific ingredients used.
Additional Pro Tips from a Recipe Developer
Flavor Variations to Try
Once you’ve mastered the classic thanksgiving cheesecake, experiment with these delicious variations:
- Add a pecan pie layer by mixing chopped pecans with maple syrup and spreading on the crust before adding filling
- Create a marbled effect by swirling melted chocolate or caramel into the top before baking
- Make it more decadent by adding a layer of cream cheese frosting on top
- Try a chocolate cookie crust for a chocolate-pumpkin combination
Troubleshooting Common Issues
If your cheesecake sinks in the middle, it was likely overbaked. Next time, remove it when it still has that wobble. A sunken center still tastes delicious—just fill with whipped cream!
If the cheesecake sticks to the pan, run a thin knife dipped in hot water around the edges before releasing the spring. Greasing the pan well before adding the crust prevents this issue.
Making Mini Thanksgiving Cheesecakes
Want individual portions? Use this same recipe to make 18-20 mini cheesecakes in a muffin tin with paper liners. Reduce baking time to 20-25 minutes. These are perfect for parties and portion control!
Final Thoughts
This thanksgiving cheesecake brings together everything we love about the holiday season—warm spices, creamy indulgence, and the joy of sharing homemade desserts with loved ones. Whether you’re a seasoned baker or trying cheesecake for the first time, this recipe sets you up for success with detailed instructions and foolproof techniques.
The best part? You can make it days ahead, freeing up your oven and reducing holiday stress. Your guests will be amazed by this bakery-quality dessert, and you’ll love how simple it actually was to create.
So grab your springform pan, let those ingredients come to room temperature, and get ready to make the thanksgiving cheesecake that will become your new holiday tradition. Don’t forget to snap a photo of your beautiful creation and tag us—we love seeing your baking successes!
Happy baking, and Happy Thanksgiving! 🍂
Have you made this thanksgiving cheesecake recipe? Leave a comment below with your experience and any creative variations you tried! We’d love to hear how it turned out for you.