Thanksgiving Chocolate Cupcake Holiday Dessert Everyone Loves
There’s something magical about combining rich, decadent chocolate with the warmth of Thanksgiving traditions. These thanksgiving chocolate cupcakes are moist, fluffy, and topped with silky frosting that melts in your mouth. I’ll never forget the year I brought these to our family gathering—they disappeared faster than the pumpkin pie! What makes them truly special is…
There’s something magical about combining rich, decadent chocolate with the warmth of Thanksgiving traditions. These thanksgiving chocolate cupcakes are moist, fluffy, and topped with silky frosting that melts in your mouth. I’ll never forget the year I brought these to our family gathering—they disappeared faster than the pumpkin pie!
What makes them truly special is how they bring together classic chocolate indulgence with festive fall flavors. They’re surprisingly simple to make, taking just about 30 minutes of prep time, making them perfect for busy holiday schedules when you’re juggling multiple dishes.
What Are Thanksgiving Chocolate Cupcakes?
Ever wonder why we call them thanksgiving chocolate cupcakes instead of just chocolate cupcakes? Well, it’s all about those special seasonal touches that make them holiday-worthy! These aren’t your everyday chocolate treats—they’re dressed up with warm spices, autumn-inspired toppings, and sometimes a hint of pumpkin or cinnamon that screams “holiday season.”
As the old saying goes, “the way to a man’s heart is through his stomach,” and trust me, these festive cupcakes have won over countless hearts at my Thanksgiving table. Ready to become the dessert hero of your holiday gathering?

Why You’ll Love This Thanksgiving Chocolate Cupcake Recipe
The Perfect Holiday Showstopper
The star of this recipe is the incredibly moist chocolate cake base infused with subtle warm spices like cinnamon and nutmeg. The texture is so tender it practically dissolves on your tongue, while the deep chocolate flavor satisfies every sweet tooth at the table. Unlike store-bought options that can taste artificial or overly sweet, these homemade beauties strike the perfect balance between rich and refined.
Budget-Friendly Holiday Baking
Making these thanksgiving chocolate cupcakes at home saves you serious money compared to bakery prices, which can run $4-6 per cupcake during the holidays. With basic pantry staples and a few special ingredients, you’ll create two dozen impressive cupcakes for a fraction of the cost. Plus, you control the quality of every ingredient—no preservatives or mysterious additives here!
Customizable Toppings That Wow
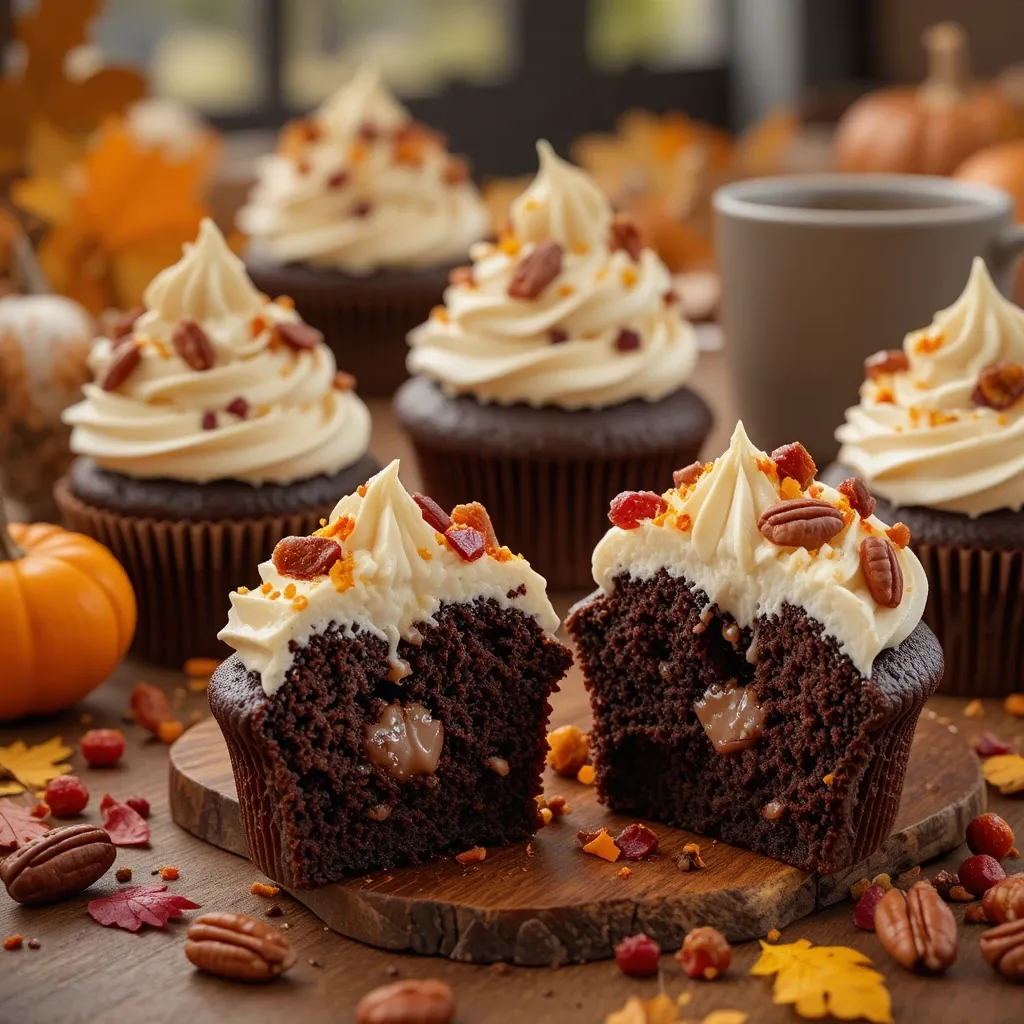
What really sets these apart are the flavorful topping options. From cream cheese frosting swirled with maple syrup to chocolate ganache decorated with sugared cranberries and pecans, the possibilities are endless. The combination of silky frosting, crunchy nuts, and tart cranberries creates an exciting texture and flavor experience in every bite. If you loved my pumpkin spice cupcakes from last fall, you’ll absolutely adore this chocolate variation—they’re like cousins at the dessert table! Don’t wait for Thanksgiving to roll around; grab your mixing bowls and let’s create some cupcake magic together.
How to Make Thanksgiving Chocolate Cupcakes
Quick Overview
These thanksgiving chocolate cupcakes are remarkably easy to whip up, even for beginner bakers. The recipe relies on the simple creaming method, which produces a light, fluffy crumb every single time. What makes them truly special is the addition of coffee, which intensifies the chocolate flavor without making them taste like coffee at all.
The rich, velvety texture comes from using both cocoa powder and melted chocolate. You’ll love how forgiving this recipe is—it’s nearly impossible to mess up!
Timing Breakdown:
- Prep Time: 20 minutes
- Baking Time: 18-20 minutes
- Cooling Time: 30 minutes
- Frosting Time: 15 minutes
- Total Time: About 1 hour 25 minutes
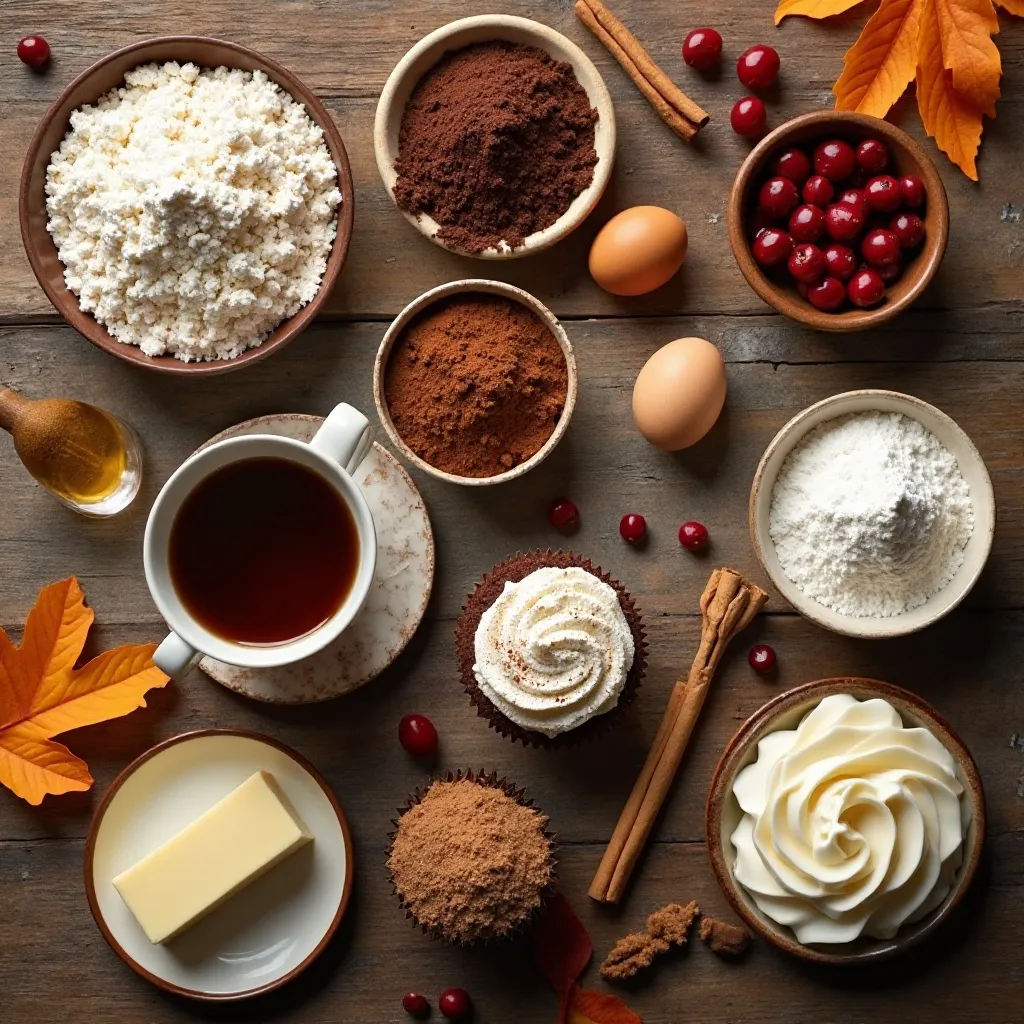
Key Ingredients for Thanksgiving Chocolate Cupcakes
For the Cupcakes:
- 1 ¾ cups all-purpose flour
- 2 cups granulated sugar
- ¾ cup unsweetened cocoa powder (Dutch-process preferred)
- 2 teaspoons baking soda
- 1 teaspoon baking powder
- 1 teaspoon salt
- ½ teaspoon ground cinnamon
- ¼ teaspoon ground nutmeg
- 2 large eggs, room temperature
- 1 cup buttermilk, room temperature
- 1 cup hot brewed coffee (or hot water)
- ½ cup vegetable oil
- 2 teaspoons vanilla extract
For the Cream Cheese Frosting:
- 8 oz cream cheese, softened
- ½ cup unsalted butter, softened
- 4 cups powdered sugar
- 2 tablespoons heavy cream
- 1 teaspoon vanilla extract
- 2 tablespoons maple syrup (optional)
- Pinch of salt
For Decoration:
- Chopped pecans or walnuts
- Sugared cranberries
- Orange zest
- Mini chocolate chips
- Cinnamon stick pieces
Step-by-Step Instructions
Step 1: Prepare Your Kitchen
Preheat your oven to 350°F (175°C). Line two 12-cup muffin tins with paper liners—I always prefer using high-quality liners that won’t peel away from the cupcakes. Brew your coffee and let it cool slightly while you gather the other ingredients. This is also the perfect time to take your eggs, buttermilk, butter, and cream cheese out of the fridge to reach room temperature, which is crucial for a smooth batter.
Step 2: Mix the Dry Ingredients
In a large mixing bowl, whisk together the flour, sugar, cocoa powder, baking soda, baking powder, salt, cinnamon, and nutmeg. Make sure to break up any lumps in the cocoa powder—I like to sift it first for the smoothest results. Whisking for about 30 seconds ensures everything is evenly distributed, which means consistent flavor in every cupcake.
Step 3: Combine the Wet Ingredients
In a separate medium bowl, whisk together the eggs, buttermilk, vegetable oil, and vanilla extract until well combined. The mixture should look smooth and slightly frothy. Room temperature ingredients are key here because they emulsify better, creating a more uniform batter that bakes evenly.
Step 4: Create the Batter
Pour the wet ingredients into the dry ingredients and mix gently with a wooden spoon or rubber spatula until just combined. Don’t overmix—you should still see a few small lumps. Now comes the interesting part: slowly pour in the hot coffee while stirring continuously. The batter will become very thin, almost liquid-like, and this is exactly what you want! This thin consistency is the secret to incredibly moist cupcakes.
Step 5: Fill and Bake
Using a large cookie scoop or ladle, fill each cupcake liner about two-thirds full. This usually comes out to about ¼ cup of batter per cupcake. Place the pans in the preheated oven and bake for 18-20 minutes. They’re done when a toothpick inserted in the center comes out with just a few moist crumbs attached—not wet batter, but not completely clean either. The tops should spring back lightly when touched.
Step 6: Cool Completely
Remove the cupcakes from the oven and let them cool in the pans for 5 minutes. This brief resting period helps them set up properly. Then transfer them to a wire cooling rack and let them cool completely before frosting—this usually takes about 30 minutes. I know it’s tempting to frost them while warm, but trust me, the frosting will melt and slide right off!
Step 7: Make the Cream Cheese Frosting
While the cupcakes cool, beat the softened cream cheese and butter together in a large bowl using an electric mixer on medium speed for about 2-3 minutes until light and fluffy. Gradually add the powdered sugar, one cup at a time, beating well after each addition. Add the heavy cream, vanilla extract, maple syrup (if using), and a pinch of salt. Beat on high speed for another 2-3 minutes until the frosting is smooth, creamy, and holds stiff peaks.
Step 8: Frost and Decorate
Transfer the frosting to a piping bag fitted with your favorite decorative tip—I love using a large star tip for that classic swirl. Pipe generous swirls of frosting onto each completely cooled cupcake, starting from the outside and working your way toward the center. Immediately sprinkle with chopped pecans, place a few sugared cranberries on top, add a light dusting of orange zest, or get creative with your own festive decorations. The options are endless!
What to Serve Thanksgiving Chocolate Cupcakes With
These thanksgiving chocolate cupcakes are versatile enough to stand alone as dessert, but pairing them with complementary items creates an unforgettable experience. Serve them alongside a warm cup of spiced apple cider or hot chocolate with a cinnamon stick for the ultimate cozy autumn treat. The warm beverage cuts through the richness of the chocolate perfectly.
For a more elaborate dessert table, display them with pumpkin pie, pecan tart, or apple crisp to give your guests variety. The chocolate offers a nice contrast to the traditional fruit-based Thanksgiving desserts.
I also love serving these with a scoop of vanilla bean ice cream or a dollop of bourbon-spiked whipped cream on the side. The cold, creamy element balances the dense chocolate cake beautifully. For a coffee bar setup, place them next to freshly brewed espresso or flavored coffees—the chocolate and coffee combination is absolutely divine.
If you’re hosting a more casual gathering, serve them with cold glasses of milk (a hit with the kids!) or even dessert wine for the adults. A Port or late-harvest Riesling complements the chocolate and spice notes wonderfully.
Top Tips for Perfecting Thanksgiving Chocolate Cupcakes
Use Room Temperature Ingredients
This cannot be stressed enough! Room temperature eggs, buttermilk, butter, and cream cheese incorporate much more easily and create a smoother, more cohesive batter and frosting. Cold ingredients can cause the batter to curdle or the frosting to become lumpy. Plan ahead and set everything out about an hour before you start baking.
Don’t Skip the Coffee
Even if you’re not a coffee drinker, don’t substitute it with plain water. The coffee enhances and deepens the chocolate flavor dramatically without making the cupcakes taste like coffee. It’s a baker’s secret weapon! If you absolutely must skip it, use hot water with a tablespoon of espresso powder dissolved in it.
Avoid Overmixing the Batter
Once you combine the wet and dry ingredients, mix only until you no longer see dry flour streaks. Overmixing develops the gluten in the flour, which results in tough, dense cupcakes instead of light, tender ones. A few small lumps in the batter are perfectly fine and will bake out.
Test for Doneness Properly
Every oven is different, so start checking your cupcakes at the 17-minute mark. Insert a toothpick into the center of a cupcake—it should come out with a few moist crumbs clinging to it. If it comes out completely clean, you’ve slightly overbaked them, and they might be a bit dry. If it comes out with wet batter, give them another 2 minutes and test again.
Let Cupcakes Cool Completely Before Frosting
This is crucial! Frosting warm cupcakes causes the frosting to melt, slide off, and create a messy disaster. Be patient and let them cool for the full 30 minutes. If you’re in a rush, you can place them in the refrigerator for about 15 minutes to speed up the cooling process.
Customize the Spices
Feel free to adjust the cinnamon and nutmeg to your taste. Some people love a stronger spice presence that really screams “Thanksgiving,” while others prefer a subtle hint. You can also experiment with adding a pinch of ginger, allspice, or even cardamom for a unique twist.
Make Ahead for Stress-Free Holidays
These cupcakes can be baked a day ahead and stored unfrosted in an airtight container at room temperature. Frost them the morning of your gathering for the freshest presentation. You can also freeze the unfrosted cupcakes for up to 3 months!
Storing and Reheating Tips
Room Temperature Storage
Store frosted thanksgiving chocolate cupcakes in an airtight container at room temperature for up to 2 days. Make sure the container is tall enough that the frosting doesn’t smush against the lid. If you’re stacking them, place parchment paper between layers. They’ll stay moist and delicious, though the frosting may soften slightly.
Refrigerator Storage
Because these cupcakes have cream cheese frosting, I recommend refrigerating them if you’ll be keeping them longer than 2 days. Place them in an airtight container and refrigerate for up to 5 days. Before serving, let them sit at room temperature for about 20-30 minutes to take the chill off—cold cupcakes don’t have as much flavor, and the texture is better when slightly warm.
Freezing for Long-Term Storage
These cupcakes freeze beautifully! For best results, freeze them unfrosted. Wrap each cupcake individually in plastic wrap, then place them all in a freezer-safe bag or container. They’ll keep for up to 3 months. To thaw, remove from the freezer and let them come to room temperature on the counter for about an hour, then frost and decorate as desired.
If you need to freeze already-frosted cupcakes, place them on a baking sheet and freeze until the frosting is solid (about 2 hours), then wrap individually and store in a freezer container. The texture of cream cheese frosting can change slightly after freezing, so unfrosted is always preferred.
Reheating Tips
While cupcakes are typically served at room temperature, if you want to warm them slightly for that fresh-from-the-oven experience, remove any frosting first. Wrap an unfrosted cupcake in a damp paper towel and microwave for 10-15 seconds. Then let it cool for a minute and apply fresh frosting. This trick makes day-old cupcakes taste freshly baked!
Common Baking Mistakes to Avoid
Mistake 1: Overfilling the Cupcake Liners
Filling liners more than two-thirds full causes the batter to overflow during baking, creating mushroom-shaped cupcakes with uneven tops. Stick to the two-thirds rule, which is approximately ¼ cup of batter per liner. A cookie scoop makes portioning easy and consistent.
Mistake 2: Opening the Oven Door Too Early
Resist the urge to peek! Opening the oven door before the 15-minute mark lets heat escape and can cause the cupcakes to sink in the middle. The sudden temperature drop interrupts the rising process. Wait until at least 17 minutes before checking.
Mistake 3: Using Expired Leavening Agents
Baking soda and baking powder lose their potency over time. If your cupcakes don’t rise properly or taste flat, check the expiration dates on these ingredients. To test baking powder, mix a teaspoon with hot water—it should bubble vigorously. For baking soda, mix with vinegar and look for immediate fizzing.
Mistake 4: Not Measuring Flour Correctly
Scooping flour directly with your measuring cup packs it down, giving you more flour than the recipe calls for, which results in dry, dense cupcakes. Instead, use the spoon-and-level method: spoon flour into your measuring cup and level it off with a knife. Even better, weigh your flour if you have a kitchen scale (1 ¾ cups = 210 grams).
Mistake 5: Skipping the Buttermilk
Don’t substitute regular milk for buttermilk unless you make it acidic by adding a tablespoon of lemon juice or vinegar. Buttermilk’s acidity reacts with the baking soda to create lift and tenderness. It also adds a subtle tangy flavor that balances the sweetness perfectly.
Mistake 6: Overmixing the Frosting
While you want your frosting smooth, beating it for too long incorporates too much air, creating a frosting that’s too fluffy and doesn’t hold its shape well. Beat just until smooth and creamy—usually 3-4 minutes total is plenty.
Frequently Asked Questions
Can I make these thanksgiving chocolate cupcakes without buttermilk?
Yes! Make your own buttermilk substitute by adding 1 tablespoon of white vinegar or lemon juice to 1 cup of regular milk. Stir it together and let it sit for 5 minutes until it curdles slightly. This creates the acidity needed for the recipe. You can also use plain yogurt thinned with a bit of milk as another alternative.
Why did my cupcakes sink in the middle?
Cupcakes typically sink for a few reasons: overmixing the batter (which creates too much air that collapses), opening the oven door too early, or underbaking. Make sure your oven temperature is accurate—use an oven thermometer to verify. Also, avoid filling the liners too full, as this causes uneven rising.
Can I use regular cocoa powder instead of Dutch-process?
Absolutely! Regular (natural) cocoa powder will work fine, though it will give you a slightly lighter color and a bit more acidic flavor. Dutch-process cocoa creates a darker, richer chocolate flavor and color, which is why I prefer it for these festive cupcakes. Either works beautifully.
How do I make these cupcakes more “Thanksgiving-themed”?
Beyond the warm spices already in the recipe, you can add ½ cup of pumpkin puree (reduce buttermilk to ¾ cup), fold in mini chocolate chips, or mix a tablespoon of instant espresso powder into the batter. For decoration, use fall colors in your frosting (orange, burgundy, brown), top with maple leaf fondant cutouts, candy pumpkins, or create a turkey design with candy corn and frosting.
Can I make these cupcakes dairy-free?
Yes, with some substitutions! Use a plant-based milk with 1 tablespoon of vinegar instead of buttermilk, replace the butter with vegan butter, and use dairy-free cream cheese for the frosting. The texture might be slightly different, but they’ll still be delicious. Coconut milk (full-fat) creates an especially rich result.
How can I make these cupcakes more moist?
These are already quite moist thanks to the coffee and oil, but you can add an extra tablespoon of vegetable oil or substitute sour cream for half of the buttermilk. Also, be careful not to overbake—remember, the toothpick should come out with moist crumbs, not completely clean. Storing them properly in an airtight container also preserves moisture.
What’s the best way to get smooth frosting?
Make sure your butter and cream cheese are truly softened (not melted!) to room temperature. Beat them together first before adding any sugar. Add powdered sugar gradually, and use the paddle attachment on your mixer rather than the whisk. If your frosting seems too thick, add cream one teaspoon at a time. If it’s too thin, add more powdered sugar or refrigerate for 15 minutes to firm up.
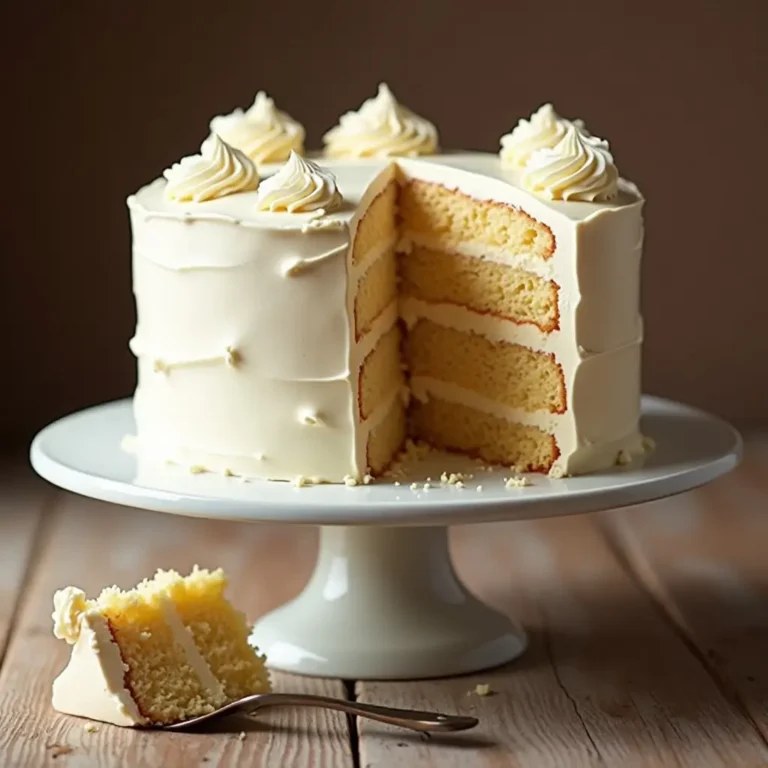
Can I turn this into a Thanksgiving chocolate cake instead?
Definitely! Pour the batter into two greased and floured 9-inch round cake pans. Bake at 350°F for 25-30 minutes or until a toothpick comes out clean. Let cool completely before frosting and stacking. You’ll want to double the frosting recipe to have enough for filling and covering the entire cake.
Nutrition Information
| Nutrient | Per Cupcake (with frosting) |
|---|---|
| Calories | 285 |
| Total Fat | 12g |
| Saturated Fat | 5g |
| Cholesterol | 35mg |
| Sodium | 245mg |
| Total Carbohydrates | 42g |
| Dietary Fiber | 2g |
| Sugars | 32g |
| Protein | 3g |
Note: Nutrition information is approximate and will vary based on specific ingredients and portion sizes used.
Final Thoughts
These thanksgiving chocolate cupcakes have become my go-to holiday dessert for good reason. They’re show-stopping yet surprisingly simple, rich yet not overwhelming, and they please chocolate lovers and traditional Thanksgiving dessert fans alike. I love how they bring something different to the dessert table without straying too far from the holiday spirit.
The best part? Watching everyone reach for seconds and asking for the recipe! There’s nothing quite like seeing your loved ones enjoy something you’ve made from scratch, especially during the holidays when we’re all gathered together creating memories.
Whether you’re hosting Thanksgiving dinner or bringing a contribution to someone else’s table, these cupcakes are guaranteed to impress. The combination of deep chocolate flavor, warm spices, and creamy frosting is absolutely irresistible.
So preheat that oven, grab your mixing bowls, and get ready to create some Thanksgiving magic. Your holiday dessert table will thank you, and who knows—these might just become your new family tradition!