Thanksgiving Cupcake Decorations Ideas Everyone Will Love
Transform your Thanksgiving dessert table into a stunning autumn showcase with these gorgeous cupcake decorations that are as delightful to look at as they are to eat. Whether you’re hosting a crowd or bringing treats to a potluck, these festive cupcakes steal the show every single time. Here’s a fun fact: decorated cupcakes became popular…
Transform your Thanksgiving dessert table into a stunning autumn showcase with these gorgeous cupcake decorations that are as delightful to look at as they are to eat. Whether you’re hosting a crowd or bringing treats to a potluck, these festive cupcakes steal the show every single time.
Here’s a fun fact: decorated cupcakes became popular during World War II when ingredients were rationed and smaller cakes made baking easier.
These Thanksgiving cupcake decorations are special because they’re beginner-friendly and take less than 30 minutes to decorate once your cupcakes are baked. If you loved our Pumpkin Spice Cupcakes recipe, you’ll adore these decorating techniques that turn simple cupcakes into edible masterpieces.
What Are Thanksgiving Cupcake Decorations?
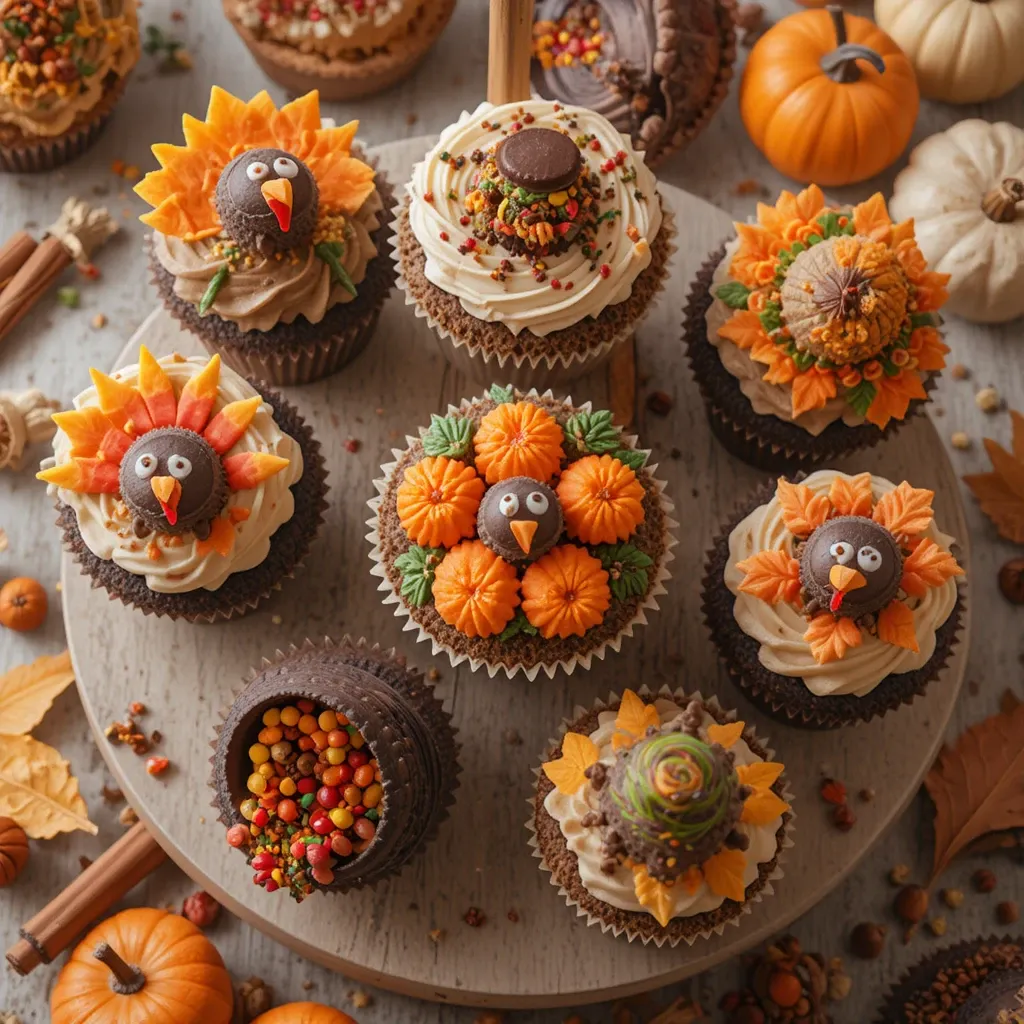
Ever wondered why we go all-out decorating cupcakes for Thanksgiving? It’s because these little treats are the perfect canvas for celebrating autumn’s bounty. From adorable turkey toppers to elegant fall leaf designs, Thanksgiving cupcake decorations bring festive cheer to every bite.
They’re miniature works of art that prove the old saying true: “the way to a man’s heart is through his stomach,” especially when that path includes buttercream pumpkins and candy corn turkeys. Ready to impress your family with desserts that look professionally decorated? Let’s dive in.
Why You’ll Love This Thanksgiving Cupcake Decorations Recipe
Endless Creative Possibilities
These Thanksgiving cupcake decorations offer unlimited ways to express your creativity. You can pipe buttercream leaves in rich autumn hues, craft adorable turkey faces with candy eyes, or create elegant fondant pumpkins that look almost too pretty to eat. The best part is that each technique works beautifully whether you’re decorating a dozen cupcakes or fifty.
Budget-Friendly Holiday Desserts
Making decorated cupcakes at home saves you serious money compared to bakery prices. A dozen professionally decorated Thanksgiving cupcakes can cost $40-60 at specialty bakeries, but you can create equally stunning designs for under $15 in decorating supplies. You’ll already have the basic ingredients for the cupcakes, and items like candy corn, chocolate chips, and food coloring are incredibly affordable at grocery stores.
Flavorful Foundation
The magic starts with perfectly moist cupcakes in seasonal flavors like spiced pumpkin, apple cinnamon, or classic vanilla bean. Top them with silky cream cheese frosting, rich chocolate buttercream, or maple-infused icing that captures autumn’s essence. Each bite combines the tender crumb of the cupcake with sweet, creamy frosting and fun textural elements from your decorations.
Similar to our Fall Cookie Decorating Guide, these techniques work with various flavor combinations, so explore different recipes on the blog to find your favorite base. Don’t wait until Thanksgiving morning—start practicing these decorating techniques this week so you’ll be confident creating showstopping cupcakes for your holiday celebration.
How to Make Thanksgiving Cupcake Decorations
Quick Overview
Creating stunning Thanksgiving cupcake decorations is easier than you might think. These techniques require no special baking skills—just creativity and basic decorating tools. The beauty of these designs is their forgiving nature; even imperfect attempts look charming and festive.
Time Breakdown:
- Cupcake baking time: 18-22 minutes
- Cooling time: 30-45 minutes
- Decoration time: 15-30 minutes (depending on complexity)
- Total time: Approximately 1-2 hours from start to finish
Key Ingredients for Thanksgiving Cupcake Decorations
For the Cupcakes (makes 12):
- 1½ cups all-purpose flour
- 1½ teaspoons baking powder
- ½ teaspoon salt
- ½ cup unsalted butter, softened
- 1 cup granulated sugar
- 2 large eggs, room temperature
- 2 teaspoons vanilla extract
- ½ cup whole milk, room temperature
For the Buttercream Frosting:
- 1 cup unsalted butter, softened
- 4 cups powdered sugar
- 2-3 tablespoons heavy cream
- 1 teaspoon vanilla extract
- Pinch of salt
- Gel food coloring (orange, red, yellow, brown for autumn colors)
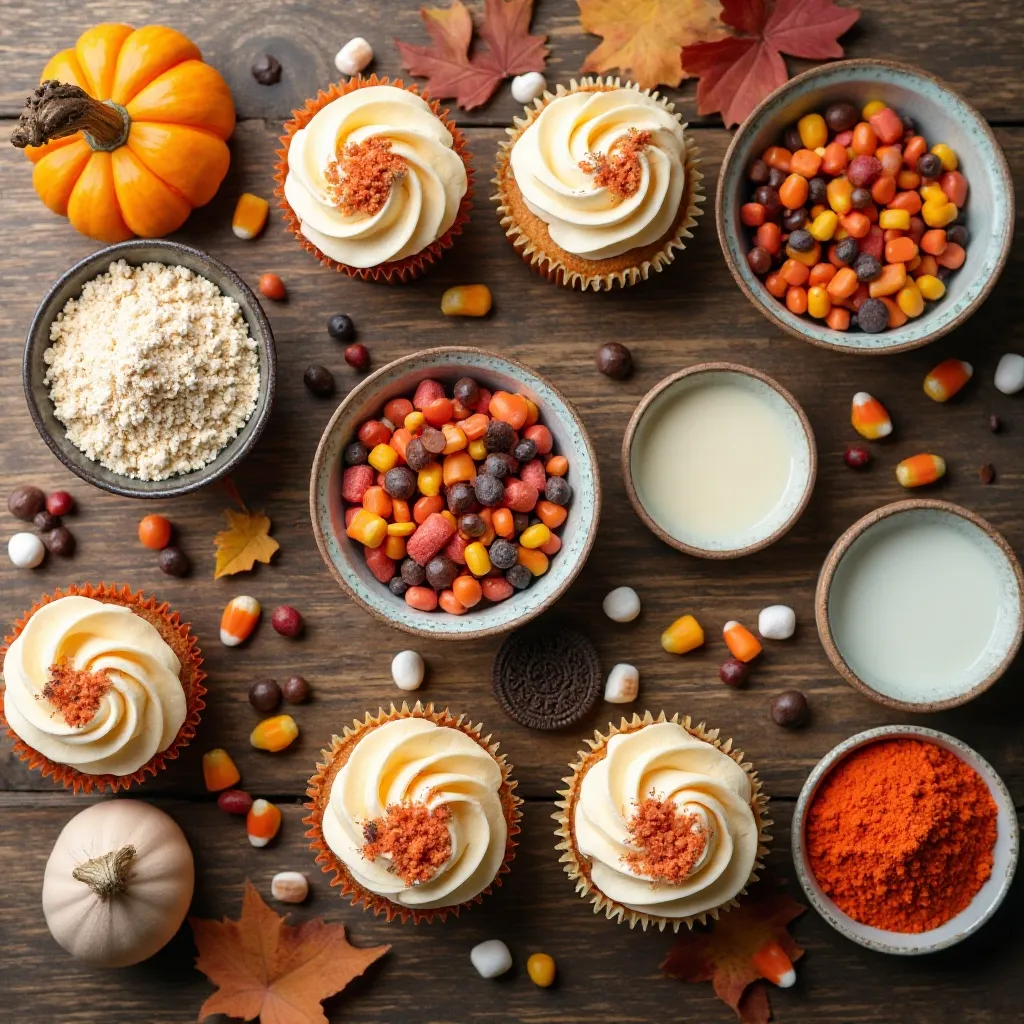
For Decorations:
- Candy corn
- Mini chocolate chips
- Oreo cookies (for turkey bodies)
- Candy eyes
- Red and orange fondant or fruit chews
- Fall-themed sprinkles
- Pretzel sticks (for antlers or branches)
- Mini marshmallows
- Graham cracker crumbs
- Edible gold dust (optional)
Step-by-Step Instructions
Baking the Cupcakes:
Preheat your oven to 350°F (175°C) and line a 12-cup muffin tin with paper liners. In a medium bowl, whisk together the flour, baking powder, and salt until well combined. Set this dry mixture aside.
In a large mixing bowl, beat the softened butter and sugar together using an electric mixer on medium speed for 3-4 minutes until the mixture becomes light and fluffy. This creaming process incorporates air, which helps create tender cupcakes.
Add the eggs one at a time, beating well after each addition. Scrape down the sides of the bowl to ensure everything is fully incorporated. Mix in the vanilla extract.
Alternate adding the dry ingredients and milk to the butter mixture, starting and ending with the dry ingredients. Add the dry mixture in three additions and the milk in two additions, mixing on low speed just until combined after each addition. Don’t overmix—stop as soon as you no longer see streaks of flour.
Divide the batter evenly among the prepared muffin cups, filling each about two-thirds full. A cookie scoop works perfectly for this and ensures uniform cupcakes.
Bake for 18-22 minutes, or until a toothpick inserted into the center comes out clean. The tops should spring back when lightly touched. Remove from the oven and let cool in the pan for 5 minutes, then transfer to a wire rack to cool completely before decorating.
Making the Buttercream:
Beat the softened butter in a large bowl with an electric mixer on medium speed for 2-3 minutes until creamy and smooth. Gradually add the powdered sugar one cup at a time, beating on low speed after each addition to prevent a sugar cloud in your kitchen.
Once all the sugar is incorporated, add the vanilla extract, salt, and 2 tablespoons of heavy cream. Increase the mixer speed to medium-high and beat for 3-4 minutes until the frosting becomes light and fluffy. If the frosting is too thick, add the remaining tablespoon of cream.
Divide the frosting into separate bowls based on how many colors you want to create. Use gel food coloring to achieve your desired autumn shades. For classic Thanksgiving colors, make orange, deep red, golden yellow, and chocolate brown.
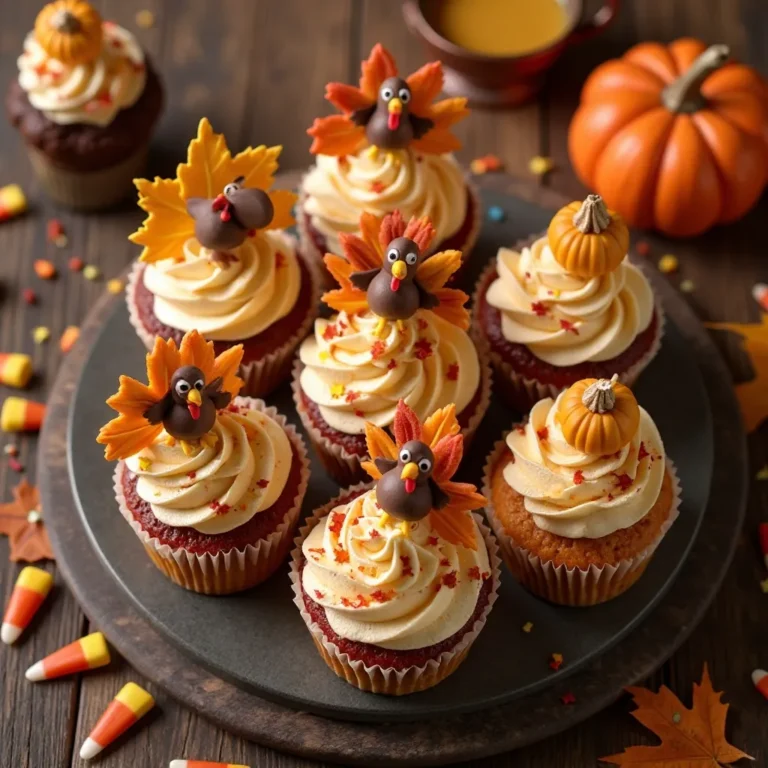
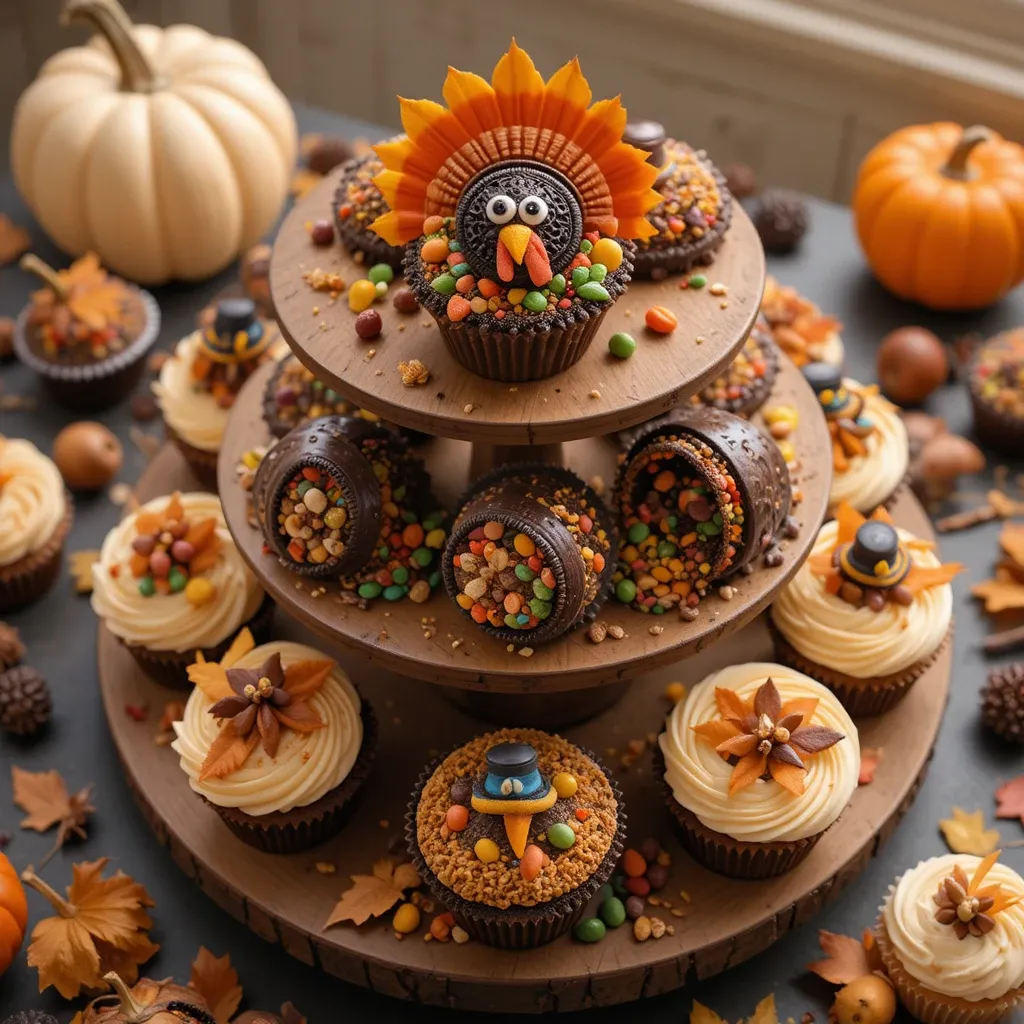
Turkey Cupcakes:
Frost your cooled cupcake with chocolate buttercream, spreading it smoothly with an offset spatula or butter knife. Place one Oreo cookie vertically into the back of the cupcake to create the turkey’s body.
Using a small amount of frosting as “glue,” attach 5-7 pieces of candy corn around the top edge of the Oreo in a fan shape to create colorful tail feathers. Press them gently but firmly so they stay in place.
Add two candy eyes to the front of the cupcake using a dab of frosting. Create a beak by cutting a small piece of orange fondant or candy corn into a triangle shape and pressing it between the eyes.
For the turkey’s wattle (the red part under the beak), roll a tiny piece of red fondant into a teardrop shape and attach it below the beak. You can also use a small piece of red fruit chew candy.
Add two candy corn pieces pointing downward at the bottom front of the cupcake to create little turkey feet.
Autumn Leaf Cupcakes:
Fit a piping bag with a leaf decorating tip (tip #352 works beautifully). Fill the bag with your colored buttercream in autumn shades—orange, red, yellow, or brown work perfectly.
Starting at the outer edge of the cupcake, pipe leaves by squeezing the bag while moving toward the center, then releasing pressure and pulling away to create the pointed leaf tip. The leaf tip creates natural veins automatically.
Continue piping leaves around the cupcake, overlapping them slightly and varying the colors for a natural, dimensional look. Create a full wreath effect or cover the entire top surface.
For added detail, lightly dust the leaves with edible gold dust using a small, clean paintbrush. This creates a gorgeous shimmer that catches the light beautifully.
Pumpkin Patch Cupcakes:
Frost the cupcake with vanilla or cream cheese buttercream as your base layer, creating a smooth, even surface.
Fit a piping bag with a round tip (tip #12) and fill with orange buttercream. Starting at the center of the cupcake, pipe a small mound of frosting. Continue piping in a circular motion, building up layers to create a rounded pumpkin shape.
Using a toothpick or skewer, gently drag lines from the top center of the orange mound down to the bottom edge, creating the characteristic ridges of a pumpkin. Space these lines evenly around the pumpkin.
Pipe a small green frosting stem on top using a small round tip, or insert a small piece of pretzel stick for a realistic twig-like stem. Add a tiny green leaf if desired.
Sprinkle graham cracker crumbs around the base of the pumpkin to create the look of a dirt patch. You can also add green-tinted coconut flakes to resemble grass.
Cornucopia Cupcakes:
Create a cornucopia (horn of plenty) using a sugar cone. Dip the cone in melted chocolate and let it set slightly. While still tacky, roll it in crushed graham crackers to give it a woven basket texture.
Frost your cupcake generously with buttercream in any autumn color. Place the chocolate-covered cone at an angle on the cupcake, as if it’s spilling its contents.
Arrange small candies, mini chocolate chips, candy corn, and fondant fruits “spilling” from the opening of the cone across the cupcake. Use various colors to represent the abundance of harvest—red, orange, yellow, and brown.
Add small frosting leaves around the arrangement using a leaf tip for extra color and visual interest.
Pilgrim Hat Cupcakes:
Frost your cupcake with chocolate buttercream, creating a smooth, flat surface. This will be the brim of the hat.
Place an unwrapped Reese’s Peanut Butter Cup or Rolo candy in the center of the cupcake to create the top of the pilgrim hat.
Using a small piece of yellow fondant or a yellow Starburst candy, cut a small rectangle and a tiny square buckle shape. Attach this around the base of the candy to create the hat’s buckle band.
For variation, you can use white buttercream to pipe a band around the base of the candy instead of using fondant.
What to Serve Thanksgiving Cupcake Decorations With
These festive cupcakes pair wonderfully with hot apple cider or spiced chai tea for an afternoon dessert moment. Serve them alongside a coffee station with vanilla and caramel syrups so guests can customize their drinks.
For a complete dessert spread, arrange these cupcakes with mini pumpkin pies, apple crisp bars, and cinnamon sugar cookies. The variety of textures and flavors keeps everyone happy.
If you’re serving these as part of your Thanksgiving dinner, they make the perfect light dessert after a heavy meal. Place them on a tiered stand as a centerpiece that doubles as dessert—guests can grab one as they mingle.
Consider pairing with a dessert wine like late-harvest Riesling or a sweet Moscato for adults. The slight effervescence cuts through the richness of the buttercream beautifully.
Top Tips for Perfecting Thanksgiving Cupcake Decorations
Achieve Smooth Frosting
For bakery-quality smooth frosting, invest in an offset spatula. After frosting your cupcake, dip the spatula in hot water, wipe it dry, and gently smooth the frosting in one continuous motion. This creates a perfectly smooth canvas for your decorations.
Color Matching Perfection
When creating autumn colors, start with small amounts of gel food coloring—you can always add more but can’t take it away. For the perfect pumpkin orange, combine orange gel with just a tiny bit of brown. For realistic autumn leaves, mix your greens with brown to create olive tones rather than bright spring greens.
Stabilize Your Decorations
If your candy decorations keep sliding off, the issue is usually too-soft frosting. Pop your frosted cupcakes in the refrigerator for 10-15 minutes to firm up the frosting before adding dimensional decorations. The slightly hardened frosting provides a more stable base.
Piping Bag Alternatives
Don’t have piping bags? Use a sturdy ziplock bag with a corner snipped off. For more control, place a decorating tip in the bag before filling. This works surprisingly well for basic designs, though investing in reusable piping bags is worthwhile if you decorate regularly.
Make-Ahead Strategy
Bake cupcakes up to two days ahead and store them undecorated in an airtight container at room temperature. Make your buttercream up to one week ahead and refrigerate it. Bring the frosting to room temperature and rewhip it before using—this refreshes the texture perfectly.
Temperature Matters
Always work with room temperature ingredients when baking cupcakes. Cold eggs and milk can cause the batter to curdle or mix unevenly. Set your ingredients out 30-60 minutes before you start baking for the best results.
Avoid Overmixing
Once you add flour to your batter, mix only until the ingredients are just combined. Overmixing develops gluten, which makes cupcakes dense and tough instead of light and tender. A few small flour streaks are okay—they’ll disappear during baking.
Proper Cooling is Essential
Never frost warm cupcakes. The heat melts the buttercream, creating a soupy mess that won’t hold decorations. Wait until cupcakes are completely cool to the touch—this usually takes 30-45 minutes on a wire rack.
Storing and Reheating Tips
Room Temperature Storage:
Decorated cupcakes can stay at room temperature for up to 2 days if stored properly. Place them in a large airtight container, being careful not to let the decorations touch the lid. If you don’t have a container tall enough, loosely tent the cupcakes with aluminum foil—just don’t let it touch the frosting.
Refrigerator Storage:
For longer storage, refrigerate decorated cupcakes for up to 5 days. The cold temperature keeps the buttercream fresh and prevents any candy decorations from melting. Cover the container and let cupcakes come to room temperature for 30 minutes before serving for the best flavor and texture.
Freezing Instructions:
Freeze unfrosted cupcakes for up to 3 months. Wrap each cooled cupcake individually in plastic wrap, then place them all in a freezer-safe bag. Thaw overnight in the refrigerator or at room temperature for 2-3 hours before decorating.
You can also freeze fully decorated cupcakes, though some decorations may become soft during thawing. Place decorated cupcakes on a baking sheet and freeze uncovered for 1-2 hours until solid. Then wrap carefully and store in an airtight container for up to 1 month.
Reheating Notes:
Cupcakes are best enjoyed at room temperature, so there’s typically no need to reheat them. If you’ve refrigerated them, simply let them sit out for 20-30 minutes before serving. Never microwave decorated cupcakes—the frosting will melt and decorations will become messy.
Tips for Avoiding Common Baking Mistakes
Sunken Centers:
If your cupcakes sink in the middle, you’ve likely overmixed the batter or opened the oven door too early. The sudden temperature change causes the structure to collapse. Wait until at least 15 minutes have passed before checking on your cupcakes.
Dry Cupcakes:
Overbaking is the most common cause of dry cupcakes. Check them at the earliest time suggested in the recipe. The toothpick should have just a few moist crumbs, not come out completely clean. Cupcakes continue cooking slightly after you remove them from the oven.
Dome-Shaped Tops:
While slightly domed tops are normal, excessive doming usually means your oven is too hot. Use an oven thermometer to verify your temperature is accurate. Also, avoid filling cupcake liners more than two-thirds full.
Sticky Liners:
If cupcake liners stick to your cupcakes, you may have underbaked them or used low-quality liners. Let cupcakes cool completely before removing liners. Using vegetable oil spray on the liners before filling can also help prevent sticking.
Lumpy Frosting:
Lumpy buttercream usually results from cold butter or unsifted powdered sugar. Ensure your butter is softened to room temperature (it should dent easily when pressed). Sift powdered sugar before adding it to eliminate any lumps. If you still have lumps, beat the frosting on high speed for an additional 2-3 minutes.
Decorations Sliding Off:
This happens when frosting is too warm or too soft. Use less liquid in your buttercream recipe, or refrigerate frosted cupcakes briefly before adding heavy decorations. Candy corn and cookies need a firm base to stay upright.
Color Bleeding:
When multiple frosting colors touch each other, they can bleed together, especially in warm conditions. Pipe borders between colors using a contrasting shade, or refrigerate the cupcake between color applications to set each layer.
Additional Creative Decoration Ideas
Acorn Cupcakes:
Pipe a chocolate dome of frosting on top of the cupcake. Dip the top in chocolate sprinkles or chopped nuts to create texture. Place a mini Nilla Wafer on top at an angle and use a green frosting leaf as the cap.
Candy Apple Cupcakes:
Frost with caramel buttercream and drizzle with additional caramel sauce. Top with chopped peanuts or pecans and a red candy “apple” in the center. These mimic the classic fall fair treat.
Wheat Sheaf Cupcakes:
Use pretzel sticks to create bundles of wheat. Arrange 5-7 pretzels standing upright in the frosting, then tie them together with a small piece of fruit leather or fondant “ribbon” around the middle.
Football Cupcakes:
For sports-loving Thanksgiving celebrants, frost cupcakes with chocolate buttercream, then pipe white frosting laces across the top to create footballs. These are perfect for game day gatherings.
Nutrition Information
| Nutrient | Per Cupcake (with frosting) |
|---|---|
| Calories | 380 |
| Total Fat | 18g |
| Saturated Fat | 11g |
| Cholesterol | 75mg |
| Sodium | 180mg |
| Total Carbohydrates | 52g |
| Dietary Fiber | 0.5g |
| Sugars | 42g |
| Protein | 3g |
Note: Nutrition values are approximate and will vary based on specific ingredients and decoration choices used.
Frequently Asked Questions
How far in advance can I decorate Thanksgiving cupcakes?
You can decorate Thanksgiving cupcakes up to 2 days before serving if stored properly. Bake the cupcakes and make the frosting ahead of time, but add delicate decorations like candy corn on the day of serving to prevent them from becoming soft or sticky. For best results, decorate the day before and refrigerate in an airtight container.
Can I use store-bought frosting for these decorations?
Yes, store-bought frosting works for simpler designs, but homemade buttercream pipes more smoothly and holds decorations better. If using store-bought, choose a thicker variety labeled for decorating. You can improve its consistency by beating it with a mixer for 2-3 minutes and adding 1/4 cup of powdered sugar to stiffen it.
What’s the best way to transport decorated cupcakes?
Use a cupcake carrier with individual compartments to prevent decorations from smudging. If you don’t have one, place cupcakes in a shallow box lined with non-slip shelf liner. Never stack decorated cupcakes, and keep them in a cool, temperature-controlled car—never the trunk.
Do I need special decorating tools?
You don’t need expensive equipment to create beautiful Thanksgiving cupcakes. A basic decorating set with a few piping tips (round, star, and leaf), disposable piping bags, and an offset spatula will cover most designs. Many grocery stores sell these items in their baking aisle for under $10.
Can I make these cupcakes gluten-free?
Absolutely! Substitute the all-purpose flour with a 1:1 gluten-free baking flour that contains xanthan gum. The decorating techniques remain exactly the same. Just ensure any candies and decorations you use are also certified gluten-free.
How do I prevent food coloring from staining?
Gel food coloring stains less than liquid varieties. When working with deep colors like red or purple, wear disposable gloves. If your hands do get stained, scrub them with a paste made from baking soda and dish soap, then apply lemon juice.
What if my buttercream is too soft to hold decorations?
If your kitchen is warm, buttercream can become too soft. Refrigerate the frosting for 10-15 minutes, then rewhip it before using. You can also add 1-2 additional tablespoons of powdered sugar to thicken it without refrigerating.
Can kids help with these decorations?
Yes! Many of these designs are kid-friendly. Let children press candy corn into frosting, arrange sprinkles, or use candy eyes. Supervise any work with piping bags, but simpler designs like pumpkin patches made with round tips are perfect for young decorators.
What’s the easiest decoration for beginners?
Start with the pumpkin patch cupcakes. They require only basic piping with a round tip and look impressive even with imperfect technique. The ridges you create with a toothpick hide any uneven frosting, making this design very forgiving.
How do I fix decorations that have fallen off?
Use a small amount of fresh frosting as glue to reattach decorations. If candy pieces become sticky from humidity, pat them dry with a paper towel first. For decorations that repeatedly fall, the frosting may be too soft—refrigerate the cupcake for 10 minutes to firm it up.
Final Thoughts
Thanksgiving cupcake decorations transform ordinary desserts into memorable centerpieces that capture the warmth and beauty of the holiday season. Whether you’re crafting adorable turkey faces, elegant autumn leaves, or festive pumpkin patches, these techniques allow you to express creativity while providing delicious treats for your loved ones.
The beauty of these decorations lies in their flexibility. You can keep designs simple for a quick weeknight project with kids or invest more time creating elaborate displays for your Thanksgiving gathering. Either way, homemade decorated cupcakes show thoughtfulness and effort that guests truly appreciate.
Remember, perfection isn’t the goal—personality is. Slightly wobbly turkey feathers and imperfectly piped leaves have character and charm. Your family will remember the fun you had creating these treats together far more than they’ll notice any small imperfections.
Start with one or two designs that appeal to you most, master those techniques, and expand your decorating repertoire over time. Save this post for next year’s Thanksgiving planning, and don’t forget to share photos of your beautiful creations!
Happy decorating, and may your Thanksgiving be filled with delicious desserts, grateful hearts, and cherished moments with the people you love most.