Thanksgiving Cupcake Toppers You Can Make in 30 Minutes
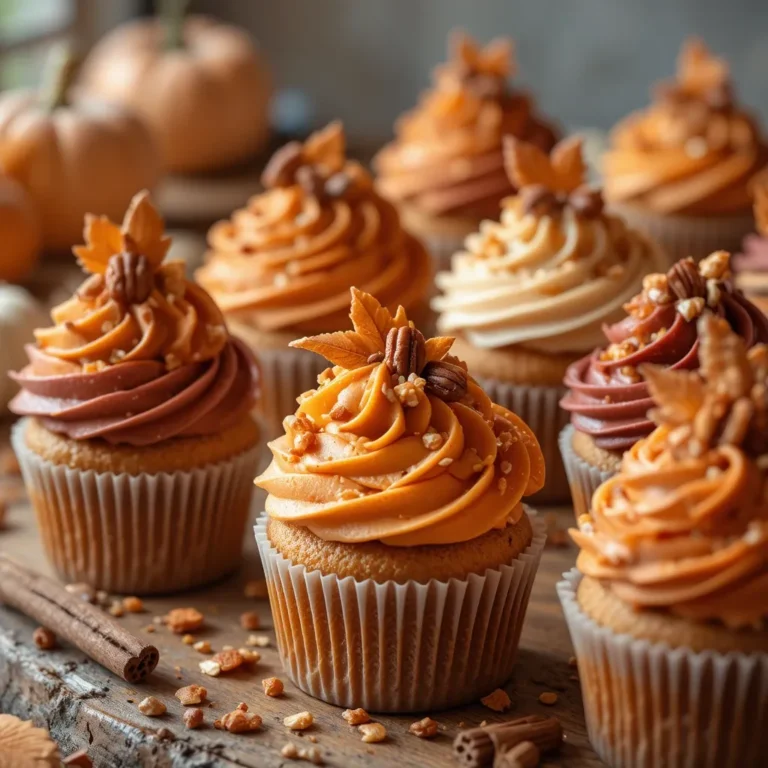
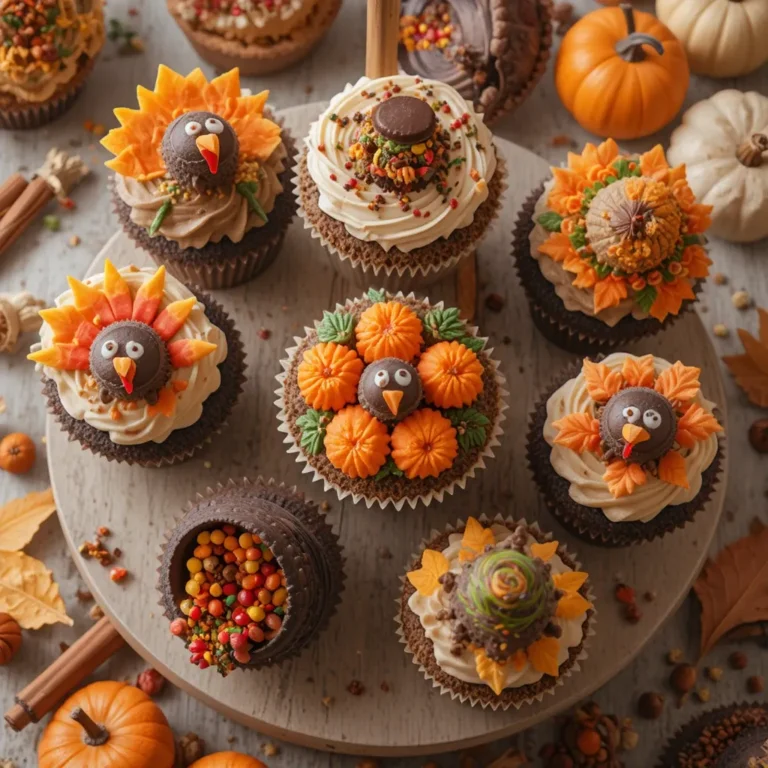
Picture this: your Thanksgiving table, laden with turkey and all the trimmings, but what really catches everyone’s eye? Your stunning cupcakes crowned with festive toppers! Thanksgiving cupcake toppers are the easiest way to transform ordinary cupcakes into showstopping desserts that capture the spirit of the holiday. Whether you’re hosting a large family gathering or bringing…
Picture this: your Thanksgiving table, laden with turkey and all the trimmings, but what really catches everyone’s eye? Your stunning cupcakes crowned with festive toppers! Thanksgiving cupcake toppers are the easiest way to transform ordinary cupcakes into showstopping desserts that capture the spirit of the holiday.
Whether you’re hosting a large family gathering or bringing treats to a potluck, these decorative touches add that special something without requiring advanced baking skills.
Just like our popular Pumpkin Spice Cupcakes, these toppers prove that impressive doesn’t have to mean complicated. Get ready to create Instagram-worthy treats that taste as amazing as they look!
What Are Thanksgiving Cupcake Toppers?
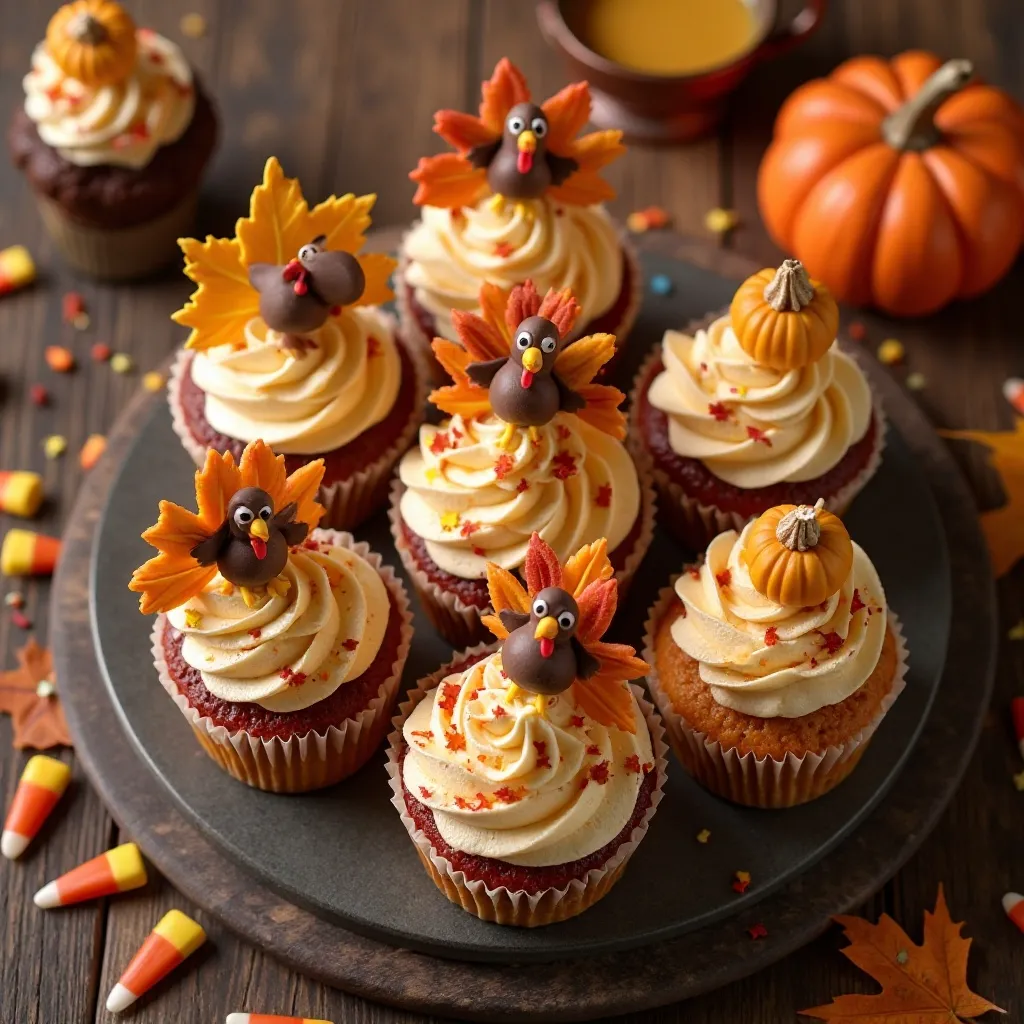
Ever wonder why something so simple can make such a big impact? Thanksgiving cupcake toppers are decorative elements placed on top of frosted cupcakes to celebrate the harvest season. They come in countless designs—think turkeys, autumn leaves, pumpkins, pilgrims, and gratitude messages.
As the saying goes, “the way to a man’s heart is through his stomach,” but the way to everyone’s camera roll is through beautifully decorated desserts! These charming additions turn basic cupcakes into conversation starters that guests will remember long after the pie is gone. Ready to elevate your Thanksgiving baking game?
Why You’ll Love This Thanksgiving Cupcake Toppers Recipe:
Transform Your Cupcakes Instantly
The magic of Thanksgiving cupcake toppers lies in their ability to instantly elevate your desserts from simple to spectacular. Imagine biting into a moist, fluffy cupcake while admiring a cute turkey made from fondant or a rustic wooden pick featuring “Give Thanks” in elegant script. These toppers add visual interest, create photo opportunities, and show your guests you care about the details.
Budget-Friendly Holiday Decorating
Making your own Thanksgiving cupcake toppers at home costs a fraction of what you’d spend at a bakery. With basic supplies like cardstock, toothpicks, fondant, or even printable designs, you can create dozens of toppers for just a few dollars. Compare this to ordering custom cupcakes at $4-6 each, and you’re saving serious money while having fun in the process. Plus, homemade toppers let you customize everything to match your exact color scheme and theme.
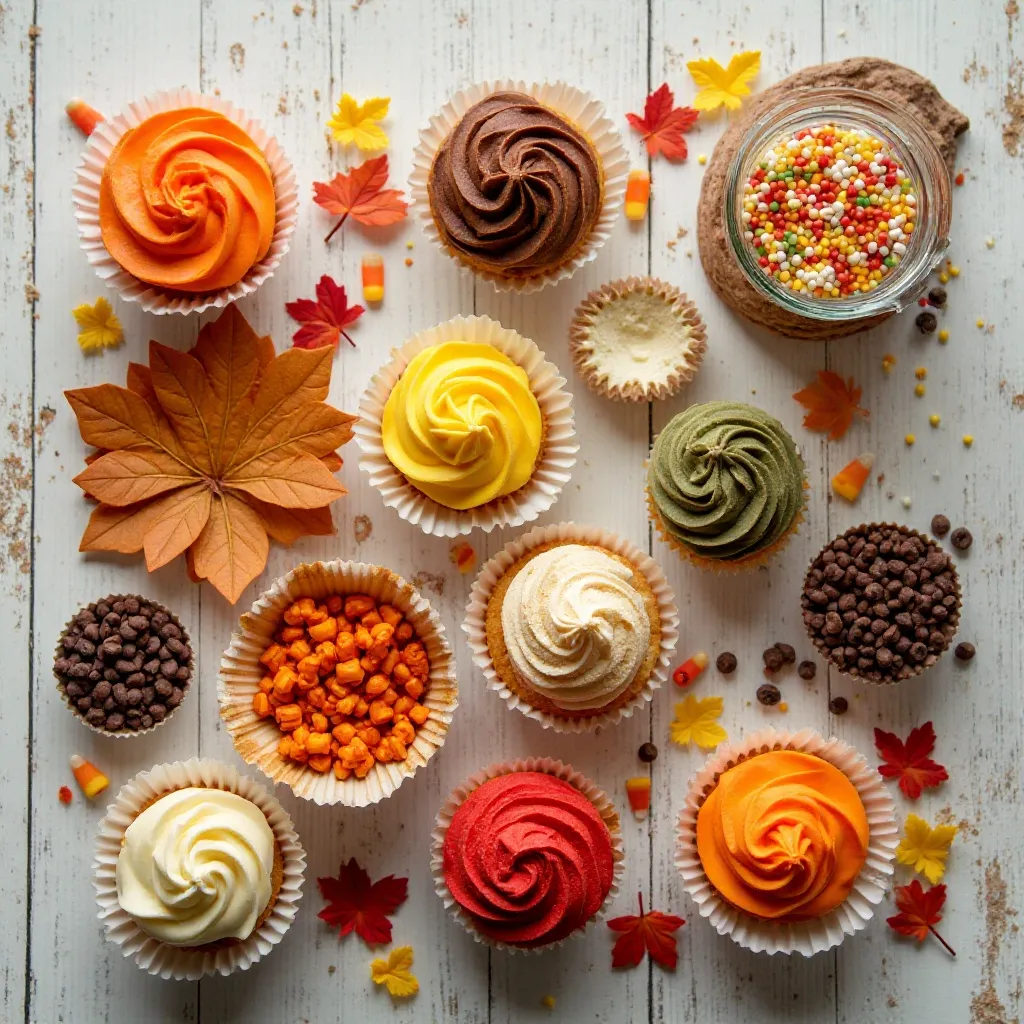
Endless Creative Possibilities
The beauty of Thanksgiving cupcake toppers is their versatility. Use edible options like fondant turkeys, candy corn arrangements, or chocolate acorns. Prefer non-edible decorations? Try paper toppers, wooden picks, or miniature flags. You can even mix techniques—top chocolate cupcakes with cream cheese frosting and add a fondant pumpkin, similar to how our Maple Pecan Cupcakes combine complementary flavors and textures. Whether you’re crafting with kids or creating elegant adult treats, there’s a style for every skill level.
Perfect for All Ages
Kids absolutely love cupcakes with fun toppers, making them ideal for family gatherings where multiple generations gather. The toppers also make it easy to identify different cupcake flavors if you’re serving a variety.
Ready to create your own stunning Thanksgiving cupcake toppers? Let’s dive into everything you need to know!
How to Make Thanksgiving Cupcake Toppers:
Quick Overview
Creating Thanksgiving cupcake toppers is surprisingly simple and incredibly rewarding. Whether you choose edible fondant designs or printable paper toppers, you’ll have beautiful decorations ready in no time.
The process involves selecting your style, gathering materials, and assembling your toppers with care. Most designs take just 30-45 minutes to complete, though edible options may require additional drying time.
Time Breakdown:
- Prep Time: 15-20 minutes
- Assembly Time: 15-25 minutes
- Drying Time (if using fondant): 2-4 hours
- Total Active Time: 30-45 minutes
Key Ingredients for Thanksgiving Cupcake Toppers:
For Fondant Toppers:
- 8 oz fondant in autumn colors (orange, brown, red, yellow, green)
- 2 tablespoons powdered sugar (for dusting)
- 1 tablespoon corn syrup (for adhering pieces)
- Food coloring gel (various colors)
- Edible markers (black, brown)
- 12 lollipop sticks or sturdy toothpicks
For Paper Toppers:
- 24 sheets cardstock in autumn colors
- 12 wooden toothpicks or decorative picks
- Clear adhesive or glue stick
- Printable topper designs (download free templates online)
- Scissors or craft knife
- Hole punch (optional)
For Cupcake Base:
- 12 baked and cooled cupcakes (any flavor)
- 2 cups buttercream or cream cheese frosting
- Piping bag with decorating tip
- Offset spatula
Optional Decorations:
- Edible glitter in gold or copper
- Mini chocolate chips for turkey eyes
- Candy corn pieces
- Autumn-colored sprinkles
- Royal icing for details
Step-by-Step Instructions:
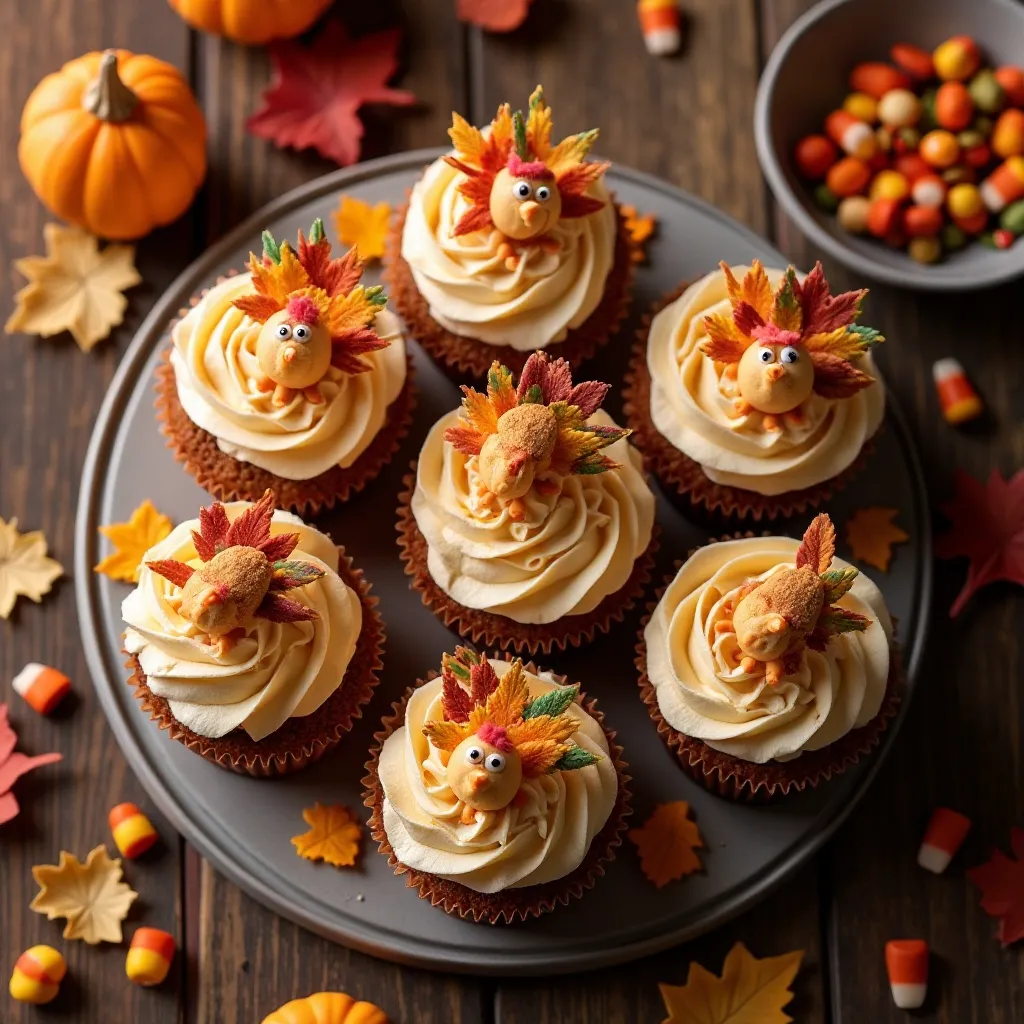
Making Fondant Turkey Toppers:
Start by kneading your brown fondant until it becomes soft and pliable, roughly 2-3 minutes of gentle working. Dust your clean work surface with powdered sugar to prevent sticking.
Roll the brown fondant into a ball about 1 inch in diameter for the turkey body. This will be the foundation of your design, so make it nice and smooth.
Take small pieces of red, orange, and yellow fondant and roll them into teardrop shapes approximately 1.5 inches long. These will become the colorful tail feathers that make your turkey pop. You’ll need about 5-7 feathers per turkey for a full, festive look.
Attach the feathers to the back of the turkey body by brushing a tiny amount of corn syrup on the narrow end of each feather and pressing gently into the body. Fan them out in a semi-circle for that classic turkey tail display.
Create a smaller ball of brown fondant (about half the size of the body) for the turkey’s head. Attach it to the front of the body using corn syrup as glue.
Roll a tiny piece of orange fondant into a triangle for the beak and a small red piece for the waddle. Use corn syrup to attach these to the head. Use edible markers or tiny black fondant dots to add eyes.
Insert a lollipop stick or toothpick into the bottom of the turkey body, pushing it about halfway through. Place your completed turkey on parchment paper and let it dry for 2-4 hours until firm to the touch.
Making Paper Toppers:
Print your chosen Thanksgiving designs onto cardstock, ensuring your printer settings are on “best quality” for crisp images. You can find free printable templates featuring pumpkins, leaves, “Give Thanks” messages, and turkey designs online.
Carefully cut around each design using sharp scissors or a craft knife for intricate details. Take your time here—clean edges make professional-looking toppers.
If making double-sided toppers, cut two identical shapes. Apply glue stick or clear adhesive to one side, position your toothpick in the center, then press the second design on top, creating a sandwich with the toothpick inside.
For single-sided toppers, simply apply a small dot of glue to the back of your design and press the toothpick firmly into place. Let dry for 5 minutes.
Add extra embellishments if desired—a sprinkle of edible glitter, a ribbon bow, or hand-drawn details with markers.
Making Fondant Pumpkin Toppers:
Knead orange fondant until soft and workable. Roll it into a ball about 3/4 inch in diameter for a perfectly proportioned mini pumpkin.
Use a toothpick or small tool to create vertical indentations around the pumpkin ball, spacing them evenly to create the classic pumpkin ridge pattern. You should have about 6-8 ridges going from top to bottom.
Roll a small piece of green fondant into a thin rope, then curl it slightly to create a realistic stem and vine. Attach the stem to the top of your pumpkin using corn syrup.
Insert a toothpick into the bottom of the pumpkin, and let dry completely on parchment paper for 2-4 hours.
Making Leaf Toppers:
Mix fondant colors to create realistic autumn shades—combine orange and brown for burnt sienna, yellow and red for deep gold, red and brown for burgundy.
Roll fondant to about 1/8 inch thickness. Use leaf-shaped cookie cutters or cut freehand with a knife to create maple, oak, or generic fall leaf shapes.
Use a toothpick or leaf-vein tool to press realistic vein patterns into each leaf. This detail makes all the difference in creating authentic-looking leaves.
Let leaves dry partially flat on parchment paper for 30 minutes, then gently curl or bend them for a more natural, dimensional appearance. Insert toothpicks and let dry completely for 2 more hours.
Assembling Cupcakes with Toppers:
Ensure your cupcakes are completely cooled before frosting—warm cupcakes will melt your buttercream. Frost each cupcake with a generous swirl of buttercream using a piping bag fitted with a large star or round tip.
Alternatively, use an offset spatula to spread frosting smoothly across the top for a clean, modern look.
While the frosting is still soft, gently insert your topper into the center of each cupcake, pushing the stick about 1 inch into the cake for stability.
Add complementary decorations around the base of the topper—sprinkle autumn-colored jimmies, press candy corn pieces into the frosting, or dust with edible gold glitter for extra sparkle.
Arrange your finished cupcakes on a serving platter, grouping different designs together for visual impact. These are best served within 4-6 hours of assembly for optimal freshness.
What to Serve Thanksgiving Cupcake Toppers With:
These festive cupcakes pair beautifully with hot apple cider, spiced chai lattes, or pumpkin spice coffee for a complete autumn experience. The warm beverages complement the sweet frosting perfectly.
For a dessert table spread, serve alongside pumpkin pie bars, pecan tassies, and apple crisp to offer variety in textures and flavors. The cupcakes provide individual portions while other desserts can be shared family-style.
Create a stunning beverage pairing station with maple bourbon cocktails for adults or sparkling apple cider for all ages. The combination of rich cupcakes and refreshing drinks keeps guests satisfied without overwhelming their palates.
Consider serving with a cheese board featuring aged cheddar, cranberry goat cheese, and honey for guests who prefer savory options between desserts. The contrast in flavors creates a sophisticated tasting experience.
For kids’ tables, pair cupcakes with chocolate milk, hot cocoa with marshmallows, or fruit punch. This keeps younger guests engaged and gives them their own special treat selection.
Top Tips for Perfecting Thanksgiving Cupcake Toppers:
Work with Room Temperature Fondant
Always bring fondant to room temperature before working with it. Cold fondant cracks and refuses to cooperate, while overly warm fondant becomes sticky and loses its shape. Knead it for 2-3 minutes until it feels like soft playdough—that’s your sweet spot for perfect sculpting.
Use Cornstarch Instead of Powdered Sugar Sometimes
While powdered sugar prevents sticking, it can make colored fondant look dusty or faded. When working with deep colors like burgundy or navy, use cornstarch for dusting instead. It disappears into the fondant without affecting the color intensity.
Print Paper Toppers on Cardstock, Not Regular Paper
Regular printer paper is too flimsy for cupcake toppers and will droop or tear when inserted into frosting. Invest in 65-110 lb cardstock for sturdy, professional-looking toppers that stand upright beautifully.
Let Fondant Toppers Dry Completely
Patience pays off here. Rushing the drying process means your carefully crafted turkey or pumpkin might collapse when inserted into the cupcake. Allow at least 2-4 hours, or even overnight for larger, more detailed pieces.
Coordinate Colors with Your Frosting
Consider how your topper colors work with your frosting choice. Orange pumpkins pop against chocolate frosting, while brown turkeys shine on cream cheese or vanilla buttercream. Plan your color palette before you start assembling.
Make Extras
Always create 2-3 extra toppers beyond what you need. Toothpicks can break, fondant pieces might crack during drying, or you might simply want backup options. Having extras eliminates last-minute stress.
Seal Paper Toppers with Clear Contact Paper
For paper toppers, add durability and a professional finish by laminating or covering with clear contact paper before cutting. This prevents the paper from absorbing moisture from the frosting and creating ugly wrinkles.
Use Gel Food Coloring, Not Liquid
Liquid food coloring adds too much moisture to fondant and can make it sticky or cause it to break down. Gel food coloring is concentrated, requires less product, and maintains the perfect fondant consistency.
Insert Toppers Just Before Serving
While you can make toppers days in advance, wait to insert them into frosted cupcakes until shortly before serving. This prevents the toothpicks from absorbing moisture and keeps everything looking crisp and fresh.
Store Leftover Fondant Properly
Wrap unused fondant tightly in plastic wrap, then place in an airtight container or resealable bag. It will stay fresh for months and can be used for future projects, making it economical for multiple occasions.
Storing and Reheating Tips:
Storing Decorated Cupcakes
Store fully decorated cupcakes in a single layer in an airtight container at room temperature for up to 2 days. Make sure the container is tall enough that the toppers don’t touch the lid—crushed decorations are heartbreaking!
For longer storage, refrigerate decorated cupcakes for up to 5 days, but note that refrigeration can sometimes cause fondant toppers to become slightly sticky due to condensation. Let them come to room temperature for 30 minutes before serving.
Never freeze fully decorated cupcakes with toppers attached. The moisture from thawing will ruin both paper and fondant decorations.
Storing Toppers Separately
This is the best approach for make-ahead preparation. Store fondant toppers in an airtight container with parchment paper between layers for up to 2 weeks at room temperature. Keep them away from direct sunlight, which can fade colors.
Paper toppers can be stored in a resealable plastic bag or container for several months. They’re virtually indestructible when kept dry.
Freezing Unfrosted Cupcakes
Bake cupcakes up to 3 months in advance and freeze them unfrosted in airtight containers or freezer bags. Thaw at room temperature for 2-3 hours, then frost and add toppers the day of serving for the freshest presentation.
Refrigerating Buttercream-Frosted Cupcakes
If you must refrigerate frosted cupcakes before adding toppers, let them sit at room temperature for 30-45 minutes before inserting decorations. This prevents condensation from forming on cold frosting, which can make toppers slip or become soggy.
Reviving Stale Cupcakes
If cupcakes become slightly dry, brush them lightly with simple syrup before frosting. This adds moisture back and ensures your toppers sit atop delicious, tender cake rather than dry crumbs.
Common Baking Mistakes to Avoid:
Overfilling Cupcake Liners
Fill liners only 2/3 full to prevent overflow and mushroom tops that make topper placement difficult. Level cupcakes create stable platforms for your beautiful decorations.
Using Wet Cupcake Liners
Even a few drops of water on liners can cause uneven baking and stuck papers. Always ensure liners are completely dry before filling with batter.
Opening the Oven Door Too Early
Wait at least 15 minutes before checking cupcakes. Opening the oven prematurely causes temperature drops that lead to sunken centers—exactly where your topper needs to sit!
Not Testing for Doneness
A toothpick inserted into the center should come out clean or with just a few moist crumbs. Underbaked cupcakes collapse when cooling, making topper insertion messy.
Frosting Warm Cupcakes
This is the cardinal sin of cupcake decorating! Warm cupcakes melt buttercream into a soupy mess. Always cool completely—at least 45 minutes at room temperature or 20 minutes in the refrigerator.
Using Old Baking Powder
Check the expiration date! Old leavening agents produce flat, dense cupcakes that won’t rise properly to showcase your gorgeous toppers.
Overmixing the Batter
Mix until just combined after adding flour. Overmixing develops gluten and creates tough, dense cupcakes instead of light, fluffy bases for your decorations.
Incorrect Oven Temperature
Invest in an oven thermometer. Many ovens run 25°F hotter or cooler than the dial indicates, leading to burned or underbaked cupcakes.
Skipping the Liner Test
Before baking all your cupcakes, bake just one or two first to test. This lets you adjust baking time or temperature if needed without ruining an entire batch.
Not Adjusting for Altitude
At high altitudes (above 3,000 feet), reduce baking powder by 1/4, increase liquid by 2-4 tablespoons, and raise oven temperature by 15-25°F for properly risen cupcakes.
Frequently Asked Questions:
<h4>Can I make Thanksgiving cupcake toppers ahead of time?</h4>
Absolutely! Fondant toppers can be made up to 2 weeks in advance and stored in an airtight container at room temperature. Paper toppers can be created months ahead and stored in a dry place. Just wait to insert them into frosted cupcakes until within 4-6 hours of serving for the freshest appearance. <h4>Are Thanksgiving cupcake toppers edible?</h4>
It depends on the type you choose. Fondant toppers, chocolate decorations, and candy arrangements are completely edible. Paper toppers, wooden picks, and plastic decorations should be removed before eating the cupcake. Always inform guests which type you’ve used to avoid any confusion. <h4>What’s the best frosting to use with cupcake toppers?</h4>
Buttercream and cream cheese frosting work beautifully because they’re sturdy enough to hold toppers securely. Avoid whipped cream frosting, as it’s too soft and may not support the weight. Pipe frosting in a swirl or spread it smoothly—both methods work well. <h4>How do I keep fondant toppers from cracking?</h4>
Knead fondant thoroughly before use and work in small amounts of vegetable shortening if it feels dry. Store finished toppers in a cool, dry place away from direct sunlight. Avoid refrigerating fondant decorations, as the moisture can cause them to weep or break down. <h4>Where can I find free printable Thanksgiving cupcake topper templates?</h4>
Many websites offer free printable templates, including Pinterest, Etsy (filter for free items), and crafting blogs. Search terms like “free printable Thanksgiving cupcake toppers” or “Thanksgiving cupcake topper templates” will yield hundreds of options in various styles. <h4>Can I use regular toothpicks for cupcake toppers?</h4>
Yes, standard wooden toothpicks work perfectly fine for paper toppers. For heavier fondant designs, lollipop sticks or thicker decorative picks provide better support and stability. Just ensure whatever you use is food-safe and clearly visible so guests don’t accidentally eat it. <h4>How far in advance should I frost cupcakes before adding toppers?</h4>
Ideally, frost cupcakes 2-4 hours before serving and add toppers within the last hour. This timing keeps frosting fresh and prevents toppers from absorbing moisture or shifting. If you must frost earlier, refrigerate and bring to room temperature before adding toppers. <h4>What flavors work best for Thanksgiving cupcakes?</h4>
Popular fall flavors include pumpkin spice, apple cinnamon, maple, brown butter, chai, sweet potato, and classic vanilla or chocolate. Choose flavors that complement your dinner menu without being too heavy after a big Thanksgiving meal. <h4>Can I make vegan or gluten-free cupcakes for toppers?</h4>
Definitely! The toppers work with any cupcake base. Use your favorite vegan or gluten-free cupcake recipe—just ensure the texture is sturdy enough to support the topper weight. Denser gluten-free cupcakes actually work wonderfully for this purpose. <h4>How do I transport cupcakes with tall toppers?</h4>
Use a cupcake carrier with high clearance, or create a custom cardboard box with inserted support. Place cupcakes in the carrier without toppers, transport, and insert toppers at your destination for the safest option. This prevents any topper disasters during transit.
Nutrition Information:
| Nutrient | Per Cupcake with Topper |
|---|---|
| Calories | 285 |
| Total Fat | 12g |
| Saturated Fat | 7g |
| Cholesterol | 45mg |
| Sodium | 180mg |
| Total Carbohydrates | 42g |
| Dietary Fiber | 0.5g |
| Sugars | 28g |
| Protein | 3g |
Note: Nutrition information is approximate and based on a standard vanilla cupcake with buttercream frosting and a fondant topper. Values will vary depending on cupcake recipe, frosting type, and topper materials used.
Bonus Creative Ideas:
Edible Glitter and Gold Leaf
Elevate simple fondant toppers by brushing them with edible glue and dusting with edible glitter in copper, gold, or bronze. For ultra-luxe toppers, apply small pieces of edible gold leaf to create a glamorous metallic finish that catches the light beautifully.
Cookie Toppers
Bake mini sugar cookies using fall-shaped cutters, decorate with royal icing, and use them as substantial, delicious toppers. These cookie toppers become a two-in-one treat that guests will love.
Fresh Herb Accents
Add a sophisticated touch by tucking small sprigs of fresh rosemary, thyme, or sage into the frosting alongside your topper. The herbs add visual interest and a subtle, earthy aroma that complements fall flavors.
Chocolate Transfer Sheets
Use pre-designed chocolate transfer sheets with autumn patterns to create professional-looking chocolate toppers. Simply melt chocolate, spread on the transfer sheet, let it set, cut into shapes, and insert toothpicks.
Candy Corn Turkeys
Create the easiest turkey toppers ever using candy corn, chocolate chips, and candy eyes. Attach pieces with a dot of frosting to create adorable turkey faces that kids will go crazy for.
Chalkboard Toppers
Cut small squares of black cardstock, write messages with white gel pens to mimic chalk, and create rustic “chalkboard” toppers with phrases like “Thankful,” “Blessed,” or “Gather.”
Mini Banner Toppers
String tiny triangular flags between two toothpicks to create adorable bunting banners that span across cupcake tops. These work especially well for messages split across multiple cupcakes, like “GIVE” on one and “THANKS” on another.
Maple Leaf Prints
Press real maple leaves into rolled fondant to create beautiful, natural vein impressions, then cut around the leaf shape. This technique produces incredibly realistic leaves with authentic details.
Now you have everything you need to create stunning Thanksgiving cupcake toppers that will make your desserts the star of the holiday table! Whether you choose elegant fondant designs, fun paper printables, or creative candy combinations, these toppers transform ordinary cupcakes into extraordinary celebrations of the season. Gather your supplies, invite the family to help, and start crafting beautiful memories along with beautiful desserts. Happy Thanksgiving, and happy decorating!