Thanksgiving Cupcake Turkeys Cutest Dessert for Your Holiday Table
Thanksgiving cupcake turkeys for the holiday! These adorable turkey cupcakes are easy to make and perfect for kids and festive dessert tables.
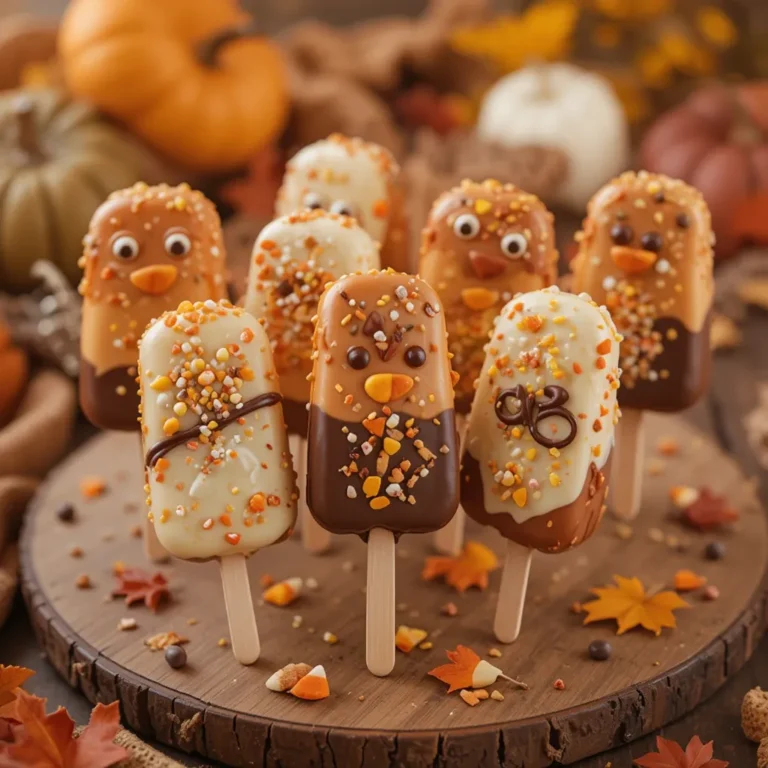
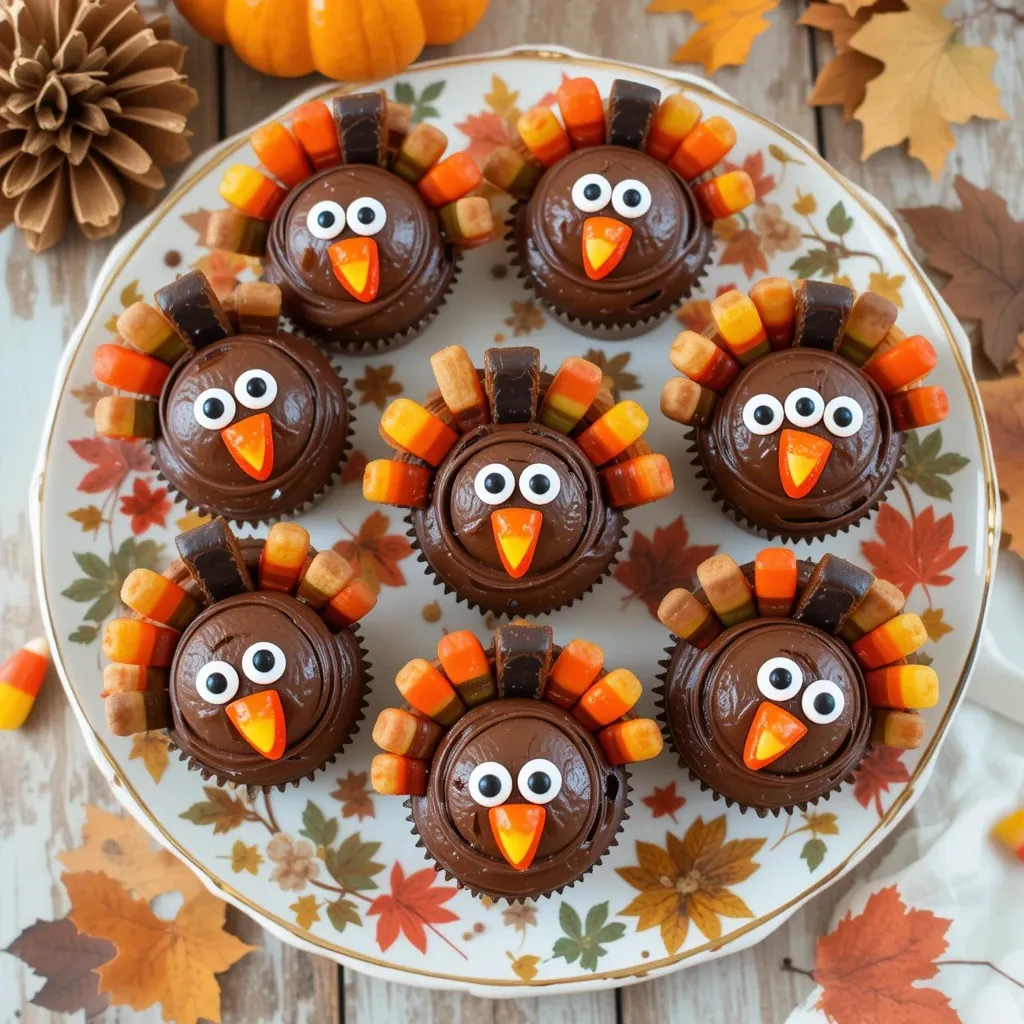
These adorable Thanksgiving cupcake turkeys are the perfect combination of festive, fun, and absolutely delicious! With their chocolate frosting bodies, cookie feather displays, and candy corn beaks, they’re guaranteed to steal the show at your holiday gathering.
I discovered this recipe three years ago when my daughter’s school needed treats, and honestly, they’ve become our family tradition. They’re surprisingly simple to make, take less than an hour from start to finish, and kids absolutely love decorating them. If you enjoyed my Pumpkin Spice Cupcakes, you’ll adore these playful turkeys that bring the same moist, flavorful base with an extra dose of holiday charm!
What are Thanksgiving Cupcake Turkeys?
Ever wonder why we turn perfectly good cupcakes into birds? Well, these Thanksgiving cupcake turkeys are basically the edible equivalent of arts and crafts meeting dessert heaven! They’re regular cupcakes transformed into adorable turkey characters using cookies, candies, and frosting.
The best part? You don’t need any fancy skills to make them look amazing. As they say, the way to a family’s heart is through adorable food that tastes incredible. Trust me, once you make these cuties, you’ll find excuses to create them year-round!
Why You’ll Love This Thanksgiving Cupcake Turkeys Recipe
They’re Actually Fun to Make
Here’s something I never expected: making Thanksgiving cupcake turkeys became my favorite part of holiday prep. Unlike complicated desserts that stress me out, these little guys are genuinely enjoyable. The decorating process feels more like playtime than work, especially when you’ve got kids helping. My seven-year-old became the “candy corn placement specialist” last year, and I’ve never seen her so focused!
Budget-Friendly Holiday Magic
Let’s talk money for a second. Bakery cupcakes can cost $4-5 each, and custom holiday designs? Forget about it. Making these Thanksgiving cupcake turkeys at home costs about $1 per cupcake, maybe less if you catch sales on candy. You’re looking at feeding a crowd for under $15, which is pretty amazing when you consider how impressive they look.
The Flavor Combination is Perfection
The chocolate frosting base pairs beautifully with the vanilla cupcake, while the cookies add a satisfying crunch. Those candy corn beaks aren’t just cute – they add a nostalgic sweetness that screams fall. And the candy eyes? Pure joy in every bite. It’s like eating a smile. If you loved my Chocolate Peanut Butter Cupcakes, you’ll appreciate how the textures play together here. Why not whip up a batch this weekend and watch everyone’s faces light up?
How to Make Thanksgiving Cupcake Turkeys
Quick Overview
These Thanksgiving cupcake turkeys are ridiculously easy to pull off, even if you’re not a confident baker. You’re basically making standard cupcakes, then having a blast turning them into festive turkeys with store-bought decorations. The frosting is smooth and chocolatey, the cookies provide that wow-factor tail, and the candy details bring personality to each little bird.
Time Breakdown:
- Prep Time: 20 minutes
- Baking Time: 18-20 minutes
- Decorating Time: 15-20 minutes
- Total Time: 55 minutes to 1 hour
- Yield: 12 cupcakes
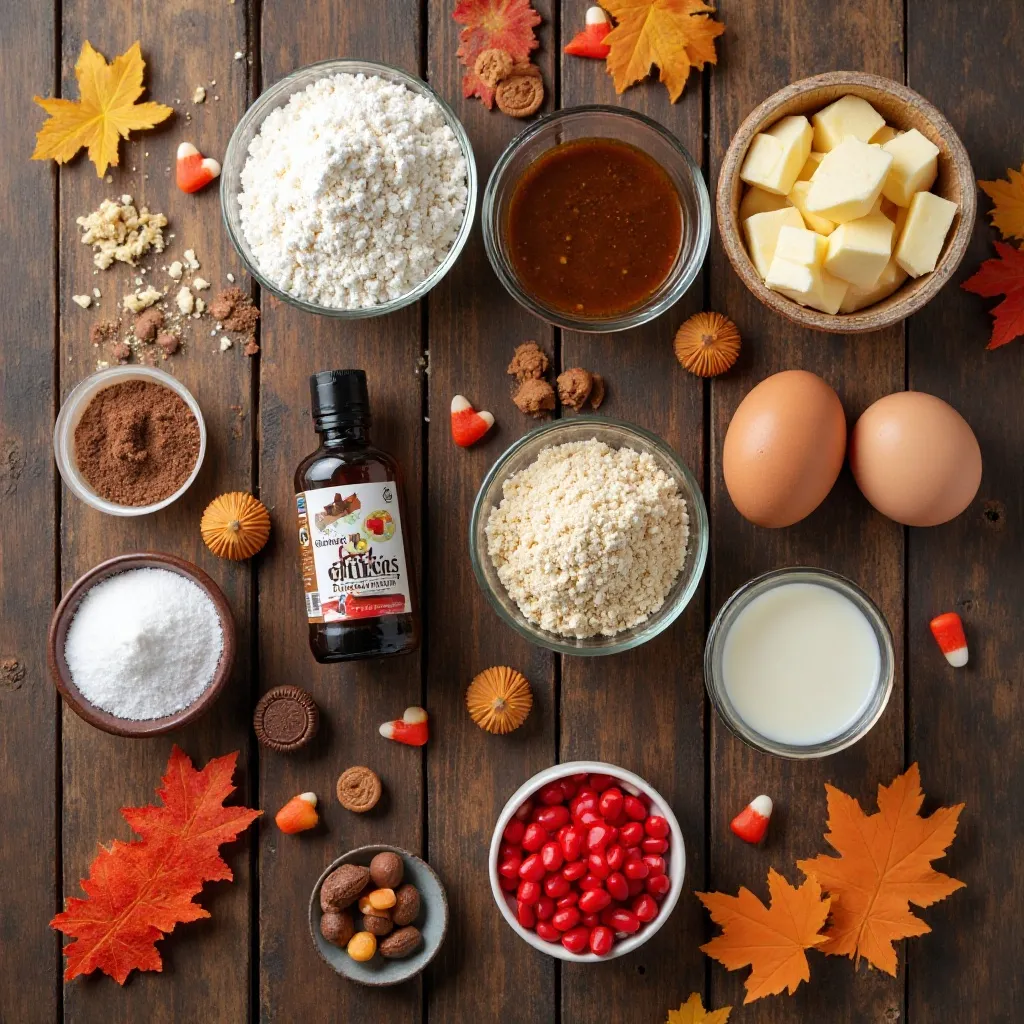
Key Ingredients for Thanksgiving Cupcake Turkeys
For the Cupcakes:
- 1½ cups all-purpose flour
- 1 cup granulated sugar
- 1½ teaspoons baking powder
- ½ teaspoon salt
- ½ cup unsalted butter, softened
- 2 large eggs, room temperature
- 2 teaspoons vanilla extract
- ½ cup whole milk
For the Chocolate Frosting:
- 1 cup unsalted butter, softened
- 3½ cups powdered sugar
- ½ cup unsweetened cocoa powder
- ⅓ cup heavy cream
- 2 teaspoons vanilla extract
- Pinch of salt
For Decorating:
- 12 chocolate sandwich cookies (like Oreos)
- 24 candy eyes
- 12 pieces candy corn
- 12 mini peanut butter cups (Reese’s work great)
- Optional: Red fruit leather or red frosting for wattles
Step-by-Step Instructions
Step 1: Prepare Your Workspace
Preheat your oven to 350°F (175°C). Line a 12-cup muffin tin with cupcake liners. I prefer using brown or orange liners for that autumn vibe, but any color works. Make sure all your ingredients are at room temperature – this is crucial for achieving that perfect, fluffy texture.
Step 2: Mix the Dry Ingredients
In a medium bowl, whisk together the flour, sugar, baking powder, and salt. I like to do this really well, about 30 seconds of whisking, to ensure the baking powder distributes evenly. This prevents those random super-puffy spots some cupcakes get.
Step 3: Cream Butter and Eggs
In a large mixing bowl or stand mixer, beat the softened butter on medium speed for about 2 minutes until it’s light and fluffy. Add the eggs one at a time, beating well after each addition. Pour in the vanilla extract. The mixture should look smooth and slightly pale.
Step 4: Combine Wet and Dry
Add half of your flour mixture to the butter mixture, then pour in half the milk. Mix on low speed just until combined. Add the remaining flour mixture and milk, mixing until you see no more flour streaks. Don’t overmix! I stop as soon as everything comes together. Overmixing creates tough cupcakes, and nobody wants that.
Step 5: Fill and Bake
Divide the batter evenly among the cupcake liners, filling each about two-thirds full. I use a cookie scoop for this – it makes them all uniform and prevents mess. Bake for 18-20 minutes, or until a toothpick inserted in the center comes out clean. Let them cool in the pan for 5 minutes, then transfer to a wire rack to cool completely. This cooling step is non-negotiable for frosting!
Step 6: Make the Chocolate Frosting
While the cupcakes cool, make your frosting. Beat the softened butter in a large bowl for 3-4 minutes until super fluffy. Sift together the powdered sugar and cocoa powder (this prevents lumps – trust me on this). Add half the sugar mixture to the butter, beating on low. Pour in the heavy cream and vanilla, then add the remaining sugar mixture. Beat on low until combined, then increase speed to high and beat for 2 minutes. The frosting should be smooth, fluffy, and perfect for spreading.
Step 7: Frost the Cupcakes
Once your cupcakes are completely cool, frost them generously with chocolate frosting. I use an offset spatula to create a smooth, rounded surface – this becomes the turkey’s body. You want a nice thick layer because that’s what holds all your decorations in place.
Step 8: Create the Turkey Tails
Take your chocolate sandwich cookies and carefully insert them into the back of each frosted cupcake at a slight angle. They should stand upright like a turkey’s fanned tail feathers. If your frosting is firm enough, they’ll stay put immediately. If not, pop the cupcakes in the fridge for 10 minutes to let the frosting set.
Step 9: Add the Turkey Head
Unwrap your mini peanut butter cups. Press one gently into the front of each cupcake, right into that chocolate frosting. This becomes the turkey’s head and body connection. Make sure it’s secure but don’t press so hard that your frosting smooshes everywhere.
Step 10: Attach the Face Details
Now for the fun part! Use a tiny bit of frosting as “glue” to attach two candy eyes to each peanut butter cup head. Press a candy corn beak right below the eyes, with the pointed end facing down. If you’re using red fruit leather or frosting for wattles, add a small piece or dollop just below the beak. Step back and admire your adorable turkey army!
What to Serve Thanksgiving Cupcake Turkeys With
These Thanksgiving cupcake turkeys are pretty versatile for serving! I love setting them out on the dessert table alongside traditional pumpkin pie and apple crisp – they add that playful element that balances more serious desserts. They’re also perfect with hot apple cider or spiced chai tea.
For the kids’ table, serve them with vanilla ice cream for a special treat. The chocolate frosting pairs wonderfully with cold ice cream! If you’re doing a casual Thanksgiving brunch, these work beautifully next to coffee and hot chocolate.
I also like to include them in dessert boards with cinnamon cookies, caramel apple slices, and chocolate-covered pretzels. They become the centerpiece that everyone photographs before devouring. And honestly? They’re great all by themselves as an afternoon snack while you’re prepping the big meal.
Top Tips for Perfecting Thanksgiving Cupcake Turkeys
Use Room Temperature Ingredients
This isn’t just baker speak – it actually matters! Room temperature butter, eggs, and milk blend together smoothly and create better texture. Cold ingredients can cause the batter to curdle or not mix properly. I set mine out about an hour before baking.
Don’t Overmix the Batter
Mix just until you can’t see flour anymore. Overmixing develops gluten, which makes cupcakes dense and tough instead of light and fluffy. When in doubt, undermix slightly.
Let Cupcakes Cool Completely
I know it’s tempting to frost warm cupcakes, but resist! Warm cupcakes will melt your frosting into a soupy mess. Wait at least 30 minutes for them to cool completely. Pop them in the fridge for 10 minutes if you’re impatient like me.
Customize Your Turkeys
Feel free to swap decorations based on what you have! Use M&Ms instead of candy eyes, orange frosting dots instead of candy corn, or chocolate chips for eyes. Some people use pretzels for different tail effects. Get creative!
Make Ahead Strategy
You can bake cupcakes 2 days ahead and store them unfrosted in an airtight container. Make frosting 1 day ahead and refrigerate, then bring to room temperature before using. Decorate the morning of your event for best results.
Frosting Consistency Matters
If your frosting is too stiff, add a tablespoon of milk. Too soft? Add more powdered sugar. You want it firm enough to hold decorations but soft enough to spread smoothly.
Storing and Reheating Tips
Store your Thanksgiving cupcake turkeys in an airtight container at room temperature for up to 2 days. If your kitchen is warm, refrigerate them instead – the chocolate frosting can get soft in heat. Just bring them to room temperature 30 minutes before serving for the best flavor.
For longer storage, freeze unfrosted cupcakes! Wrap each one individually in plastic wrap, then place them all in a freezer bag. They’ll stay fresh for up to 3 months. Thaw overnight in the refrigerator, then frost and decorate the day you plan to serve them.
Already decorated cupcakes can technically be frozen, but I don’t recommend it – the decorations often shift or get damaged, and candy can become weird textures when thawed. If you must freeze decorated ones, place them on a baking sheet in the freezer until solid, then carefully transfer to a container with lots of space between them.
Leftover frosting stores beautifully in the fridge for up to a week in an airtight container. Let it come to room temperature and give it a quick whip before using. You can also freeze frosting for up to 3 months!
Common Baking Mistakes to Avoid
Mistake #1: Overfilling the Liners
I learned this the hard way! If you fill liners more than two-thirds full, cupcakes will overflow and create mushroom tops that make decorating difficult. Stick to the two-thirds rule, and you’ll get perfect dome shapes.
Mistake #2: Opening the Oven Too Early
Don’t peek! Opening the oven before the 15-minute mark can cause cupcakes to sink in the middle. The sudden temperature drop interrupts the rising process. Wait until at least 18 minutes to check.
Mistake #3: Using Expired Baking Powder
Baking powder loses potency after about 6 months. Test yours by adding a teaspoon to warm water – it should bubble vigorously. Dead baking powder means flat, dense cupcakes.
Mistake #4: Decorating Immediately After Frosting
Give your frosted cupcakes 5-10 minutes to set slightly before pushing cookies and candies into them. This prevents the frosting from smearing and makes decorations stay in place better.
Mistake #5: Using Old Candy
Stale candy corn won’t stick well and tastes off. Buy fresh candy specifically for this recipe. Same goes for those candy eyes – fresh ones have better adhesive backing.
Mistake #6: Skipping the Sifting
Always sift your cocoa powder and powdered sugar for frosting. Unsifted cocoa creates lumpy frosting with weird dark spots. It takes 30 extra seconds and makes a huge difference.
Frequently Asked Questions
Can I use box mix for these Thanksgiving cupcake turkeys?
Absolutely! A standard vanilla or chocolate box mix works perfectly. Just follow the package directions, then decorate as described. I’ve done this many times when I’m short on time, and they turn out great.
What if I don’t have candy eyes?
No problem! Use mini chocolate chips (pointed end pressed into the frosting works as pupils), small white candies with dots of black frosting, or even create eyes with white frosting and mini chocolate chips. One year I used white M&Ms with frosting dots – super cute!
How do I keep the cookies from falling over?
Make sure your frosting is thick enough to support them. If they keep tipping, refrigerate the cupcakes for 10-15 minutes to firm up the frosting, then gently press the cookies in at a slight angle. You can also pipe a little extra frosting behind the cookie for support.
Can I make these dairy-free or gluten-free?
Yes! For dairy-free, substitute butter with vegan butter, use almond or oat milk, and choose dairy-free chocolate frosting. For gluten-free, use a 1:1 gluten-free baking flour. The decorating process stays exactly the same.
Why did my cupcakes sink in the middle?
Common causes include opening the oven too early, overmixing the batter, using old leavening agents, or having oven temperature too high. Make sure your oven is properly calibrated and resist peeking until at least 18 minutes in!
Can I use different cookie colors for the tails?
Definitely! Golden Oreos create a lighter “tail feather” effect. Some people use chocolate chip cookies or even wafer cookies. I’ve seen beautiful ones made with Fudge Striped cookies too. Get creative!
How far in advance can I decorate these?
I recommend decorating them the same day you’ll serve them, or at most the night before. The cookies can soften slightly if they sit in frosting too long, and you want them to look fresh and crisp for your guests.
What’s the best way to transport these to a party?
Use a cupcake carrier if you have one. Otherwise, place them in a container with high sides, making sure nothing touches the decorations. I sometimes use toothpicks stuck around the edges (not touching the cupcakes) and cover with plastic wrap – the toothpicks keep the wrap from smashing the decorations.
Nutrition Information
| Nutrient | Per Serving |
|---|---|
| Calories | 385 |
| Total Fat | 19g |
| Saturated Fat | 11g |
| Cholesterol | 75mg |
| Sodium | 185mg |
| Total Carbohydrates | 52g |
| Dietary Fiber | 2g |
| Sugars | 40g |
| Protein | 4g |
Note: Nutritional values are approximate and based on one decorated cupcake.
These Thanksgiving cupcake turkeys have become such a cherished tradition in my kitchen. There’s something magical about watching simple cupcakes transform into these cheerful little characters that make everyone smile. Whether you’re bringing them to a potluck, serving them at your family dinner, or making them as a fun activity with kids, they never disappoint.
The best part? You don’t need to be an expert baker to pull these off. If you can frost a cupcake and press candy into frosting, you’ve got this! I hope these little turkeys bring as much joy to your Thanksgiving table as they have to mine.
Happy baking, and may your holidays be filled with delicious treats and even better memories! 🦃

