Thanksgiving Layer Cake Your Family Will Love
Bake a Thanksgiving layer cake full of autumn flavor, layered beauty, and indulgent frosting — perfect for holiday celebrations and dessert tables.
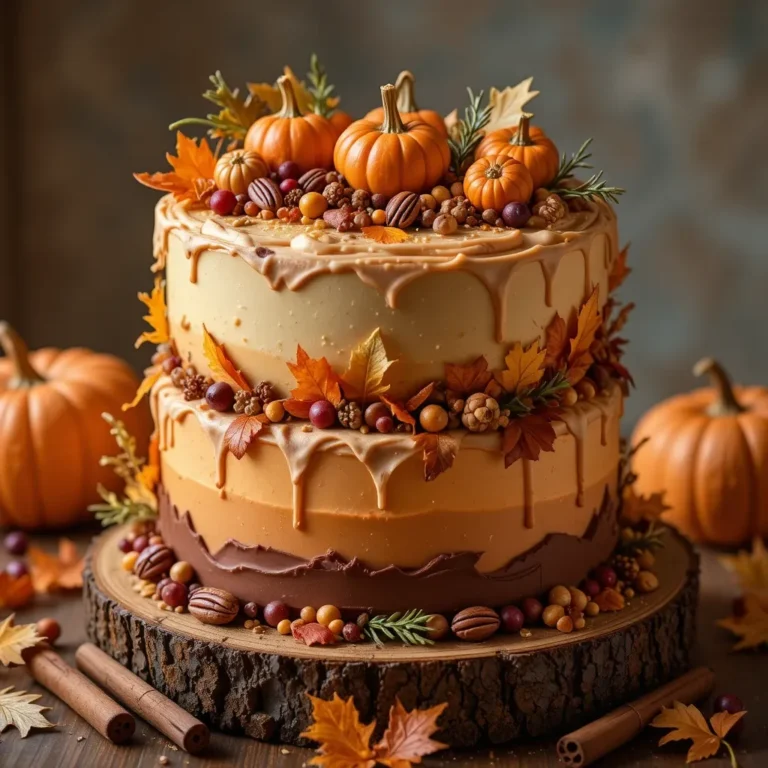
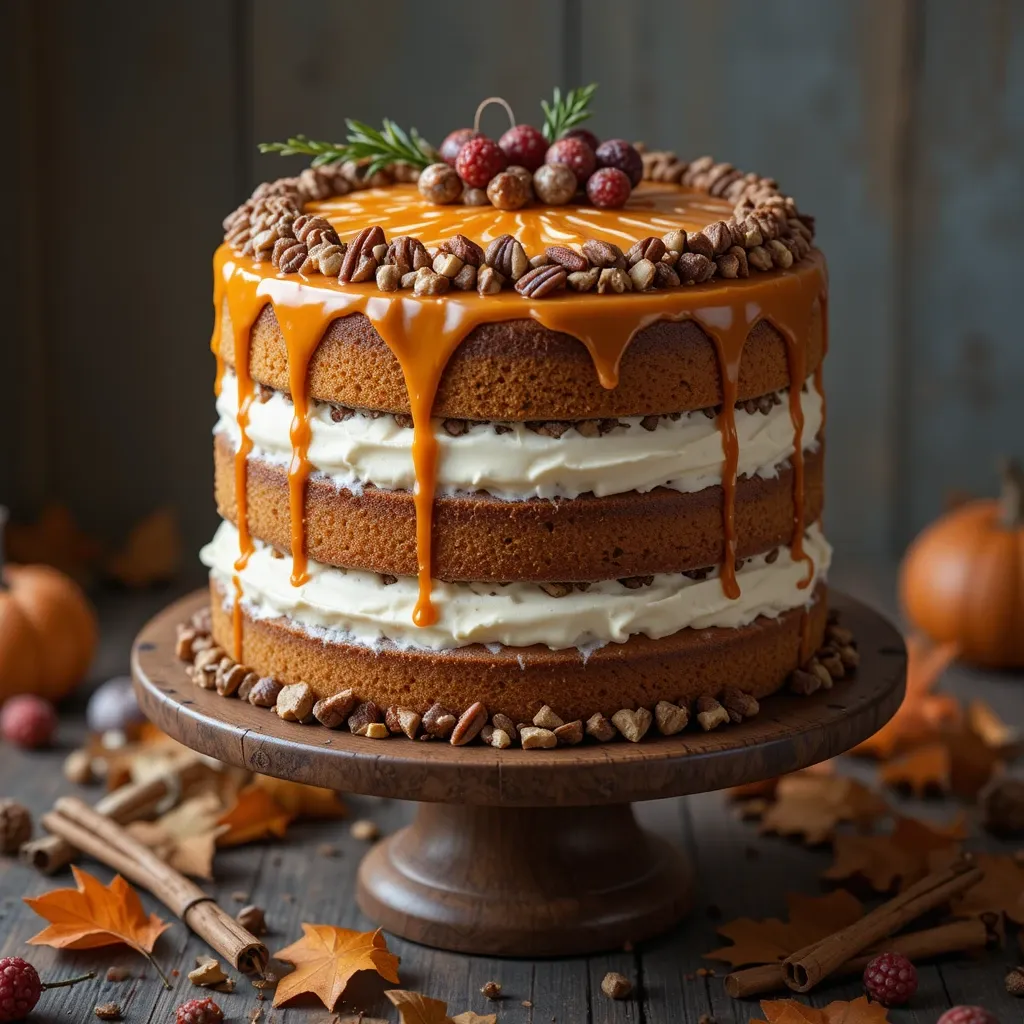
Picture this: a towering masterpiece of moist spiced cake layers, velvety cream cheese frosting, and autumn flavors that make everyone gather around your dessert table. This Thanksgiving layer cake isn’t just dessert – it’s the grand finale your holiday feast deserves.
With warm cinnamon, nutmeg, and a hint of pumpkin spice, this cake captures everything we love about fall in one spectacular creation. It’s surprisingly simple to make, feeds a crowd, and can be prepared a day ahead. Similar to our popular [Apple Spice Bundt Cake], this recipe brings comfort and celebration together in perfect harmony.
What is Thanksgiving Layer Cake?
Ever wonder why we call it a Thanksgiving layer cake and not just “autumn cake” or “holiday cake”? Well, this beauty earned its name because it combines all the quintessential Thanksgiving flavors – warm spices, brown sugar sweetness, and that cozy feeling of gathering around the table with loved ones.
It’s like taking all the best parts of pumpkin pie, spice cake, and cream cheese frosting and stacking them into one glorious tower. After all, they say the way to anyone’s heart is through their stomach, and this cake is your golden ticket! Don’t wait for the perfect occasion – make this your new Thanksgiving tradition today.
Why You’ll Love This Thanksgiving Layer Cake
The Ultimate Holiday Showstopper
This Thanksgiving layer cake transforms simple pantry ingredients into an impressive three-layer masterpiece that looks like it came from a fancy bakery. The moist, tender crumb gets its incredible texture from buttermilk and oil, while the cream cheese frosting adds a tangy-sweet contrast that keeps everyone coming back for seconds. Each bite delivers the perfect balance of spice and sweetness without being overwhelming.
Budget-Friendly Baking
Skip the $60 bakery cake and make this beauty at home for a fraction of the cost. You likely have most ingredients in your pantry already – flour, sugar, eggs, and those essential fall spices. Making it yourself also means you control the sweetness level and can adjust the spices to your family’s preferences. Plus, you get the satisfaction of creating something truly special with your own hands.
Customizable and Crowd-Pleasing
The beauty of this Thanksgiving layer cake lies in its versatility. Add pecans for crunch, fold in mini chocolate chips for extra indulgence, or swirl in caramel between layers. The frosting can be flavored with maple syrup, cinnamon, or even a splash of bourbon for adult gatherings. If you enjoyed our [Carrot Cake with Cream Cheese Frosting], you’ll adore how this recipe takes those familiar flavors and elevates them for the holidays. Ready to become the dessert hero of Thanksgiving? Let’s get baking!
How to Make Thanksgiving Layer Cake
Quick Overview
This Thanksgiving layer cake comes together easier than you’d think. The batter mixes up in minutes with simple ingredients, bakes into perfectly even layers, and assembles into a stunning centerpiece that serves 12-16 people.
Time Breakdown:
- Prep Time: 30 minutes
- Baking Time: 25-30 minutes
- Cooling Time: 1 hour
- Assembly & Frosting: 45 minutes
- Total Time: 2 hours 45 minutes
The result? A moist, flavorful cake with creamy frosting that tastes like fall in every bite.
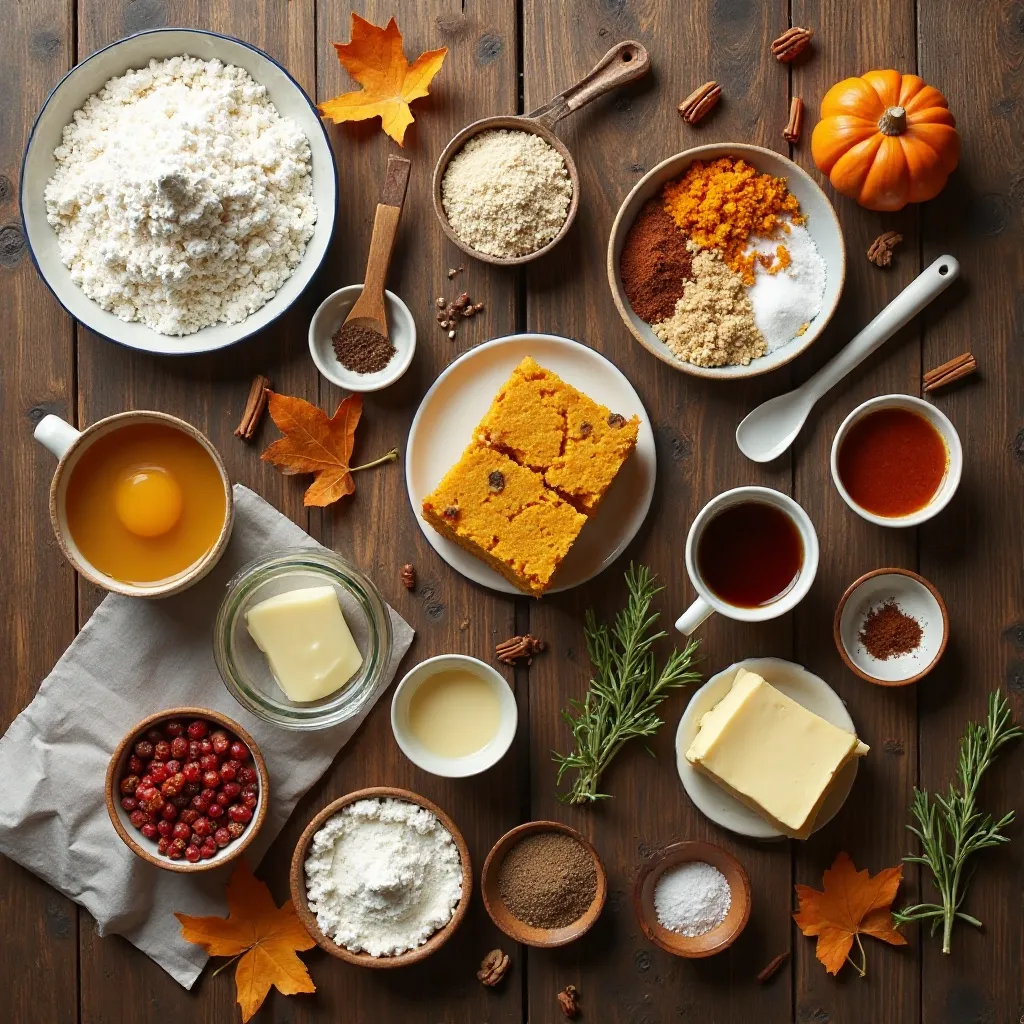
Key Ingredients for Thanksgiving Layer Cake
For the Cake:
- 3 cups all-purpose flour
- 2½ cups granulated sugar
- 1 tablespoon baking powder
- 1 teaspoon baking soda
- 1 teaspoon salt
- 2 teaspoons ground cinnamon
- 1 teaspoon ground nutmeg
- ½ teaspoon ground ginger
- ½ teaspoon ground cloves
- 4 large eggs, room temperature
- 1½ cups vegetable oil or melted coconut oil
- 1 cup buttermilk, room temperature
- 1 cup pumpkin puree (not pumpkin pie filling)
- 2 teaspoons vanilla extract
- ½ cup strong brewed coffee, cooled
For the Cream Cheese Frosting:
- 16 ounces cream cheese, softened
- 1 cup unsalted butter, softened
- 6 cups powdered sugar, sifted
- 2 teaspoons vanilla extract
- ¼ teaspoon salt
- 2-4 tablespoons heavy cream (as needed)
Optional Garnishes:
- Chopped pecans or walnuts
- Caramel drizzle
- Fresh rosemary sprigs
- Candied cranberries
- Cinnamon sticks
Step-by-Step Instructions
Prepare Your Baking Setup
Preheat your oven to 350°F (175°C). Grease three 9-inch round cake pans thoroughly with butter or non-stick spray, then line the bottoms with parchment paper circles. Grease the parchment too. Lightly dust each pan with flour, tapping out any excess. This double protection ensures your cakes release perfectly every time.
Mix the Dry Ingredients
In a large mixing bowl, whisk together the flour, sugar, baking powder, baking soda, salt, cinnamon, nutmeg, ginger, and cloves. Whisk for at least 30 seconds to ensure the spices are evenly distributed throughout the flour mixture. This step is crucial for consistent flavor in every slice.
Combine the Wet Ingredients
In a separate large bowl, whisk the eggs until they’re slightly foamy. Add the oil, buttermilk, pumpkin puree, vanilla extract, and cooled coffee. Whisk until everything is completely smooth and well combined. The coffee enhances the chocolate notes in the spices and adds depth without making the cake taste like coffee.
Create the Batter
Pour the wet ingredients into the dry ingredients. Using a wooden spoon or rubber spatula, gently fold everything together until just combined. Don’t overmix – a few small lumps are fine. Overmixing develops the gluten and creates a tough, dense cake. The batter will be relatively thin, which is exactly what you want for a moist cake.
Divide and Bake
Divide the batter evenly among your three prepared pans. Use a kitchen scale for perfect accuracy, or eyeball it by filling each pan about two-thirds full. Tap each pan gently on the counter a few times to release any air bubbles. Bake for 25-30 minutes, rotating the pans halfway through for even baking. The cakes are done when a toothpick inserted in the center comes out with just a few moist crumbs.
Cool Completely
Let the cakes cool in their pans for exactly 10 minutes on wire racks. Run a thin knife around the edges of each pan to loosen the cakes. Carefully invert each cake onto the wire rack, peel off the parchment paper, then flip right-side up to cool completely. This takes at least one hour. Never frost warm cakes or the frosting will melt and slide off.
Make the Cream Cheese Frosting
While the cakes cool, make your frosting. In a large bowl using an electric mixer, beat the softened cream cheese and butter together on medium speed for 3-4 minutes until completely smooth and fluffy. Scrape down the sides of the bowl. Reduce speed to low and gradually add the powdered sugar, one cup at a time, mixing well after each addition. Add the vanilla and salt. Beat on medium-high speed for 2-3 minutes until light and fluffy. If the frosting is too thick, add heavy cream one tablespoon at a time until you reach the perfect spreading consistency.
Level the Cake Layers
Once your cakes are completely cool, use a long serrated knife or cake leveler to trim off any domed tops, creating flat, even surfaces. This ensures your cake stacks beautifully without leaning. Save the scraps for snacking or making cake truffles later.
Assemble the First Layer
Place one cake layer on your serving plate or cake stand. Slide strips of parchment paper under the edges to protect your plate while frosting. Spread about 1 to 1½ cups of frosting evenly across the top of the first layer, spreading it all the way to the edges. Use an offset spatula for the smoothest application.
Stack and Frost
Place the second cake layer on top, pressing down gently to secure it. Spread another 1 to 1½ cups of frosting on this layer. Top with the third and final cake layer, making sure it’s perfectly centered. Use any remaining frosting to cover the top and sides of the entire cake. Start with a thin crumb coat (a very thin layer that seals in crumbs), then refrigerate for 15 minutes. Apply the final, thick layer of frosting for a beautiful finish.
Decorate and Serve
Get creative with your decorations. Pipe rosettes or stars around the top border using a piping bag fitted with a star tip. Press chopped pecans into the sides of the cake. Drizzle with salted caramel sauce. Add fresh rosemary sprigs and candied cranberries for a festive touch. Refrigerate the finished cake for at least 30 minutes before slicing to let the frosting set. Remove from the refrigerator 20 minutes before serving for the best flavor and texture.
What to Serve Thanksgiving Layer Cake With
This Thanksgiving layer cake shines as the star of your dessert table, but pairing it thoughtfully makes the experience even more memorable.
Serve slices alongside freshly whipped cream or vanilla ice cream for temperature and texture contrast. The cold, creamy element balances the cake’s richness beautifully.
Hot beverages are this cake’s best friend. Pour cups of spiced chai tea, pumpkin spice lattes, or classic hot apple cider. The warm spices echo the cake’s flavor profile perfectly. For adults, spiked coffee with Bailey’s or bourbon makes an indulgent pairing.
Fresh fruit provides a refreshing counterpoint. Arrange sliced pears, apples, or fresh figs on the dessert plate. Their natural acidity cuts through the sweetness and adds elegant sophistication.
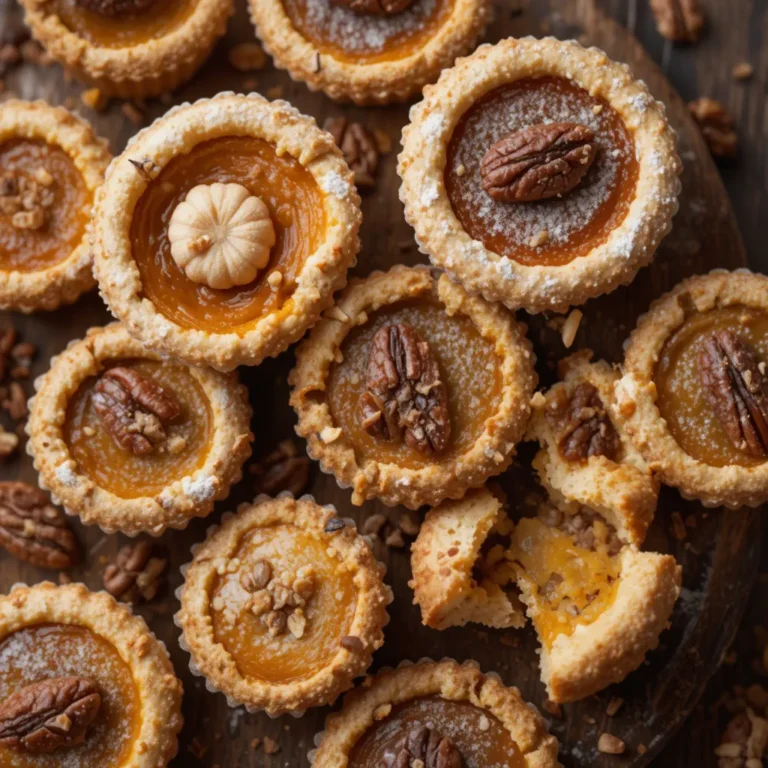
Create a dessert spread by offering this cake alongside [Pecan Pie Bars] and [Pumpkin Cheesecake Bites]. This variety lets guests sample multiple treats and makes your table look abundant and welcoming.
Don’t forget the drinks for kids. Fresh pressed apple juice, sparkling cider, or warm hot chocolate make everyone feel included in the celebration.
Top Tips for Perfecting Thanksgiving Layer Cake
Temperature Matters
Bring all your dairy ingredients to room temperature before starting. Cold eggs and buttermilk don’t incorporate well, creating a dense, uneven texture. Set everything out 30-60 minutes before baking.
Don’t Skip the Coffee
The coffee doesn’t make your cake taste like coffee – it intensifies the chocolate notes in the spices and creates incredible depth. Use strong brewed coffee, cooled to room temperature. Instant coffee dissolved in hot water works perfectly too.
Measure Flour Correctly
Spoon flour into your measuring cup and level it off with a knife. Don’t scoop directly from the bag or pack it down. Too much flour creates dry, tough cake. For best results, weigh your flour using a kitchen scale (3 cups = 360 grams).
Test for Doneness Carefully
Check your cakes at 25 minutes by inserting a toothpick in the center. You want a few moist crumbs clinging to it – not wet batter, but not completely clean either. Overbaking creates dry cake, even if your recipe is perfect.
Chill Between Frosting Layers
After applying your crumb coat, refrigerate the cake for 15-20 minutes. This sets the first layer of frosting, preventing crumbs from mixing into your final, beautiful outer layer. This professional trick makes amateur bakers look like pros.
Adjust Spice Levels
If your family prefers less spice, reduce the amounts by half. For spice lovers, add an extra teaspoon of cinnamon or a quarter teaspoon of allspice. Taste the batter (it’s safe since we’ll cook it) and adjust before baking.
Use Pumpkin Puree, Not Pie Filling
Always use plain pumpkin puree, not pumpkin pie filling. The pie filling contains added sugar and spices that throw off the recipe’s balance. Check the ingredients label – it should list only pumpkin.
Stabilize Your Frosting
If making this cake in warm weather or if it needs to sit out for hours, add 2 tablespoons of cornstarch to your frosting. This helps it hold its shape without refrigeration for longer periods.
Storing and Reheating Tips
Room Temperature Storage
If you plan to eat the cake within two days, you can store it at room temperature in a cool environment (below 70°F). Cover it loosely with a cake dome or large bowl turned upside down. Never use plastic wrap directly on frosting as it sticks and ruins your smooth finish. The cream cheese frosting remains stable for up to 48 hours in cool conditions.
Refrigerator Storage
For longer storage, refrigerate your Thanksgiving layer cake. It stays fresh in the refrigerator for up to five days. Cover it with a cake dome or tent aluminum foil over it, making sure the foil doesn’t touch the frosting. Before serving, let the cake sit at room temperature for 20-30 minutes. Cold cake has muted flavors and a firmer texture, so this warming period is essential for the best taste experience.
Freezing Instructions
This cake freezes beautifully for up to three months. For best results, freeze the cake layers unfrosted. Wrap each cooled layer tightly in plastic wrap, then in aluminum foil. Label with the date. When ready to serve, thaw layers in the refrigerator overnight, then bring to room temperature before frosting and assembling.
You can also freeze the fully assembled and frosted cake. First, place it in the freezer uncovered for one hour to firm up the frosting. Then wrap the entire cake in plastic wrap followed by aluminum foil. Thaw in the refrigerator overnight, then bring to room temperature before serving.
Reheating Individual Slices
While this cake is delicious cold, slightly warming individual slices brings back that fresh-baked tenderness. Microwave a slice for 8-10 seconds – just enough to take the chill off without melting the frosting. Alternatively, let slices sit at room temperature for 15 minutes before eating.
Make-Ahead Strategy
Bake the cake layers up to two days in advance. Wrap them well and store at room temperature. Make the frosting one day ahead and refrigerate in an airtight container. Bring the frosting to room temperature and rewhip briefly before assembling your cake. This strategy breaks the work into manageable sessions and actually improves flavor as the cakes have time to develop.
Common Baking Mistakes to Avoid
Opening the Oven Door Too Early
Resist the urge to check your cakes before the 20-minute mark. Opening the oven door releases heat and causes temperature fluctuations that make cakes sink in the middle. The sudden temperature drop interrupts the rising process when the cake structure is still fragile. Use your oven light to peek instead.
Using Expired Leavening Agents
Baking powder and baking soda lose potency over time, resulting in dense, flat cakes that don’t rise properly. Test your baking powder by adding a teaspoon to hot water – it should bubble vigorously. Test baking soda by adding a pinch to vinegar. Replace these ingredients every six months for reliable results.
Overmixing the Batter
Stop mixing as soon as the flour disappears into the wet ingredients. Overmixing develops gluten strands, creating a tough, chewy texture instead of the tender crumb we want. Mix gently with a folding motion, not vigorous stirring. Think of it like you’re incorporating air, not beating it out.
Uneven Pan Sizes
Using different sized pans throws off baking times and creates lopsided layers. Invest in three matching 9-inch round pans for even baking. If you only have two pans, bake two layers first, then wash, cool, and prepare one pan again for the third layer. Adjust the batter amount accordingly.
Frosting Warm Cakes
This is the number one mistake home bakers make. Warm cakes create a melting disaster that slides right off. Always let cakes cool completely – at least one full hour on wire racks. Touch the bottom of the cake pan; if it’s even slightly warm, wait longer. Patience here prevents heartbreak.
Skipping the Parchment Paper
Even with greased pans, cakes can stick, especially in older pans with scratches. The parchment paper circle creates a foolproof release barrier. Trace your pan on parchment, cut it out, and place it in the greased pan. This small step saves your cakes every single time.
Not Leveling the Layers
Domed cake tops make unstable, leaning towers. Always trim the tops with a long serrated knife to create flat, even surfaces. This might feel wasteful, but it’s essential for professional-looking results. Those scraps make delicious snacks or can be frozen for cake pops later.
Using the Wrong Consistency Frosting
Too-stiff frosting tears your cake layers and won’t spread smoothly. Too-soft frosting slides off and won’t hold its shape. The perfect consistency should spread easily but hold peaks when you pull the spatula up. Adjust with more powdered sugar to thicken or cream to thin until you achieve spreadable perfection.
Frequently Asked Questions
Can I make this Thanksgiving layer cake ahead of time?
Absolutely! Bake the cake layers up to two days in advance and store them wrapped tightly at room temperature. Make the frosting a day ahead and refrigerate it. Assemble the cake up to one day before serving and refrigerate. This actually improves the texture as the layers settle and the flavors meld together. Just remember to bring it to room temperature 30 minutes before serving.
Can I use a different type of flour?
All-purpose flour works best for this recipe’s structure and texture. Cake flour makes the cake too delicate and crumbly for stacking. Whole wheat flour creates a dense, heavy texture. If you need a gluten-free version, use a 1:1 gluten-free baking flour blend with xanthan gum. The texture will be slightly different but still delicious.
What if I don’t have buttermilk?
Make your own buttermilk substitute. Add one tablespoon of white vinegar or lemon juice to a measuring cup, then fill to the one-cup line with regular milk. Stir and let it sit for 5 minutes until it curdles slightly. This creates the acidity needed for tender cakes and proper rising. You can also use plain yogurt thinned with a little milk.
Why did my cake sink in the middle?
Several factors cause sinking: opening the oven door too early, expired baking powder, overmixing the batter, or oven temperature that’s too high or low. Make sure your oven temperature is accurate using an oven thermometer. Old leavening agents lose power and won’t provide enough lift. Overmixing creates too much structure that collapses as the cake cools.
Can I make this as a sheet cake instead of layers?
Yes! Pour all the batter into a greased 13×18-inch sheet pan. Bake at 350°F for 35-40 minutes until a toothpick comes out clean. Cool completely, then frost the top. This version serves the same number of people but with less assembly work. It’s perfect for casual gatherings or transporting to potlucks.
How do I prevent my frosting from melting?
Use fully softened (not melted) butter and cream cheese at room temperature. Beat them until fluffy before adding sugar. Make sure your cake is completely cool before frosting. If serving outdoors or in warm conditions, add 2 tablespoons of cornstarch to the frosting for stability. Keep the finished cake refrigerated until 20 minutes before serving.
Can I reduce the sugar in this recipe?
You can reduce the sugar by up to ¼ cup without dramatically affecting texture, but the cake will be less moist and won’t stay fresh as long. Sugar isn’t just for sweetness – it tenderizes the crumb and helps retain moisture. For a less sweet option, reduce the frosting sugar instead, which has less impact on structure.
What’s the best way to get smooth frosting?
Apply a thin crumb coat first, then refrigerate for 15 minutes. Use an offset spatula and work in long, smooth strokes. For perfectly smooth sides, hold your spatula at a 45-degree angle and rotate your cake stand while keeping the spatula still. A bench scraper also creates beautifully smooth sides. Dip your spatula in hot water and wipe dry between strokes for the smoothest finish.
Can I add other mix-ins to the batter?
Definitely! Fold in one cup of chopped pecans, walnuts, or mini chocolate chips at the end. Add ½ cup of raisins or dried cranberries. Swirl in caramel sauce between layers. Just don’t add more than one cup total of mix-ins or the cake structure becomes compromised. Toss any add-ins in a tablespoon of flour first to prevent sinking.
My frosting is too runny – how do I fix it?
Add more powdered sugar, ¼ cup at a time, beating well after each addition until the frosting thickens. If it’s extremely runny, refrigerate the bowl for 15-20 minutes, then beat again. This firms up the butter and cream cheese. Make sure your butter and cream cheese were softened but not melted when you started, as melted fats create permanently runny frosting.
Nutrition Information
| Nutrient | Per Slice (1/16 of cake) |
|---|---|
| Calories | 645 |
| Total Fat | 34g |
| Saturated Fat | 14g |
| Cholesterol | 105mg |
| Sodium | 380mg |
| Total Carbohydrates | 82g |
| Dietary Fiber | 2g |
| Sugars | 64g |
| Protein | 6g |
| Vitamin A | 45% DV |
| Calcium | 8% DV |
| Iron | 10% DV |
Note: Nutrition information is approximate and based on one slice from a 16-slice cake with standard ingredients.
Pro Baker’s Secret: The secret to incredibly moist cake is adding coffee to the batter. It deepens the flavors and keeps the cake tender for days. Trust the process – you won’t taste the coffee, just amazingly rich, complex flavor that tastes like you spent hours developing it.
This Thanksgiving layer cake represents everything we love about holiday baking. It brings people together, creates lasting memories, and fills your home with the irresistible aroma of cinnamon and spice. Whether this is your first time making a layer cake or you’re a seasoned baker, this recipe delivers consistent, impressive results that make you look like a professional.
The beauty of this cake extends beyond its taste. It’s a conversation starter, a show-stopper, and a labor of love that tells your family and friends how much they mean to you. In a world of store-bought convenience, taking the time to bake from scratch creates something truly special.
So gather your ingredients, preheat that oven, and create your own Thanksgiving tradition. Your kitchen will smell incredible, your guests will be impressed, and you’ll have the satisfaction of knowing you created something beautiful with your own hands. This isn’t just cake – it’s edible gratitude, served one delicious slice at a time.
Happy baking, and may your Thanksgiving table be filled with love, laughter, and this extraordinary cake!