Turkey Cakesicles: The Easiest Thanksgiving Dessert Ever
Turkey Cakesicles are the sweetest Thanksgiving dessert idea! Chocolate-dipped cake pops shaped like turkeys for a fun and delicious.
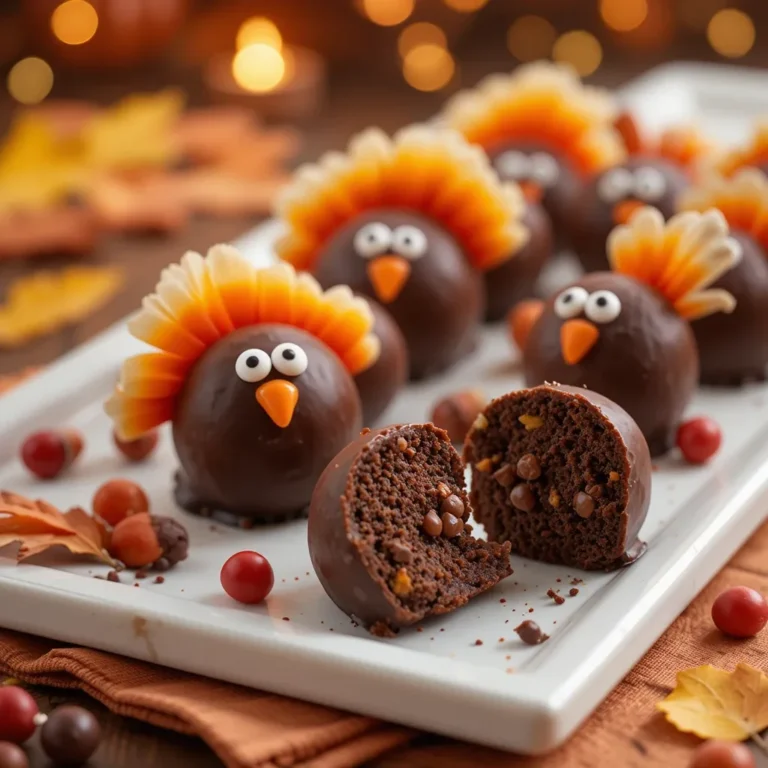
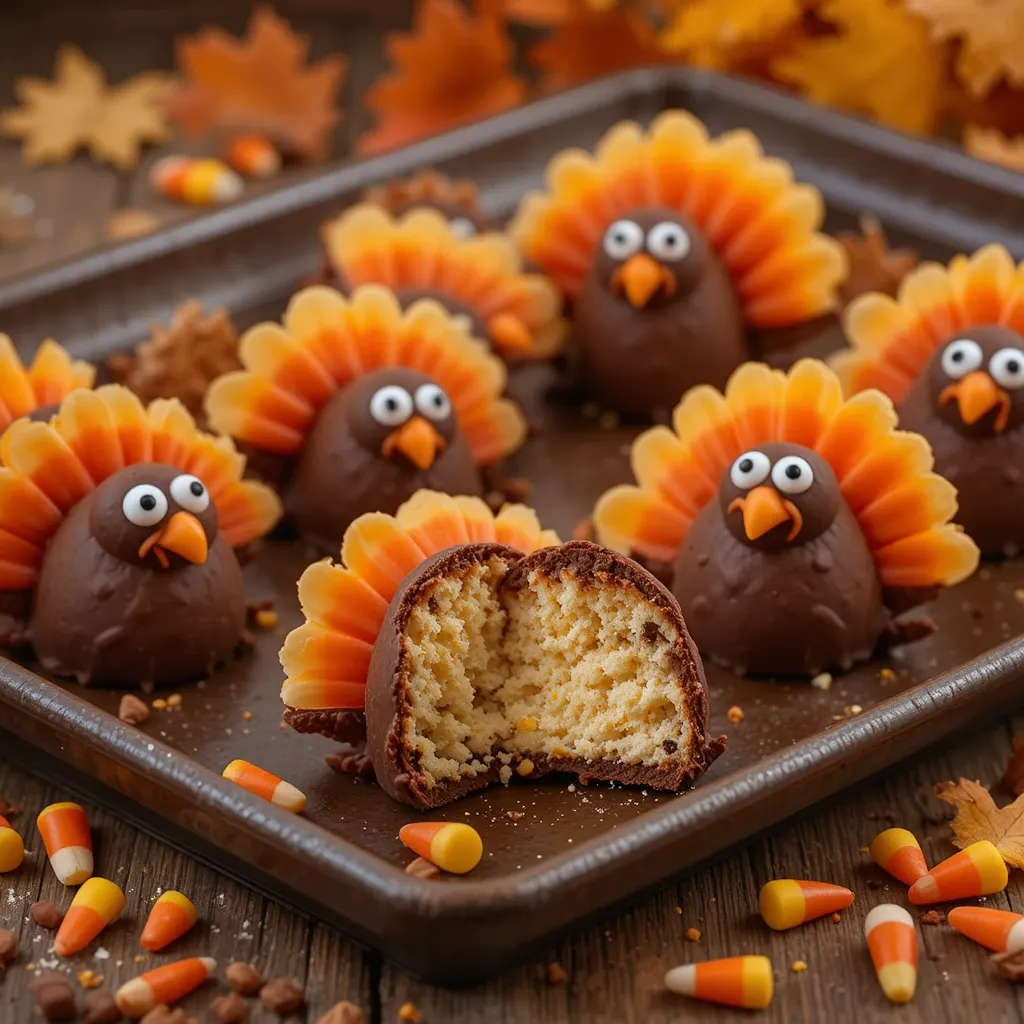
There’s something magical about turning cake into adorable bite-sized treats, and these turkey cakesicles are pure Thanksgiving joy on a stick! Moist, flavorful, and ridiculously cute, these little turkey-shaped delights combine the best of cake pops and popsicles.
I still remember my niece’s face lighting up when she first saw these at our family gathering last year. Fun fact: cakesicles became a viral sensation during the pandemic when home bakers were looking for creative, Instagram-worthy treats!
These turkey cakesicles are surprisingly simple to make, ready in under two hours, and guaranteed to be the star of your holiday dessert table. If you loved my pumpkin spice cake pops, you’re going to absolutely adore these festive beauties!
What Are Turkey Cakesicles?
Ever heard of cakesicles and wondered if they’re cake or popsicles? Well, they’re neither and both at the same time! These clever little treats are essentially cake and frosting molded into a popsicle shape, coated in chocolate, and decorated to look like adorable turkeys.
Why “cakesicles”? Because they look like popsicles but taste like heaven in cake form! As my grandmother always said, “the way to a man’s heart is through his stomach,” and trust me, these turkey cakesicles will steal everyone’s heart at your Thanksgiving table.
Don’t let the fancy name intimidate you – give these a try and watch them disappear faster than you can say “Happy Thanksgiving!”
Why You’ll Love This Turkey Cakesicles Recipe
The Ultimate Thanksgiving Show-Stopper
These turkey cakesicles are the perfect blend of delicious and adorable. The combination of moist cake crumbs mixed with cream cheese frosting creates an incredibly rich, truffle-like texture that melts in your mouth. When you bite through the smooth chocolate coating into that tender, flavorful center, it’s pure bliss. The best part? You can customize the cake flavor to your heart’s content – chocolate, vanilla, spice cake, or even pumpkin!
Budget-Friendly Holiday Treats
Making these at home costs a fraction of what you’d pay at a fancy bakery. Professional cakesicles can run $5-8 each, but you can make a dozen gorgeous turkey cakesicles for under $15. Plus, you probably have most of the ingredients in your pantry already. It’s the perfect project for using up leftover cake from another baking session. If you’ve tried my homemade cake pops recipe, you know how much money you save by making these treats yourself.
Creative Decorating Fun for Everyone
The decorating process is where these really shine! Using candy melts in fall colors, candy eyes, and simple candy corn pieces, you’ll create personality-filled turkeys that look professionally made. Each one becomes a little work of art. It’s an amazing activity to do with kids – they’ll love helping decorate and will feel so proud seeing their creations come to life.
Make Ahead Magic
These freeze beautifully, meaning you can prepare them weeks before Thanksgiving and have one less thing to worry about during the holiday rush. Talk about a stress-free dessert solution! Why not whip up a batch this weekend and cross dessert off your holiday to-do list?
How to Make Turkey Cakesicles
Quick Overview
Turkey cakesicles are easier than you think! This recipe delivers rich, moist cake bites with a smooth chocolate coating and adorable turkey decorations. The secret is in the cake-to-frosting ratio, which creates that perfect truffle-like consistency. With simple molding techniques and straightforward decorating steps, you’ll have Instagram-worthy treats in no time.
Time Requirements:
- Prep Time: 30 minutes
- Chilling Time: 60 minutes
- Decorating Time: 45 minutes
- Total Time: 2 hours 15 minutes
- Yield: 12-14 cakesicles
Key Ingredients for Turkey Cakesicles
For the Cake Base:
- 2 cups crumbled cake (vanilla, chocolate, or spice cake)
- ½ cup cream cheese frosting
- ½ teaspoon vanilla extract
For the Coating and Decoration:
- 2 cups orange candy melts
- 1 cup brown candy melts
- ½ cup red candy melts
- ½ cup yellow candy melts
- 12-14 popsicle sticks
- Candy eyes (24-28 pieces)
- Candy corn pieces
- Cakesicle molds (standard size)
Step-by-Step Instructions
Step 1: Prepare Your Cake Base
Start by baking your favorite cake according to package or recipe directions. Let it cool completely – this is crucial! Once cooled, crumble the cake into fine crumbs using your hands or a food processor. You want the texture similar to wet sand. I learned the hard way that leaving chunks too large makes the cakesicles fall apart.
In a large mixing bowl, combine the cake crumbs with cream cheese frosting and vanilla extract. Mix with your hands or a sturdy spoon until everything is completely combined and holds together when squeezed. The mixture should feel like play-dough.
Step 2: Melt and Coat the Molds
Melt your orange candy melts according to package directions, usually 30-second intervals in the microwave, stirring between each interval. Don’t overheat or the chocolate will seize! Using a spoon or small spatula, coat the inside of each cakesicle mold cavity with a thin, even layer of melted orange candy.
Make sure you cover all the edges and corners. Use the back of the spoon to smooth it out. Place the molds in the freezer for 5 minutes to set completely.
Step 3: Fill the Molds
Remove your molds from the freezer. Take small portions of your cake mixture and press them firmly into each cavity, filling it about three-quarters full. Make a small well or indentation in the center of the mixture. Insert a popsicle stick into each well, pushing it down about halfway into the cake mixture. The stick should be firmly embedded but not poking through the other side.
Step 4: Seal the Cakesicles
Reheat your orange candy melts if needed. Spoon melted candy over the top of each filled cavity, completely covering the cake mixture and sealing in the popsicle stick. Use a spatula or bench scraper to smooth the top, removing any excess chocolate so it’s flush with the mold. This step is important – a smooth back makes for prettier cakesicles! Place the molds in the freezer for 30-45 minutes until completely firm.
Step 5: Unmold Your Cakesicles
Gently twist and flex the mold to release the cakesicles. They should pop out easily when fully frozen. If they’re sticking, pop them back in the freezer for another 10 minutes. Handle them by the stick to avoid fingerprints on the smooth chocolate surface. Place them on a parchment-lined baking sheet.
Step 6: Create the Turkey Faces
Melt your brown candy melts. Dip the top portion of each orange cakesicle into the brown candy to create the turkey’s “head.” Let the excess drip off, then place back on the parchment paper. Before the brown chocolate sets, attach two candy eyes. Melt a tiny bit of red candy melts and use a toothpick to add a small red “wattle” under the eyes. Let everything set for 10 minutes.
Step 7: Add the Feather Details
Now for the fun part! Melt small amounts of red, yellow, and orange candy melts in separate bowls. Using a piping bag, small ziplock bag with the corner cut off, or even a toothpick, create feather designs on the back of each turkey. You can do simple lines radiating out from the center, or get creative with overlapping colors.
Add a small orange triangle for the beak using candy corn or piped orange candy. Let everything set completely at room temperature for 15-20 minutes.
Step 8: Final Touches
Once fully set, you can add extra details if desired. Some bakers add a small white dot to each eye for a sparkle effect. Others use edible markers to add additional details. Get creative and let your personality shine through!
What to Serve Turkey Cakesicles With
These adorable treats are versatile and pair wonderfully with various Thanksgiving offerings:
Hot Beverages: Serve alongside hot apple cider, pumpkin spice lattes, or creamy hot chocolate for a cozy fall dessert experience.
Coffee Bar: Set up a coffee station at your Thanksgiving gathering and display these as the perfect sweet accompaniment to espresso or cappuccino.
Dessert Platters: Arrange them on a platter with mini pumpkin pies, pecan tart bites, and autumn sugar cookies for a stunning dessert display.
Ice Cream: Stick one in a scoop of vanilla or cinnamon ice cream for an over-the-top dessert experience kids will love.
Top Tips for Perfecting Turkey Cakesicles
Get the Consistency Right
The cake-to-frosting ratio is everything! Start with less frosting than you think you need – you can always add more. The mixture should hold together when squeezed but not be so wet that it’s sticky or mushy. If it’s too dry and crumbly, add frosting one teaspoon at a time. Too wet? Add more cake crumbs gradually.
Temperature Control is Key
Work in a cool kitchen if possible. Candy melts can be finicky in warm environments. If your hands are warm, the cake mixture will become too soft and difficult to work with. I sometimes wear disposable gloves to keep the mixture cooler and prevent sticking.
Avoid Thick Chocolate Coats
When coating your molds, thin layers are better than thick ones. Thick chocolate shells can crack or be too hard to bite through comfortably. Multiple thin layers work better than one thick layer if you’re worried about coverage.
Prevent Sticking Issues
Make sure your molds are completely clean and dry before starting. Any moisture or residue can cause sticking. If you’re having persistent sticking issues, try placing the filled molds in the freezer for an extra 15 minutes.
Color Mixing Tricks
Can’t find the exact candy melt color you want? Mix colors! Orange and brown make a great burnt orange. White and red create pink. Don’t be afraid to experiment before committing to your cakesicles.
Practice Your Piping
Before piping decorative feathers directly onto your cakesicles, practice on parchment paper first. This helps you get comfortable with the consistency and pressure needed for clean lines.
Storing and Reheating Tips
Room Temperature Storage
Finished turkey cakesicles can sit at room temperature for up to 3 days in a cool, dry place. Store them in an airtight container with parchment paper between layers to prevent sticking. Avoid direct sunlight or heat sources, as the candy coating will soften or even melt.
Refrigerator Storage
For longer storage, keep cakesicles in the refrigerator for up to 2 weeks. Place them in an airtight container with parchment or wax paper separating each layer. Let them sit at room temperature for 10-15 minutes before serving for the best texture and flavor. Cold cakesicles can be a bit hard to bite into!
Freezer Storage
These freeze beautifully for up to 3 months! Wrap each cakesicle individually in plastic wrap, then place all wrapped cakesicles in a freezer-safe container or ziplock bag. Remove as much air as possible. To thaw, move them to the refrigerator overnight, then let them come to room temperature before serving. Never microwave to thaw, as this will make the chocolate sweat and lose its shine.
Make-Ahead Strategy
Want to prep ahead for Thanksgiving? Make the cakesicles up through Step 5, then freeze. Two days before your event, complete the decorating. This spreads out the work and ensures fresh-looking decorations.
Common Baking Mistakes to Avoid
Mistake #1: Using Hot or Warm Cake
Never use cake that’s still warm! It will make your mixture too wet and impossible to mold properly. Always let cake cool completely, preferably overnight in the refrigerator.
Mistake #2: Overmixing the Cake Mixture
While you want everything combined, overmixing can make the texture dense and gummy. Mix just until everything holds together, then stop.
Mistake #3: Overheating Candy Melts
Candy melts burn easily and become grainy when overheated. Always use short microwave intervals (20-30 seconds) and stir thoroughly between each heating. If candy melts seize up and become thick and lumpy, they’re likely overheated and need to be replaced.
Mistake #4: Skipping the Freezing Steps
I know it’s tempting to rush, but proper freezing time ensures your cakesicles release cleanly from molds and hold together during decorating. Patience pays off with beautiful results!
Mistake #5: Fingerprints on the Finish
Once unmolded, handle cakesicles only by the stick. Your warm fingers will leave marks on the glossy chocolate coating. If you do get fingerprints, you can carefully buff them out with a clean, soft cloth.
Mistake #6: Decorating on a Warm Surface
Make sure your base coat is completely set before adding decorative elements. If you add candy eyes or piped details to soft chocolate, they’ll slide around or sink in.
Mistake #7: Not Testing Mold Depth
Before committing to filling all your molds, test one first. Press cake mixture into one cavity, add the stick, and seal it. Freeze and unmold to ensure your ratios are correct. Adjust if needed before filling the rest.
Frequently Asked Questions
Can I use box cake mix for turkey cakesicles?
Absolutely! Box cake mix works perfectly for cakesicles. In fact, many people prefer it because of the consistent texture and moisture level. Just bake according to package directions, let cool completely, and proceed with crumbling.
What can I use instead of candy melts?
You can use chocolate chips mixed with a tablespoon of coconut oil or vegetable shortening to thin them out. Almond bark also works well. Keep in mind that real chocolate requires tempering for the best results and shine, which makes candy melts the easier option.
Do I need special cakesicle molds?
Yes, cakesicle-specific molds work best. They’re designed with the right depth and shape. You can find them online or at craft stores for $10-15. Regular popsicle molds won’t work well because they’re not designed for the weight and texture of cake.
Why are my cakesicles cracking?
Cracking usually happens when there’s too much temperature change too quickly. Let frozen cakesicles come to room temperature gradually rather than exposing them to warm air suddenly. Also, candy melts that are too thick can crack – add a teaspoon of coconut oil to thin them if needed.
Can I make these without a mold?
While molds give the best shape, you can hand-form cake balls on sticks and dip them in chocolate for a similar effect. They won’t have the classic popsicle shape, but they’ll still be delicious and can be decorated as turkeys!
How do I fix candy melts that are too thick?
Add coconut oil or vegetable shortening, one teaspoon at a time, stirring until you reach the desired consistency. The candy should be thin enough to coat smoothly but not so thin that it’s runny.
Can I use homemade frosting instead of store-bought?
Yes! Cream cheese frosting, buttercream, or even chocolate ganache work wonderfully. Homemade frosting often creates an even more delicious result. Just ensure it’s thick and spreadable, not too loose.
What’s the best way to transport cakesicles?
Transport them in a sturdy container with dividers or create slots in cardboard to hold each stick upright. Keep them cool during transport – a cooler with ice packs works well, just don’t let them touch the cakesicles directly.
Why won’t my cakesicles release from the mold?
They may not be frozen long enough. Try freezing for an additional 15-20 minutes. Also ensure your chocolate coating in the mold was thick enough to create a sturdy shell. Lastly, gently twist and flex the mold rather than pulling straight up.
Can I make these dairy-free or vegan?
Absolutely! Use dairy-free cake and vegan cream cheese frosting. For the coating, look for dairy-free candy melts (check labels as not all are dairy-free) or use dairy-free chocolate chips with coconut oil.
Nutrition Information
| Nutrient | Per Cakesicle |
|---|---|
| Calories | 285 |
| Total Fat | 14g |
| Saturated Fat | 8g |
| Cholesterol | 25mg |
| Sodium | 180mg |
| Total Carbohydrates | 38g |
| Dietary Fiber | 1g |
| Sugars | 28g |
| Protein | 3g |
Note: Nutrition information is approximate and will vary based on specific ingredients used and cake flavor chosen.
Final Thoughts
Turkey cakesicles have become my go-to Thanksgiving treat for good reason. They’re adorable, delicious, and so much easier than they look. Every time I make these, I’m reminded why I love holiday baking – the creativity, the joy on people’s faces, and the memories we create around food.
Whether you’re making these for a school party, Thanksgiving dessert table, or just for fun with the kids on a weekend, I promise they’ll be a hit. The best part? Once you master the basic technique, you can adapt it for any holiday or occasion. Christmas trees, Easter eggs, Halloween ghosts – the possibilities are endless!
Don’t stress about making them perfect. Some of my favorite cakesicles have been the wonky ones with personality. They all taste amazing, and honestly, people are usually too excited about how cute they are to notice small imperfections.
So grab those molds, get your candy melts ready, and let’s make some turkey cakesicles! Trust me, once you make these, they’ll become a yearly tradition. And when someone asks where you got these adorable treats, you can proudly say, “I made them myself!”