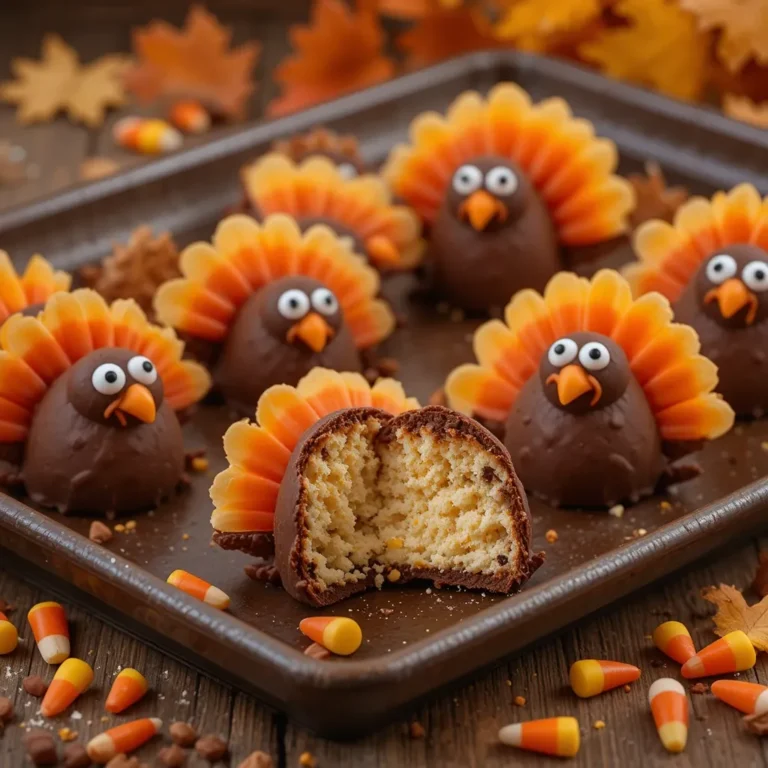
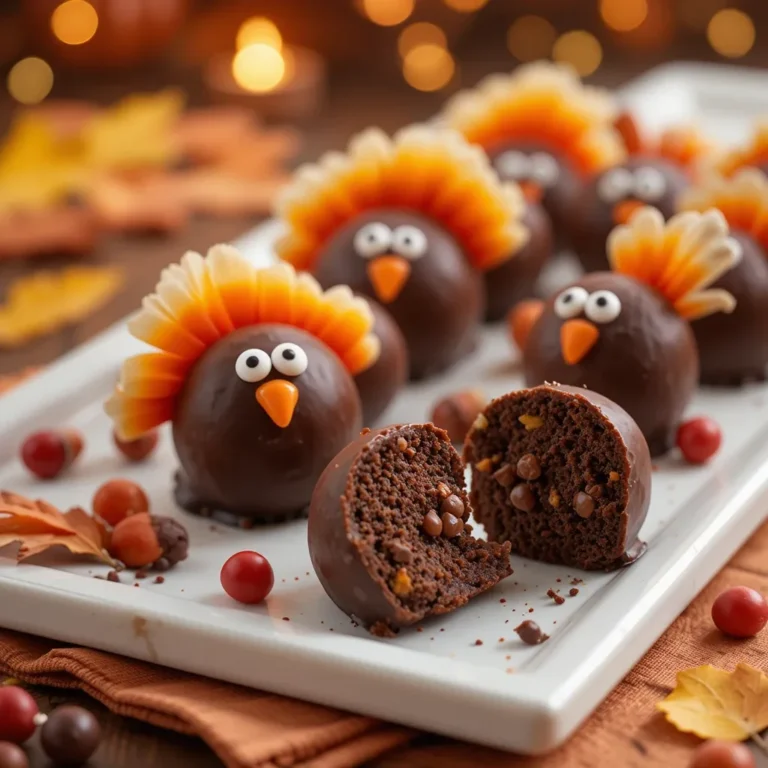
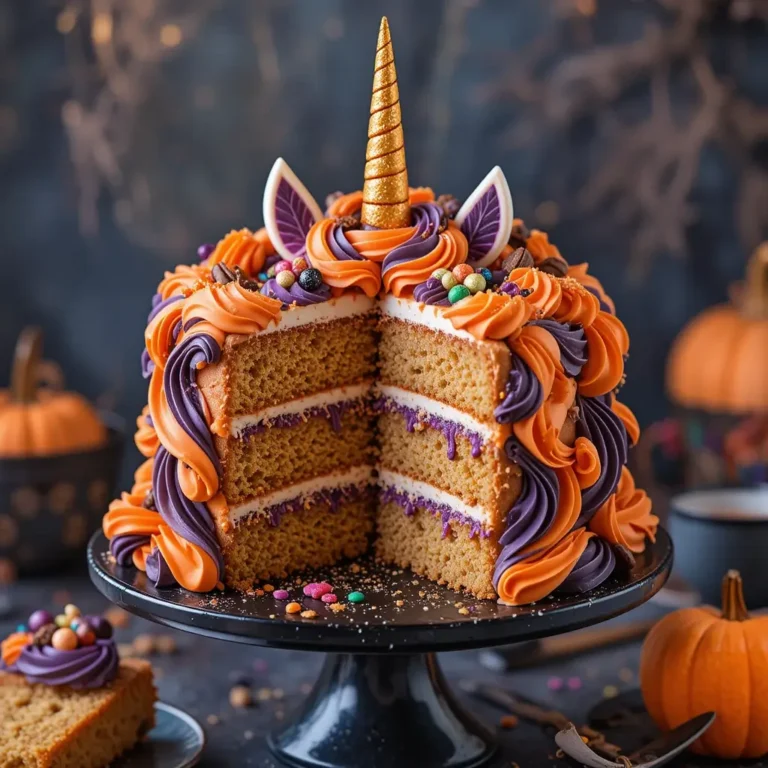
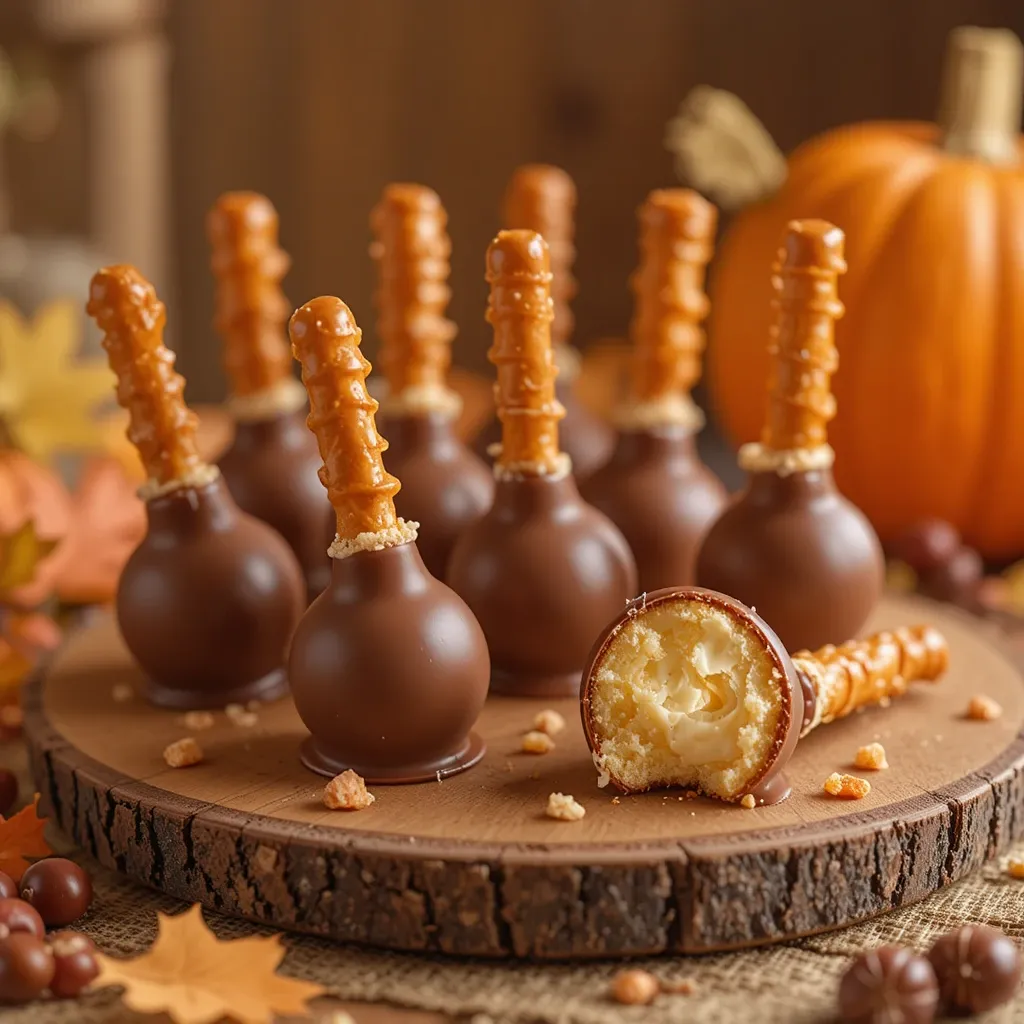
Easy Turkey Leg Cake Pops Recipe – Perfect for Thanksgiving
These adorable turkey leg cake pops are the perfect blend of whimsy and deliciousness that’ll steal the show at your Thanksgiving gathering. I stumbled upon this idea last year when my niece asked why we couldn’t have “fun desserts” at our traditional dinner, and honestly, she changed the game forever. These bite-sized beauties combine moist…
These adorable turkey leg cake pops are the perfect blend of whimsy and deliciousness that’ll steal the show at your Thanksgiving gathering. I stumbled upon this idea last year when my niece asked why we couldn’t have “fun desserts” at our traditional dinner, and honestly, she changed the game forever.
These bite-sized beauties combine moist cake with creamy frosting, all disguised as miniature turkey drumsticks that’ll have everyone reaching for seconds. They’re surprisingly simple to make, taking just about an hour from start to finish, and kids absolutely go wild for them.
If you loved my [cake ball truffles], you’ll be obsessed with this festive twist. Trust me, once you see how easy these are, you’ll wonder why you’ve been stressing over complicated desserts all these years.
What is a Turkey Leg Cake Pop?
Ever looked at a cake pop and thought, “This needs more personality”? Well, that’s exactly what turkey leg cake pops bring to the table! These clever little treats are essentially cake pops shaped and decorated to look like adorable turkey drumsticks, complete with a pretzel stick “bone” and a coating that mimics that golden-brown roasted look.
I’ll never forget the first time I made these – my husband walked into the kitchen and actually tried to grab one thinking I’d made actual turkey appetizers. After all, they say the way to a man’s heart is through his stomach, but the way to impress your guests is through creative presentation! Ready to make everyone at your Thanksgiving table smile? Let’s dive into this fun recipe together.
Why You’ll Love This Turkey Leg Cake Pop Recipe
The Wow Factor is Unbeatable
These turkey leg cake pops are total showstoppers that look way more complicated than they actually are. The moment you place a platter of these on your dessert table, cameras come out and compliments start flowing. There’s something magical about taking a familiar holiday symbol and turning it into a sweet, handheld treat that both kids and adults can’t resist.
Budget-Friendly Holiday Magic
Making these at home costs a fraction of what you’d pay at a fancy bakery or boutique cake pop shop. With basic ingredients you probably already have in your pantry – cake mix, frosting, chocolate, and pretzels – you can create dozens of these cuties for just a few dollars. Compare that to $4-5 per cake pop at specialty stores, and you’re looking at serious savings while still delivering Instagram-worthy results.
Endless Flavor Possibilities
The beauty of turkey leg cake pops is that you’re not locked into one flavor profile. Start with chocolate, vanilla, spice cake, or even pumpkin cake as your base, then mix and match with complementary frostings to create your perfect combination. The coating can be white chocolate tinted with food coloring, milk chocolate, or even peanut butter chips if you’re feeling adventurous. If you enjoyed experimenting with my [brownie cake pops], you’ll love how versatile these turkey legs can be with different flavor combinations.
Make-Ahead Friendly
Life gets hectic during the holidays, and these cake pops are the ultimate make-ahead dessert. You can prepare them up to a week in advance, leaving you free to focus on the main meal when Thanksgiving Day arrives. They actually taste better after sitting for a day, as the flavors meld together beautifully.
Ready to bring some fun to your holiday spread? Let’s get those turkey legs rolling!
How to Make Turkey Leg Cake Pops
Quick Overview
Turkey leg cake pops are surprisingly straightforward to make, even if you’ve never attempted cake pops before. The process involves baking a simple cake, crumbling it, mixing it with frosting, shaping it around pretzel sticks, and coating everything in chocolate. The result is a moist, perfectly sweet treat with a satisfying crunch from the pretzel “bone.”
Time Breakdown:
- Prep Time: 30 minutes
- Baking Time: 25-30 minutes
- Cooling Time: 30 minutes
- Decorating Time: 45 minutes
- Total Time: 2 hours 15 minutes
- Yield: 24-28 cake pops
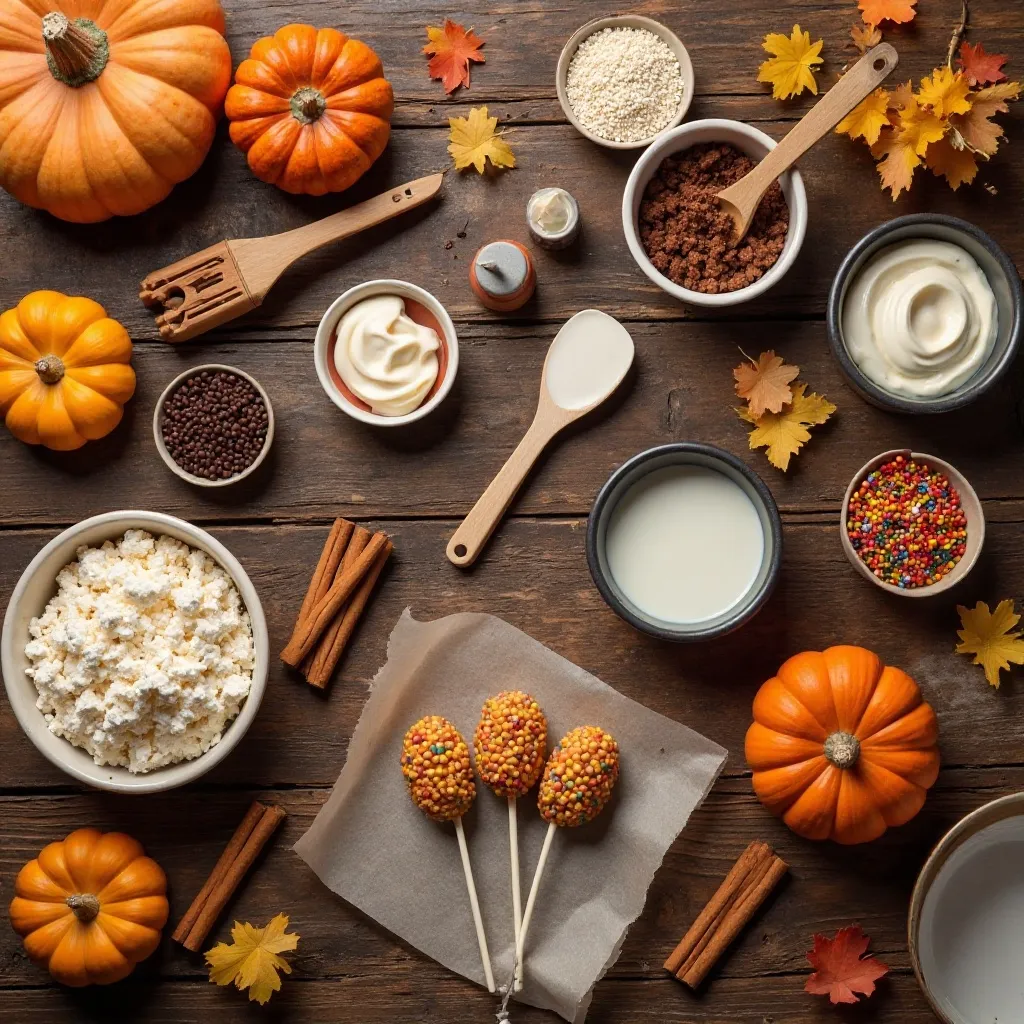
Key Ingredients for Turkey Leg Cake Pops
For the Cake Base:
- 1 box (15.25 oz) cake mix (any flavor – chocolate, vanilla, or spice work beautifully)
- Ingredients called for on the cake mix box (typically eggs, oil, and water)
- 1/2 cup (120g) frosting (store-bought or homemade)
For Coating and Decoration:
- 16 oz (450g) chocolate candy melts or chocolate chips (milk chocolate or dark chocolate)
- 24-28 pretzel rods or sticks
- 1/4 cup (60g) white chocolate candy melts (optional, for drizzle effect)
- Food coloring in brown, orange, or tan (gel food coloring works best)
- Sprinkles or edible glitter (optional)
Equipment Needed:
- 9×13 inch baking pan
- Large mixing bowl
- Cookie scoop or melon baller
- Styrofoam block or cake pop stand for drying
- Microwave-safe bowls
- Parchment paper
Step-by-Step Instructions
Step 1: Bake Your Cake
Preheat your oven according to the cake mix package directions, usually 350°F (175°C). Prepare the cake batter following the package instructions, mixing until smooth and no lumps remain. Pour the batter into a greased 9×13 inch baking pan and bake for 25-30 minutes, or until a toothpick inserted into the center comes out clean. Remove from the oven and let the cake cool completely in the pan for at least 30 minutes. This cooling step is crucial – working with warm cake will create a gooey mess rather than moldable cake balls.
Step 2: Crumble and Mix
Once your cake is completely cool, break it into large chunks and place them in a large mixing bowl. Using your hands or a fork, crumble the cake into fine crumbs, making sure there are no large pieces remaining. You want the texture to resemble bread crumbs. Add 1/2 cup of frosting to the cake crumbs and mix thoroughly with your hands or a sturdy spoon. The mixture should hold together when squeezed but not be overly wet or sticky. If it’s too dry and crumbly, add another tablespoon of frosting at a time until you reach the right consistency.
Step 3: Shape the Turkey Legs
Take your pretzel rods and break them if needed to create “bones” that are about 4-5 inches long. Using a cookie scoop or your hands, portion out about 2 tablespoons of the cake mixture for each pop. Roll it into an oval or egg shape first, then gently press one end of a pretzel stick into the cake ball, inserting it about halfway through. Mold the cake mixture around the pretzel to create a drumstick shape – wider at the top and tapering slightly toward the middle, with the pretzel stick extending from the bottom like a bone. The shape doesn’t need to be perfect; rustic turkey legs have character! Place each shaped pop on a parchment-lined baking sheet and refrigerate for at least 30 minutes to firm up.
Step 4: Melt and Color Your Chocolate
While your cake pops are chilling, prepare your coating. Place the chocolate candy melts or chocolate chips in a microwave-safe bowl. Microwave in 30-second intervals, stirring between each interval, until the chocolate is completely melted and smooth. If you want a more “roasted turkey” color, add a small amount of brown or tan gel food coloring and stir until evenly distributed. The chocolate should be thin enough to coat smoothly but not too runny. If it’s too thick, add a teaspoon of vegetable oil or coconut oil to thin it out.
Step 5: Dip and Coat
Remove your chilled cake pops from the refrigerator. Working with one at a time, hold the pretzel stick and dip the cake portion into the melted chocolate, turning to coat completely. Let any excess chocolate drip back into the bowl by gently tapping the stick against the rim. For a more realistic turkey leg appearance, don’t worry about getting a perfectly smooth coating – a slightly textured surface actually looks more authentic. If you want to add white chocolate drizzle for extra detail, melt white chocolate separately and use a fork or piping bag to create thin lines across the chocolate coating before it sets completely.
Step 6: Let Them Set
Stick each coated cake pop into a styrofoam block or cake pop stand to dry, making sure they’re standing upright with the pretzel “bone” pointing down. If you don’t have a stand, you can lay them on parchment paper, though you may get a small flat spot on one side. Let the chocolate coating harden completely at room temperature, which takes about 15-20 minutes, or speed up the process by placing them in the refrigerator for 10 minutes.
Step 7: Final Touches
Once the chocolate is set, your turkey leg cake pops are ready to serve! For extra flair, you can wrap the exposed pretzel stick with aluminum foil to make the “bone” more visible, or leave it natural for a rustic look. Arrange them on a platter, and watch them disappear faster than you can say “pass the stuffing.”
What to Serve Turkey Leg Cake Pops With
These turkey leg cake pops are incredibly versatile when it comes to pairing options. Serve them as part of your Thanksgiving dessert spread alongside traditional pumpkin pie and apple crisp for variety and visual interest. They’re also perfect with hot apple cider, spiced coffee, or creamy hot chocolate for a cozy fall beverage pairing.
For a complete dessert table, consider adding mini pumpkin cheesecakes or pecan tart bites that complement the handheld, bite-sized nature of these cake pops. If you’re hosting kids, set up a “dessert station” where they can grab a cake pop along with some whipped cream or caramel sauce for dipping.
These also work beautifully as part of a Thanksgiving gift basket. Package a few in cellophane bags tied with autumn-colored ribbon, and you’ve got a thoughtful hostess gift that shows you put in effort without spending hours in the kitchen.
Top Tips for Perfecting Turkey Leg Cake Pops
Get the Cake-to-Frosting Ratio Right
The most common mistake when making cake pops is adding too much frosting, which creates a mixture that’s too soft to hold its shape. Start with less frosting than you think you need – you can always add more. The mixture should be moist enough to hold together when squeezed but not sticky or wet. If you accidentally add too much frosting, crumble in a bit more cake to balance it out.
Chill at Every Stage
Patience is your friend here. Refrigerating the shaped cake pops before dipping ensures they’ll stay on the stick and won’t fall apart when you dip them in chocolate. If you’re working in a warm kitchen, pop them back in the fridge between batching if the chocolate gets too soft.
Master the Chocolate Consistency
Candy melts work better than regular chocolate chips because they’re formulated to create a smooth, thin coating. If you prefer using chocolate chips, add a tablespoon of coconut oil or vegetable shortening to help thin the chocolate and make it easier to work with. The chocolate should flow smoothly off a spoon – if it’s thick and gloopy, it’ll create a heavy coating that overwhelms the cake.
Work Quickly but Carefully
Once you start dipping, momentum is key. The chocolate will begin to set within a minute or two, so have your workspace organized with everything within reach. If the chocolate starts to harden while you’re working, simply pop it back in the microwave for 10-15 seconds to re-melt.
Customize for Dietary Needs
These turkey leg cake pops are easily adaptable for different dietary requirements. Use gluten-free cake mix for gluten-sensitive guests, or try a vegan cake mix with dairy-free chocolate for plant-based options. The recipe is forgiving and works with most substitutions without compromising the final result.
Storing and Reheating Tips
Short-Term Storage
Store turkey leg cake pops in an airtight container at room temperature for up to 3 days, or in the refrigerator for up to one week. If stacking them, place parchment paper between layers to prevent the coating from sticking together. They’re actually best when allowed to come to room temperature before serving, as the cake becomes more moist and flavorful after sitting for 24 hours.
Freezing for Later
These cake pops freeze exceptionally well, making them perfect for advance holiday prep. Once the chocolate coating is completely set, arrange them in a single layer on a baking sheet and freeze for one hour. Then transfer them to a freezer-safe container or zip-top bag, separating layers with parchment paper. They’ll keep frozen for up to 3 months. To thaw, simply remove them from the freezer and let them come to room temperature on the counter for about 30 minutes before serving.
No Reheating Needed
Unlike many desserts, turkey leg cake pops don’t require reheating. They’re designed to be enjoyed at room temperature, which makes them ideal for party serving. If you’ve stored them in the refrigerator, take them out about 20-30 minutes before your guests arrive so they can reach optimal serving temperature.
Tips for Avoiding Common Baking Mistakes
Mistake #1: Rushing the Cooling Process
Never try to crumble cake that’s still warm. Warm cake creates a sticky, difficult-to-work-with mixture that won’t hold its shape properly. Always let your cake cool completely, or even better, bake it the day before and let it sit overnight covered at room temperature.
Mistake #2: Making the Pops Too Large
Bigger isn’t always better with cake pops. Oversized pops are heavy and more likely to fall off the stick, plus they’re harder to eat in one or two bites. Stick to golf ball-sized portions for the best structural integrity and eating experience.
Mistake #3: Not Securing the Pretzel Stick
If your pretzels keep falling out, dip the end of each pretzel stick in melted chocolate before inserting it into the cake ball. This acts as “glue” and creates a much more secure bond. Let this chocolate set for a few minutes before dipping the entire pop.
Mistake #4: Overworking the Cake Mixture
When mixing your cake crumbs with frosting, stop as soon as everything is combined. Over-mixing can make the texture dense and gummy rather than light and cake-like. Mix just until the ingredients hold together when squeezed.
Mistake #5: Using Chocolate That’s Too Hot
If your chocolate is steaming or very hot to the touch, it’s too hot for dipping. Let it cool for a minute or two before coating your cake pops. Hot chocolate can cause the cake balls to fall apart or slide off the stick.
Frequently Asked Questions
Can I use homemade cake instead of a box mix?
Absolutely! Any cake recipe works beautifully for turkey leg cake pops. Just bake your favorite homemade cake in a 9×13 pan, let it cool completely, and proceed with the crumbling and mixing steps. Denser cakes like pound cake or butter cake work especially well because they hold their shape better than very light, fluffy cakes.
How do I prevent my cake pops from cracking?
Cracking usually happens when there’s a temperature difference between the cake pop and the chocolate coating. Make sure your cake pops are chilled but not frozen solid, and let them sit at room temperature for 5 minutes before dipping. Also, avoid chocolate that’s too hot, as this can cause the coating to crack as it cools and contracts.
Can I make these without pretzel sticks?
Yes! You can use lollipop sticks, paper straws, or even skip the stick entirely and make them as cake balls. Without the pretzel stick, they won’t look quite as much like turkey legs, but they’ll still taste amazing and can be decorated with the same chocolate coating.
What’s the best way to transport cake pops?
Styrofoam blocks work perfectly for transporting cake pops. You can also use a cardboard box with holes poked through the bottom to hold the sticks upright. For a more polished presentation, cake pop stands are inexpensive and keep your treats secure during transport.
My chocolate coating is too thick. How do I fix it?
Add a teaspoon of vegetable oil, coconut oil, or vegetable shortening to your melted chocolate and stir well. This will thin out the coating without affecting the taste. Add more oil one teaspoon at a time until you reach the desired consistency.
Can I decorate these with kids?
Definitely! The shaping and decorating process is fun for kids, though you’ll want to handle the hot chocolate melting yourself. Let kids help with crumbling the cake, mixing in the frosting, shaping the drumsticks, and adding sprinkles or other decorations before the chocolate sets.
How far in advance can I make these?
You can make turkey leg cake pops up to one week before your event if stored in the refrigerator, or up to 3 months in advance if frozen. For the best texture and flavor, I recommend making them 2-3 days ahead, which gives the flavors time to meld while keeping everything fresh.
Do I need a special stand to dry the cake pops?
While a styrofoam block or cake pop stand makes the process easier, you can also poke the sticks into an upside-down colander, or even lay them flat on parchment paper. Just be aware that laying them flat may create a small flat spot on one side.
Nutrition Information
| Nutrient | Per Cake Pop (1 pop) |
|---|---|
| Calories | 165 |
| Total Fat | 8g |
| Saturated Fat | 4g |
| Cholesterol | 15mg |
| Sodium | 125mg |
| Total Carbohydrates | 22g |
| Dietary Fiber | 1g |
| Sugars | 16g |
| Protein | 2g |
Nutrition information is approximate and will vary based on specific ingredients used.
Final Thoughts
Turkey leg cake pops have become one of my absolute favorite Thanksgiving traditions. There’s something special about watching people’s faces light up when they realize these adorable little drumsticks are actually dessert. They’re conversation starters, crowd-pleasers, and surprisingly simple to make once you get the hang of it.
I love that this recipe gives you creative freedom to experiment with different cake flavors and decorating styles while still delivering consistent, impressive results. Whether you’re making them for a kids’ table, bringing them to a potluck, or just wanting to add some whimsy to your holiday spread, these turkey leg cake pops deliver every single time.
So grab your cake mix and pretzels, put on some music, and have fun creating these little masterpieces. Your Thanksgiving dessert table will never be the same – in the best possible way!